


22
Video Recording
Preparation:
•
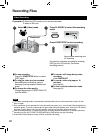
Open the LCD monitor to turn on the camcorder.
•
Insert an SD card.
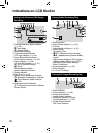
Recording Files
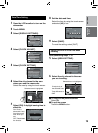
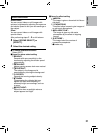
Press PLAY/REC to select the recording
mode.
PLAY/REC
[3 h 59 m]
0:00:00
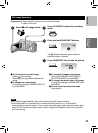
Press START/STOP to start recording.
[3 h 59 m]
0:00:01 REC
You can also start/stop recording by selecting
[REC] on the LCD monitor (On-screen
recording control).
To stop recording
Press the START/STOP button or select
[REC] again.
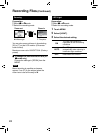
To view the video you just recorded
Select
A
while recording is paused.
Selecting $ during playback deletes that
scene.
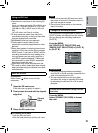
To change the video quality
Change the settings in [VIDEO QUALITY]
from the MENU.
Select ! (video) mode.
NOTE
•
The video recording mode is automatically selected when you turn the camcorder’s power off and
then on again.
•
If the camcorder is not operated for 5 minutes while the power is on, it turns itself off automatically to
conserve power. To turn the camcorder on again when using the battery pack, close the LCD monitor
and open it again. When using the AC adapter, perform any operation such as zooming.
•
After recording video for 12 consecutive hours, recording stops automatically. To ensure continuous
recording, set the [AUTO SWITCH REC MEDIA] to [ON] before you start recording.
•
A new file will be created for every 4 GB of continuous shooting.
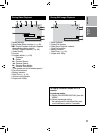
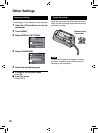
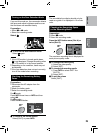
To record a still image during video
recording
Press SNAPSHOT.
To record a video clip (approx. 10
minutes)
See page 43.
To turn on the face detection mode
See page 25.
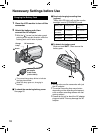
Approximate remaining time
for recording
SNAPSHOT
RECORDING/PLAYBACK