34
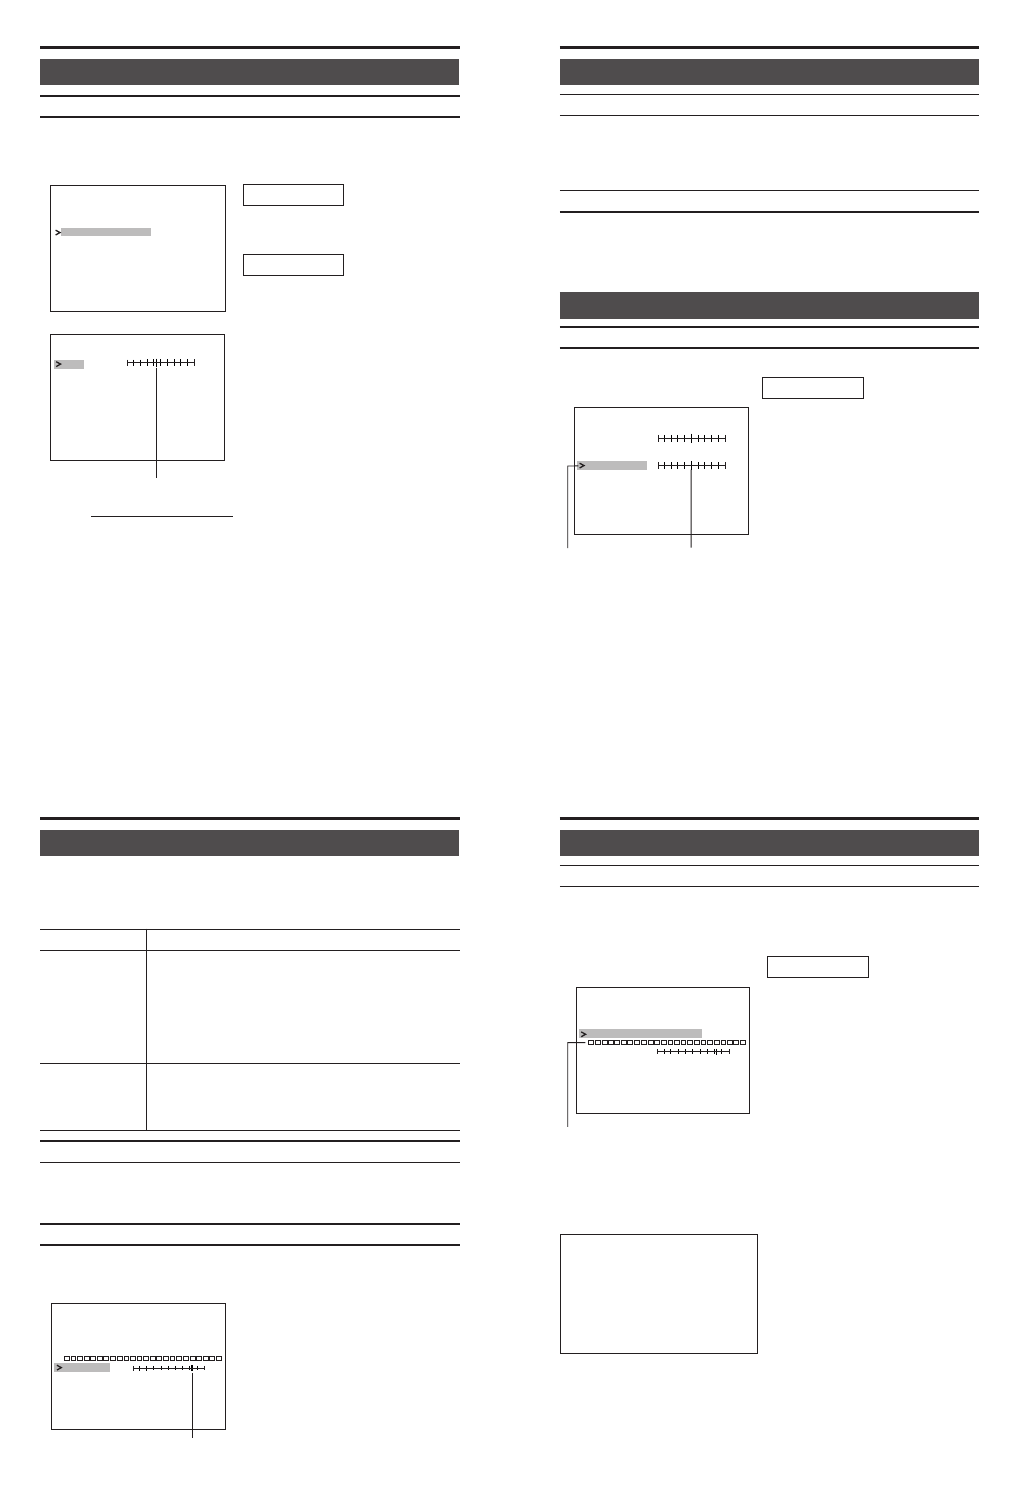
MANUAL WHITE BALANCE screen
If the entire screen appears to be reddish or bluish in color as the result
of automatic white balance adjustment, manually adjust the white bal-
ance.
Fill the entire screen with a white sub-
ject (such as paper, cloth, etc.).
1.
Display the VIDEO ADJUST
screen. (
੬
Page 24)
2.
Set WHITE BALANCE to
MANUAL and press the SET but-
ton.
● The MANUAL WHITE BAL-
ANCE screen will appear.
3.
Press the SELECTOR button in
the vertical direction (6 or 7) and
move the cursor (>) to R-B.
4.
Press the SELECTOR button in
the horizontal direction (8 or t).
● Pressing in the 8 direction will
increase bluish tint.
● Pressing in the t direction will
increase the reddish tint.
5.
To end adjustment, press the SE-
LECTOR button in the vertical di-
rection (6 or 7) to select EXIT
and press the SET button.
Set value
WDR
AGC
COLOR LEVEL
ENHANCE LEVEL
MODE
MODE
JUSTADV— — — — — —IDEO
2DMO
LOW
MA
E
NUAL..
NO MALR
NO MALR
WHI ET BALANCE
R–B
EX TI
BLUE RED
——MANUAL WHITE BALANCE — —
EXIT
Memo
The result of the white bal-
ance adjusted manually will
be stored in the unit
memory.
To use the manually ad-
justed white balance, set
WHITE BALANCE to
MANUAL.
Preparation
Operation
35
MENU SETTING
DOFFS
L— — — — — —ENS ADJUST
ET
120100 150
C
EXIT
DGIAN
600255
C
1.
Display the CAMERA SETTINGS
screen. (
੬
Page 24)
2.
Select LENS ADJUST and press
the SET button.
● The LENS ADJUST screen ap-
pears.
3.
Press the SELECTOR button in
the vertical direction (6 or 7) and
move the cursor (>) to the item to
set.
4.
Press the SELECTOR button in
the horizontal direction (8 or t)
to change the set value. Pressing
and holding the button will con-
tinuously change the value.
Item Set value
Operation
VIDEO ADJUST screen (continued)
COLOR LEVEL Default setting: NORMAL
The color level of video signals is adjusted.
● To lighten colors: decrease the value.
● To darken colors: increase the value.
[Setting range: -5 ~ NORMAL ~ 5]
ENHANCE LEVEL Default setting: NORMAL
The aperture control/contour level of the video signals is adjusted.
● Soften video: decrease the value.
● Sharpen video: increase the value.
[Setting range: -5 ~ NORMAL ~ 5]
CAMERA SETTINGS screen
LENS ADJUST screen
This setting is performed when using the DC auto iris lens.
36
Item Content
DC GAIN Adjusts operating speed of the DC auto iris lens.
Adjust according to the lens used.
Increasing the value: the speed will increase
[Setting range: 0 ~ 60 (default setting) ~ 255]
*Depending on the lens, hunching may occur
when setting this value too high. In this case,
lower the value.
DC OFFSET Standard level (brightness) for controlling the DC
auto iris operation is set.
Increasing the value: the screen will become darker
[Setting range: 100 ~ 120 (default setting) ~ 150]
CAMERA TITLE Default setting: OFF
Whether to display the camera title is set.
OFF : Camera title is not displayed.
ON : Camera title is displayed.
V PHASE
Vertical phase during line lock is adjusted. The vertical phase can be
adjusted to other cameras. This setting is enabled when the LL/INT
switch on the back of the unit is set to LL.
5.
When selecting EXIT and press-
ing the SET button, the screen will
return to the CAMERA SET-
TINGS screen.
● Press the SELECTOR button in
the horizontal direction (8 or t)
to set. Pressing in the button to
the right (t) will advance the
phase and pressing to the left (8)
will delay the phase.
LENS
EXIT
CAM TITLE OFF
CAM
E
E
R
R
A
A
VPHASE
TITLE EDIT
ADJUST ..
084 401
C— — — — — —AMERA ISETT NGS
Set value
37
1.
Display the CAMERA SETTINGS
screen. (੬ Page 24)
2.
Press the SELECTOR button in
the vertical direction (6 or 7)
and move the cursor (>) to se-
lect CAMERA TITLE EDIT.
3.
Press the SET button.
● The 1st character will appear
in purple and input will be al-
lowed.
4.
Press the SELECTOR button in
the horizontal direction (8 or t)
and select the desired character.
5.
Press the SET button to confirm
the 1st character. The 2nd char-
acter will then appear in purple.
6.
Repeat steps
4.
and
5.
above to
enter up to 24 characters.
7.
To end character entry, press the
SELECTOR button in the verti-
cal direction (6 or 7) and move
the cursor (>) to another item.
1st character
LENS
EXIT
CAM T ITLE OFF
CAM
E
E
R
R
A
A
VPHASE
TITLE EDIT
ADJUST ..
084 401
C— — — — — —AMERA ISETT NGS
CAMERA SETTINGS screen (continued)
CAMERA TITLE EDIT screen
Up to 24 characters can be entered for the camera title. The entered
camera title will appear on the bottom left of the screen when the CAM-
ERA TITLE menu item is set to ON.
MENU SETTING
Operation
To correct a character, press
the SET button to display the
character to correct in purple,
press the SELECTOR button in
the horizontal direction (8 or
t) to change the character.


