


88
Others
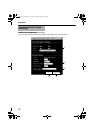
Troubleshooting (continued)
Symptom Causes and Countermeasures
Reference
Page
Multicast images cannot be
played back
● Start multicast transmission manually from the
[Streaming] page of VN-V25U.
● In the case of multicast reception at the built-in
viewer, check that the multicast address and port
number of the built-in viewer settings coincide
with those on the [Streaming] page of VN-V25U.
Make use of a network that supports IGMPv2 for
multicast transmission.
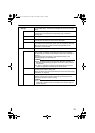
● Multicast may be blocked by the WindowsXP
firewall. When this occurs, perform the following
to allow it to pass through.
Double-click [Windows Firewall] under [Start]-
[Control Panel], click the [Add Port…] button
under the Exception tab, and register the port
number to be allowed through the firewall in the
Port Number field. Enter an arbitrary character
string in the name field.
A Page 58
A Page 78
A Page 83
The frame rate of the
displayed image is low
● Check the built-in viewer settings when a built-in
viewer is in use.
● Frame rate will be constrained when the network
bandwidth is narrow.
A Page 78
A Page 83
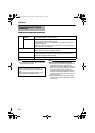
A white zone appears in the
built-in viewer
● For some computers, a part of the Internet
Explorer graphics may not appear and is left
white when the following setting is performed on
the Internet Explorer.
If [Right-click on the Desktop screen]-
[Properties]-[Settings]-[Advanced]-
[Advanced]-[DPI setting] is set to ALarge sizeB
or ACustom sizeB, select ANormal sizeB to
resume normal drawing.
—
Unable to receive alarm
notification using the
computer via TCP/UDP
● Data may be blocked by the WindowsXP firewall.
When this occurs, perform the following to allow
it to pass through.
Double-click [Windows Firewall] under [Start]-
[Control Panel], click the [Add Port…] button
under the Exception tab, and register the port
number to be allowed through the firewall in the
Port Number field. Enter an arbitrary character
string in the name field.
—
Images are not distributed to
the network
● Check whether the [MONITOR OUT] switch at
the side of VN-V25U is set to ANTSCB or APAL B.
If either of the above is selected, change the
[MONITOR OUT] switch setting to AOFFB. After
changing the switch settings, press the [RESET]
button to reboot.
A Page 10
VN-V25U_EN.book Page 88 Friday, November 2, 2007 11:26 PM