


1-6
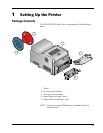
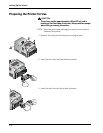
Setting Up the Printer
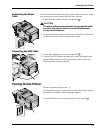
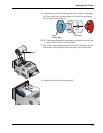
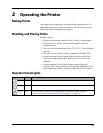
9. Push the right side of the take-up spool onto the rear spool
holder on the right.
10. Insert the left side of the take-up spool onto the spool holder
on the left.
11. Rotate the take-up spool until it locks into place.
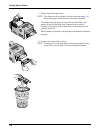
12. If there is any slack in the ribbon, remove it by turning the
supply spool.
IMPORTANT: Slack in the ribbon can cause a paper jam.
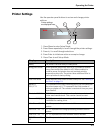
13. Close the top cover.
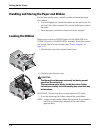
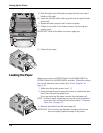
Loading the Paper
Make sure you have a KODAK Photo Print Kit 8800/8810S or
KODAK Photo Print Kit 8800/8810L available. These kits contain
the correct ribbon for your printer (see “Printer Supplies” on
page A-2).
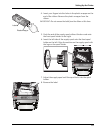
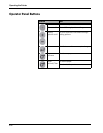
1. Make sure the printer power is on ( | ).
2. Grasp the handle on the paper door cover to release the door
latch, then lift open the paper door.
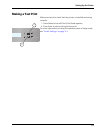
If you are replacing the paper, remove the used paper roll.
NOTE: If there is paper remaining and you still want to replace it,
close the cover and follow the instructions for “Clearing a
Paper Jam” on page 4-3.
3. Remove the plastic from the new paper roll.
IMPORTANT: Do not remove the label from the paper roll until you
have successfully loaded the paper in the printer.