


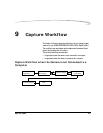

Capture Workflow
April 29, 2004 9-3
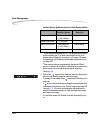
Capturing and Evaluating
Test Images
Before your photo session begins, and occasionally during a session, you
should capture and evaluate images to be sure that the lighting and camera
setup are producing the desired results.
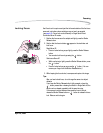
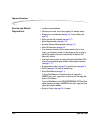
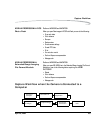
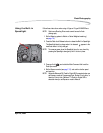
Capturing Images Set up any of the following, as needed:
• Vertical Release (see page 5-19)
• Intervalometer (see page 5-20)
• Job Tracker (see page 5-9)
• Self Timer (see page 5-26)
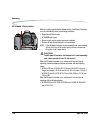
Press the Shutter Release button (or the Vertical Shutter Release button) to
capture the image.
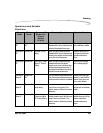
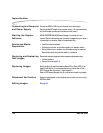
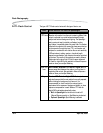
Image Attribute DCS Pro SLR/n Tool Suggested Action
Exposure Appearance of image on Image LCD View images and interpret information from
the tool. Adjust camera settings (aperture,
shutter speed, ISO) and/or lighting.
Recapture image, if needed.
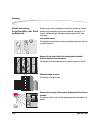
Histogram Image mode (see page 11-2)
provides exposure information about the
overall image.
Luminometer (see page 11-4) provides
exposure information about a specific area
of the image. It shows the level of luminance
channel saturation of pixels below the
crosshairs on the Image LCD.
Focus Zoom Image mode (see page 11-4) View the image at 1:1 and evaluate sharpness
and edge definition in high-contrast areas
(for example, eyes). Adjust lens focus and/or
check and adjust the depth of field.
Color Click Balance neutralizes color shifts in
subsequently captured images.
Repeat, as necessary, when lighting
conditions change.
Scene content and
composition
Appearance of image on Image LCD Look for undesirable details such as closed
eyes. Recapture image, if needed.
Zoom Image mode