


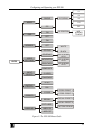
Your Picture in Picture Inserter Machines
7
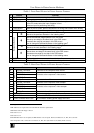
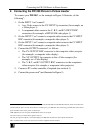
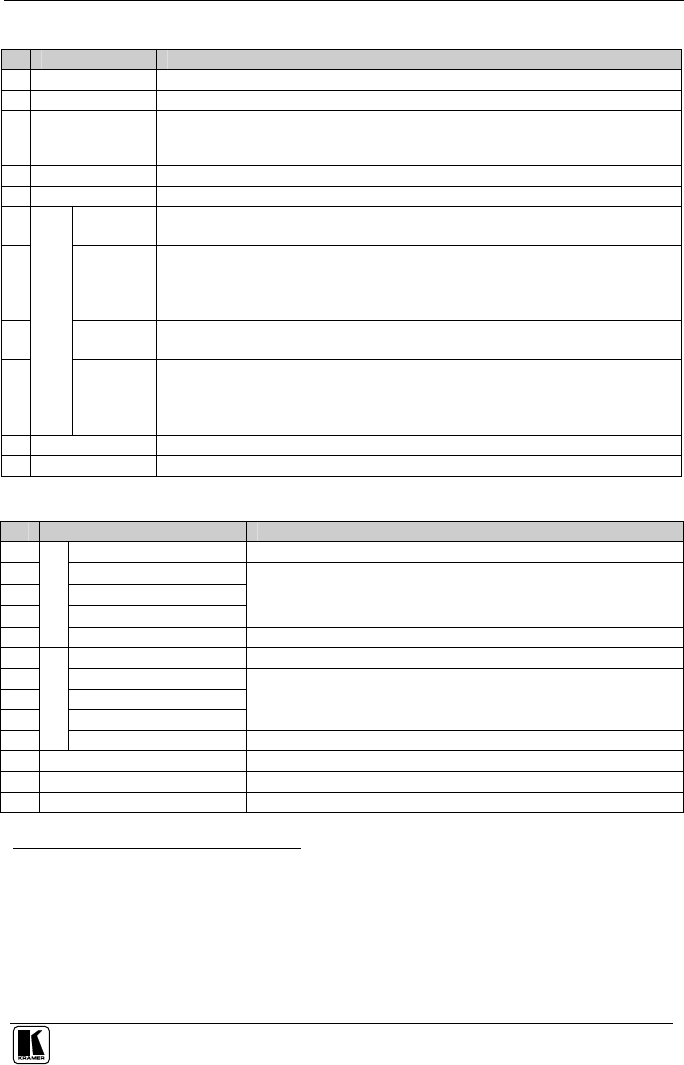
Table 1: Front Panel Picture in Picture Inserter Features
# Feature Function
1 POWER Switch Illuminated switch for turning the unit ON or OFF
2 LCD Display Displays data including the operation mode and the menu
1
(2 lines at a time)
3 INPUTS
2
Buttons In the SINGLE mode: select the input to switch to the output
In the PIP mode: select the input to appear in front
Select an input for positioning and sizing
4 LAYER Button When in the PIP mode, press to access the PIP Sizing and Position menu directly
5 FREEZE Button
3
Press to freeze/unfreeze the output video image
6
Moves the selected image to the left in the PIP mode
4
Moves to the previous character in the Labeling menu
5
7
Moves the selected image upwards in the PIP mode
4
Moves up one step (in the same level) in the OSD screen
Increases the range by one step in the OSD screen
Use to change the selected character in the Labeling menu
5
8
Moves the selected image to the right in the PIP mode
4
Moves to the next character in the Labeling menu
5
9
Navigation Buttons
Moves the selected image downwards in the PIP mode
4
Moves down one step (in the same level) in the OSD screen
Decreases the range by one step in the OSD screen
Use to change the selected character in the Labeling menu
5
10 ENTER Button Displays the main menu; moves to the next level; confirms a command
11 ESC Button Exits the OSD Menu; reverts to the previous level; stops the execution of a command
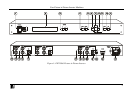
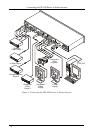
Table 2: Rear Panel Picture in Picture Inserter Features
# Feature Function
12 CV BNC Connector Connects to the composite video source
13 Y BNC Connector
14 B-Y BNC Connector
15 R-Y BNC Connector
Connects to the component
7
video source
16
INPUT 1
6
Y/C 4p Connector Connects to the s-Video source
17 CV BNC Connector Connects to the composite video acceptor
18 Y BNC Connector
19 B-Y BNC Connector
20 R-Y BNC Connector
Connects to the component
7
video acceptor
21
OUTPUT
Y/C 4p Connector Connects to the s-Video acceptor
22 PROG. (IN) Push in to upgrade to the latest Kramer firmware (see section 8)
23 RS-232 Port Connects to the PC or other serial controller
24 Power Connector with FUSE AC connector enabling power supply to the unit
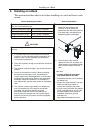
1 See Figure 5
2 PIP-200xl has two input buttons and the PIP-300 has three input buttons
3 Illuminates when the image is frozen
4 See section 7.1.1.1
5 See section 7.1.4
6 The PIP-200xl has 2 sets of inputs; the PIP-300 has 3 sets of inputs. Each set includes CV; Y, B-Y, R-Y; and Y/C
7 For component video, connect all 3 connectors: Y, B-Y, R-Y (also known as Y, Pb/Cb, Pr/Cr or YUV)