


backlight, again since the subject is lit more by the blue sky instead of the direct sunlight.
TIP: Some cameras skip this critical setting. If so, manually set the CUSTOM preset while
in shade (also called one-push, Manual and white card and other things depending on
manufacturer) and use this setting in place of the missing shade setting. TIP: I often use
this mode even in direct sun when I want to make things look warm and inviting. Try it and
you'll probably love it. The SHADE setting is a professional secret for getting great images,
pass it on!
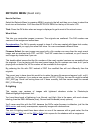
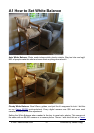
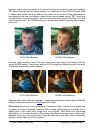
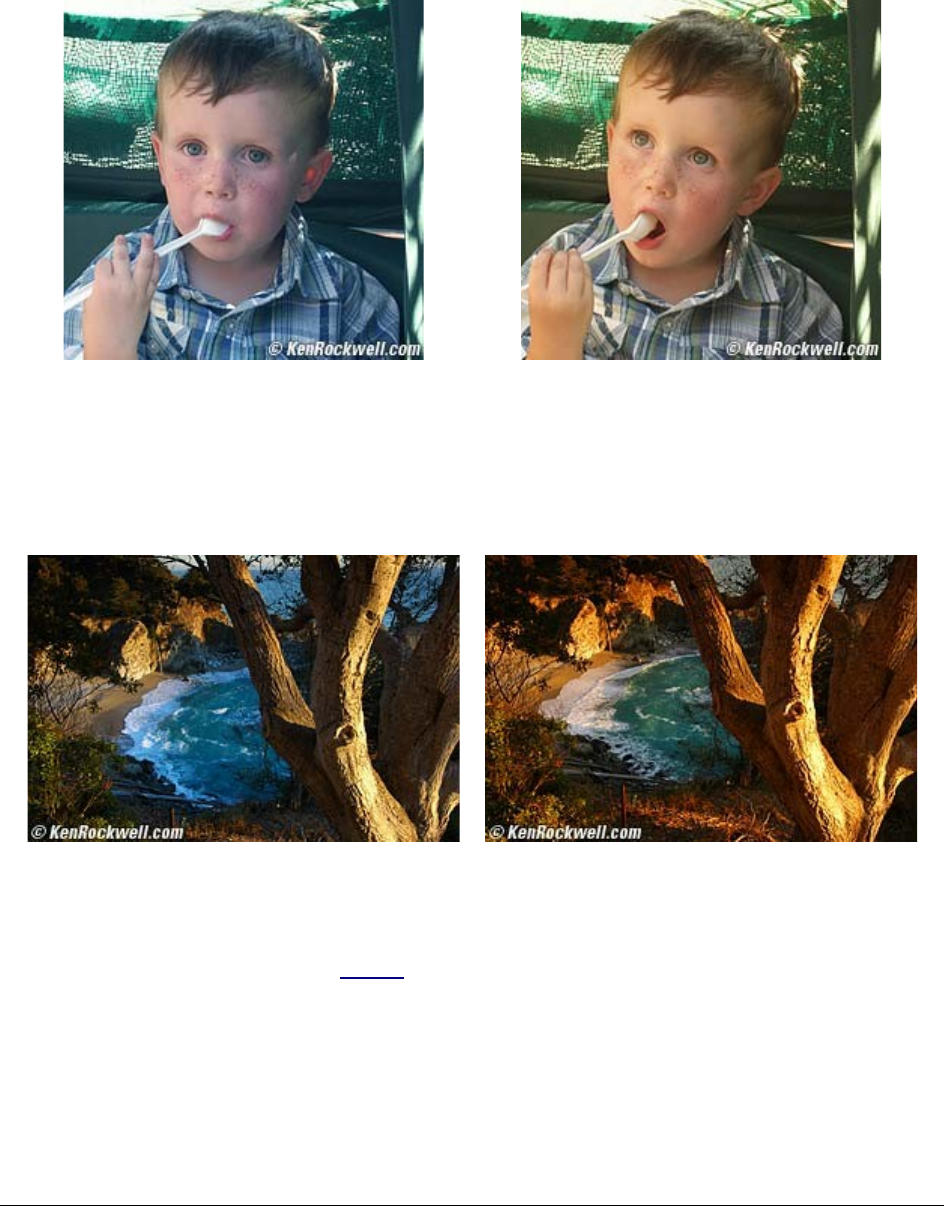
AUTO White Balance
SHADE White Balance
Example under ordinary shade. The skin looks much more warm and natural with the
correct SHADE setting. I have never seen an AUTO setting that adjusts correctly for shade.
These were made with a pocket camera.
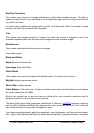
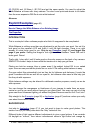
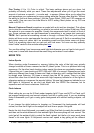
AUTO White Balance
SHADE White Balance
Example under warm afternoon sunlight. I prefer the even warmer tones from the SHADE
setting. These were made with a DSLR and an 81A filter.
Fluorescent (symbol of a long rectangle or Fluorescent tube): Use this if your photos are
too green or under Fluorescent, mercury, HMI or metal halide lights as you might find in
street lights. It will make other things look a bit purplish. With Nikons the fine-tuning
adjustment (+-3) is much stronger in this setting and adjusts from fairly warm to fairly cool.
Because of this you may not be able to get the exact color you want under Fluorescent
lighting, in which case try AUTO or preset.
© 2007 KenRockwell.com 48 converted by Sándor Nagy