


20
VQT2Z87
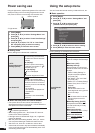
Using the light sensor, adjust the brightness of the main unit’s
display according to the surrounding brightness and set the
auto power off when the surrounding area becomes dark.
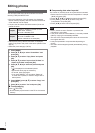
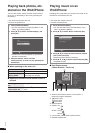
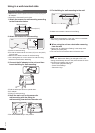
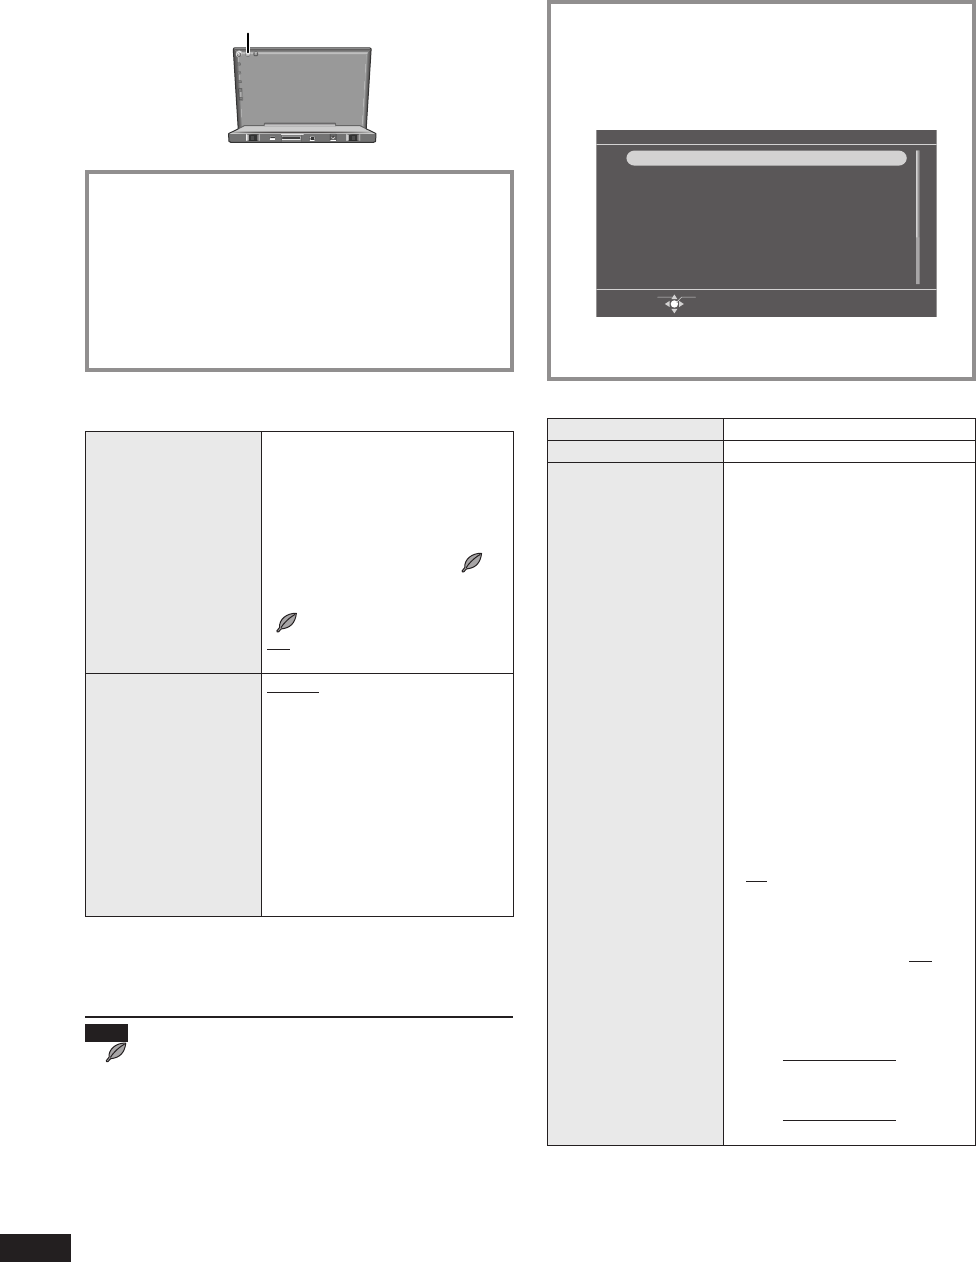
A
Back of product
A
Light sensor
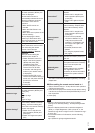
1. Press [MENU].
2. Press [e, r, w, q] to select “Settings Menu” and
press [OK].
3. Press [e, r, w, q] to select “Power Save Settings”
and press [OK].
4. Press [e, r] to select “C.A.T.S” or “Auto Power
Off” and press [w, q] to select the setting.
5. Press [MENU] to close the menu screen.
Setting items
Factory settings are indicated with underlines.
C.A.T.S
(Contrast Automatic
Tracking System)
When this is set to On, the darker
the surrounding area becomes,
the darker the screen becomes.
(3 levels)
On (Display):
When the power consumption
is reduced, the number of “ ”
increases (up to 3).
On (No display):
“ ” is not displayed.
Off:
The screen brightness is fi xed.
Auto Power Off
Enable:
When the surrounding area
becomes dark and the following
conditions continue 1 minute or
more, the power is automatically
turned off.
– No operation
– Not during audio playback of
iPod/iPhone
Disable:
The power is not automatically
turned off.
When the auto power off is set to Enable
“The power will soon be turned off automatically.” is
displayed at the bottom of the screen 1 minute before the
auto power off function is activated.
Note
“ ” presents approximation.
While copying photos, etc., “Auto Power Off” does not
function even without operation.
If the light sensor is blocked with fi nger, etc., brightness
cannot be detected.
With the power save setting enabled, when you set the
unit at a place where light is diffi cult to reach the rear
side of the unit, such as in a cabinet or near a dark-
colored wall, the screen may become dark automatically
or the power may be turned off automatically, even if the
surrounding area is bright.
•
•
•
•
•
Power saving use Using the setup menu
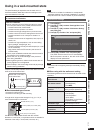
You can format the internal memory, initialize this unit, etc.
Basic operation
1. Press [MENU].
2. Press [e, r, w, q] to select “Settings Menu” and
press [OK].
3. Press [e, r, w, q] to select the item
(¼below and P21) and press [OK].
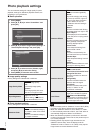
Settings Menu
Select Item
OK
Power Save Settings
Timer
Clock/Calendar Settings
View Demo
Remote Control Mode
Wall-mount Setting
Panasonic Logo
Initialize Settings
4. Press [e, r, w, q] to select the item or setting.
5. Press [MENU] to close the menu screen.
Factory settings are indicated with underlines.
Power Save Settings
¼left
Timer
¼P18
Clock/Calendar
Settings
This adjust the clock, set different
colors for holidays and Saturdays,
etc.
Set Clock (¼P7)
Holiday Settings
Select the date you want to set
and set the same color as that for
Sundays.
1. Select “Holiday Settings” in
step 4 in the basic operation
and press [OK].
2. Set “Month”, “Day” and “Year”
and press [OK].
3. Select “On” in “Holiday Setting”.
4. Select “Every Year” or “No” in
“Repeat”.
Every Year:
Set the same color for the
same day/month every year as
that for Sundays.
No:
Set the same color for the set
day/month/year as that for
Sundays.
Saturday Setting (On/Off)
Displayed with a different color
from that for Monday to Friday
when it is On.
Set Date Indication
Select “Month/Day/Year” or “Day/
Month/Year”.
Set Clock Indication
Select “12-hour System” or
“24-hour System”.