


24
VQT2Z87
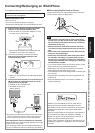
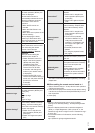
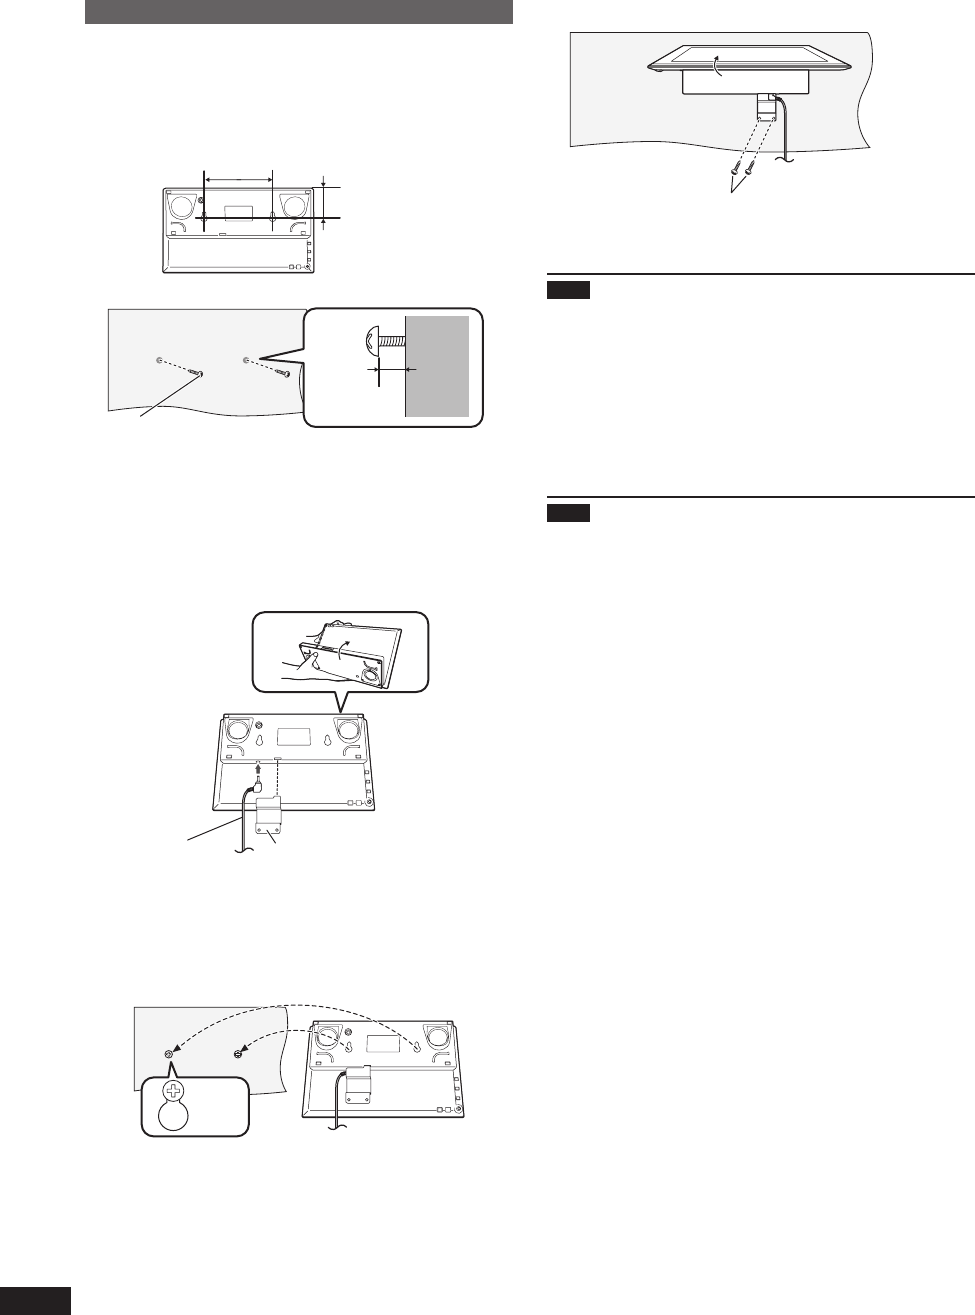
5. Fix the fi tting for wall-mounting to the wall.
Wall
G
G Make sure to attach 2 screws for the fi tting.
Note
The vertical arrangement of the main unit is not available
when using in the wall-mounted state.
When using the unit on a desk after removing
from the wall
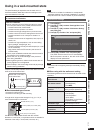
1. Select “No” for “Wall-mount Setting” in the setup menu
(¼P23) and press [OK].
2. Turn the unit off and remove the unit from the wall.
Note
When the “Wall-mount Setting” is changed to “No”, the
setting automatically returns to the previous state in which
the wall-mount setting was not set.
– Timer audio playback settings
– Power Save Settings
– Panasonic Logo
•
•
Using in a wall-mounted state
Attaching to a wall
Make sure to turn the power off to the unit and unplug the
AC adaptor.
Remove the Universal Dock for iPod.
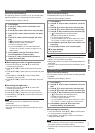
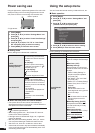
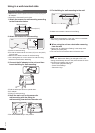
1. Attach the screws for wall-mounting according
to the illustration below.
105 mm (4
9
/64")
53 mm (2
3
/32")
2. Attach the screws for wall-mounting.
Wall
Wall
A
B
3 mm (1/8") to
4 mm (5/32")
A Screw for wall-mounting
B Fix with the screws stuck out 3 mm (1/8") to 4 mm (5/32")
from the wall.
Make sure to attach 2 screws for wall-mounting.
Use a level guide, etc. so the screws for wall-mounting
become horizontal when attaching.
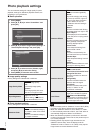
3. Connect the AC adaptor to the unit, and then
insert the fi tting for wall-mounting.
C
D
E
C Fold the stand part and turn upside down.
D AC adaptor
E Fitting for wall-mounting
4. Hook the main unit on the screws for
wall-mounting with the fi tting for
wall-mounting inserted into the main unit.
Wall
F
F Set the 2 screws fi rmly to this position.
•
•
•
•