4
VQT2Z87
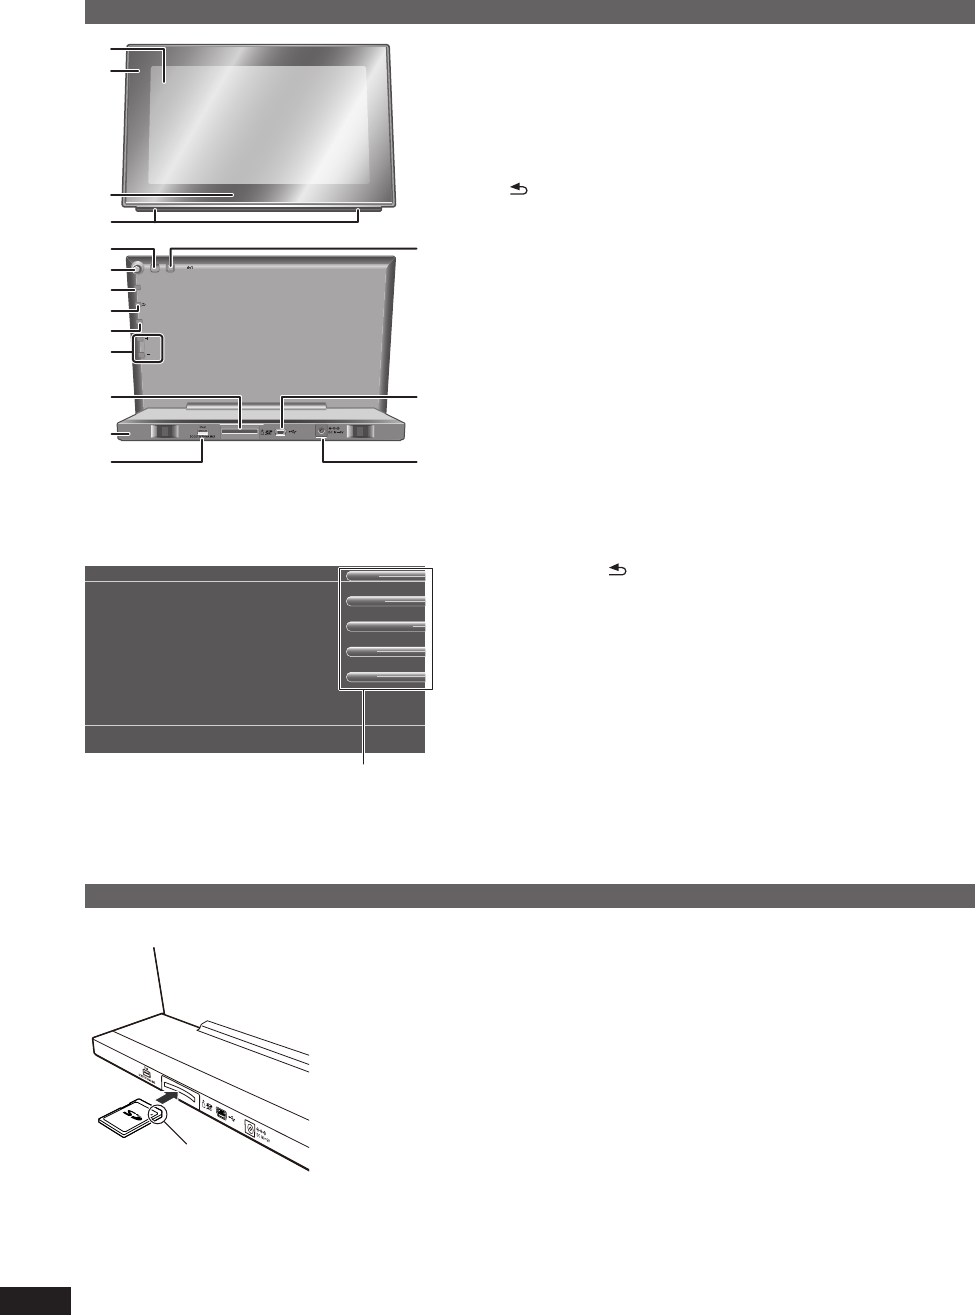
Control guide
Main unit
1 Display
2 Remote control signal sensor (¼P5)
3 Panasonic Logo (¼P21)
4 Speakers
5 Light sensor (¼P20)
6 Cursor buttons (e, r, w, q and OK) Selecting to confi rm
7 [MENU] Displaying/closing the menu screen
8 [
RETURN] Returning to the previous screen, displaying the
thumbnail screen (¼P11), displaying track list (¼P17)
9 [DISPLAY MODE] Displaying the display mode selection screen
(¼P8, 9)
10 [VOLUME 4]/[VOLUME 3] Adjusting the volume
11 SD card slot
12 Stand
13 Terminal for the Universal Dock (¼P15)
14 [POWER 8] Standby/on switch
15 USB port (¼P22)
16 AC adaptor terminal (¼P7)
ヮユワヶ
ヱヰヸユン
ュリヴヱロモヺ
ヮヰュユ
ンユヵヶンワ
ヷヰロヶヮユ
14
13
12
7
6
8
9
4
10
11
2
3
1
15
16
5
Inserting an SD card
B
Face (the side with the corner cut) (B) up and insert straight to the
end.
To remove an SD card
Press the center of the SD card. When the card slightly pops out, pull
it out with your fi ngers.
Never remove the SD card while the SD card is reading. Otherwise,
the data may be destroyed.
Keep the Memory Card out of reach of children to prevent
swallowing.
•
•
Button operation display on the main unit
MENU
RETURN
DISPLAY MODE
VOL +
VOL -
A
When [MENU], [ RETURN] and [DISPLAY MODE] are pressed
once, the guide (A) is displayed. When these buttons are pressed
while the button guide is displayed, they will function normally as
buttons.
You can operate [VOLUME 4] and [VOLUME 3] regardless of the
button guide display status.
•
•
Back of product


