28
For assistance, please call : 1-800-211-PANA(7262) or send e-mail to : consumerproducts@panasonic.com
Advanced Settings
1
Set POWER to CAMERA.
2
Hold down AUTO/MANUAL for more
than 0.7 seconds so that the “MNL”
indication appears in the EVF or the
LCD monitor.
3
Press JOG KEY repeatedly until
“AWB” appears in the EVF or LCD
monitor.
4
Rotate JOG KEY to select other
modes. (See mode chart at left.)
• Hold down AUTO/MANUAL for more
than 0.7 seconds to cancel the
setting.
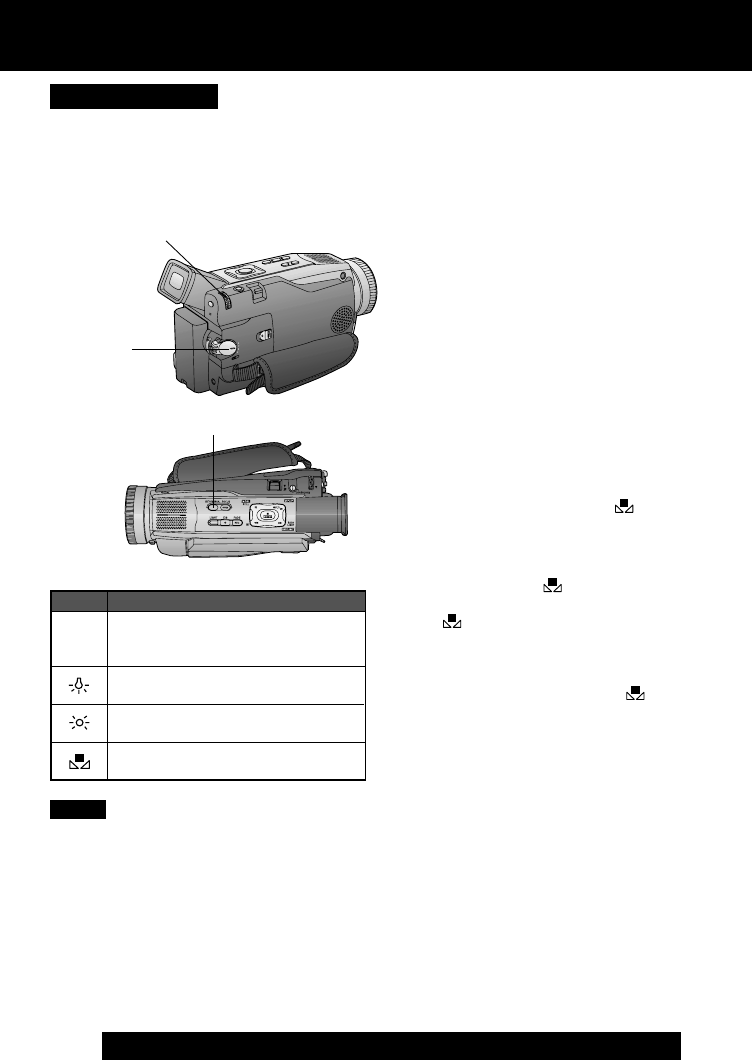
Mode
AWB
*
3, 4, A, B
JOG KEY
White Balance
Auto White Balance (“AWB”) automatically
maintains optimum color balance in most
lighting conditions. However, when using
Digital Functions, etc., you may get better
results by using the manual adjustment.
1
POWER
Description
Automatically maintains optimum
color balance in most lighting
conditions.
When the source illumination is a
halogen lamp.
When shooting outdoors on a
sunny day.
The White Balance setting that
was previously set manually.
* For manual White Balance
adjustment:
A.
Rotate JOG KEY to select “ ” .
B.
Point the Palmcorder at a white
object (full-screen) and hold JOG
KEY down until “
” indication stops
flashing.
• If “
” indication flashes when the
Palmcorder is turned on, the previous
manual White Balance setting is in
effect.
In the following cases, the “
”
indication flashes:
• The flashing indicates that the
previously adjusted White Balance
setting is still kept. This setting will be
kept until White Balance is adjusted
again.
• Correct White Balance may not be
attainable manually in poor lighting.
• When ZOOM is set to 10X or higher,
White Balance cannot be adjusted.
Note
2
AUTO/MANUAL
PV-DV52 / PV-DV52-S / PV-DV102 / PV-DV202 / PV-DV402
32


