45
Editing Features
Editing Features
4
Press (PAUSE) to start Audio
Dubbing.
• Connect the Palmcorder to the TV in
order to monitor the sound.
(p. 39)
Only NTSC (National Television Standards
Committee) recorded tapes can be audio
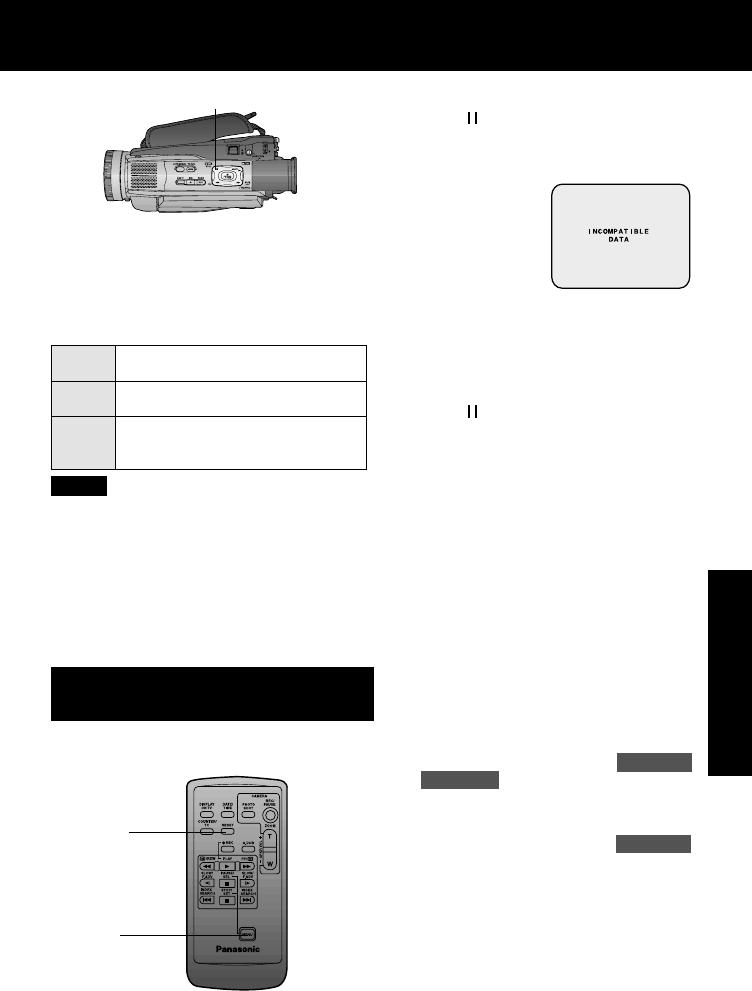
dubbed. The following screen appears if
the tape was not recorded in NTSC format.
5
Press (PAUSE) to stop Audio
Dubbing.
To listen to the desired audio sound, set
the AUDIO setting of the VCR mode MENU
(Menu OSD: p. 110) as follows:
• If the microphone used for dubbing gets
too near the speaker of your TV,
a howling noise (feedback) may occur.
• If the tape position is in or was started in
a blank section, you cannot use the
A.DUB feature.
Memory-Stop Editing (Remote
Control Only)
• 16 bit dubbed sound completely erases
the original 16 bit recorded sound.
• If you dubbed using 12 bit AUDIO
recording and then selected AUDIO-MIX
in the menu for playback, the sound will
be stereo regardless of the AUDIO-OUT
setting.
• If you recorded in LP mode, you cannot
use the A.DUB feature.
Note
You can set an automatic Dubbing stop
point.
D
RESET
A
MENU
A
Press MENU to display the VCR
menu screen.
B
Rotate JOG KEY to select DISPLAY
SETTING , and then press JOG KEY
to display the DISPLAY SETTING
menu.
C
Rotate JOG KEY to select DISPLAY ,
and then press JOG KEY to set to
MEMORY.
D
Press MENU two times to exit MENU
mode. Then, press RESET on the
remote control to reset the Counter
Memory to M 0:00:00.
Now, rewind to the editing start point,
and continue with steps 2-5. The tape will
now stop automatically at “M 0:00:00”.
ST 1
ST 2
MIX
Set this position to listen to the
original sound.
Set this position to listen to the
audio dubbed sound.
Set this position to listen to both
the original sound and the audio
dubbed sound.
AUDIO:The following selections are
available for 12 bit AUDIO dubbed
recordings only (sound recorded in SP
mode only).
4, 5
PAUSE
PV-DV52 / PV-DV52-S / PV-DV102 / PV-DV202 / PV-DV402
49
