47
Editing Features
Editing Features
3, 4
PLAY
3, 4, 5
PAUSE
3, 4
PLAY
6
STOP
4
REC
High quality digital-to-digital copying can
be accomplished if both Palmcorders
incorporate the DV Input/Output (i.LINK)
Connector (DV interface cable (i.LINK) is
not supplied).
1
Insert a pre-recorded tape into the
source (playing) Palmcorder, and set
POWER to VCR.
2
Insert a blank tape with the record
tab closed into the target (recording)
Palmcorder and set POWER to VCR.
3
Press (PLAY) on the source
Palmcorder. When the tape reaches
the point you want to start dubbing,
press
(PAUSE).
4
Hold down REC and press (PLAY)
on the target (recording) Palmcorder or
on the remote control.
Press
(PAUSE) to pause the tape at
the starting point of the dub.
5
Simultaneously, press (PAUSE) on
both units to begin dubbing.
6
Press (STOP) on the recording
unit, and then press
(STOP) on the
playing unit to end dubbing.
• When two Palmcorders are used for
dubbing, it is recommended that the
Remote Control VCR1 or VCR2 setting be
used to avoid improper-operation.
• When two Palmcorders are connected
using the DV interface cable (i.LINK) (not
supplied), a Video Editing Controller
cannot be used.
• Do not connect both an S-Video Cable or
A/V Cable and a DV Interface Cable
(i.LINK).
CAUTION:
Unauthorized exchanging and/or
copying of copyrighted recordings may
be copyright infringement.
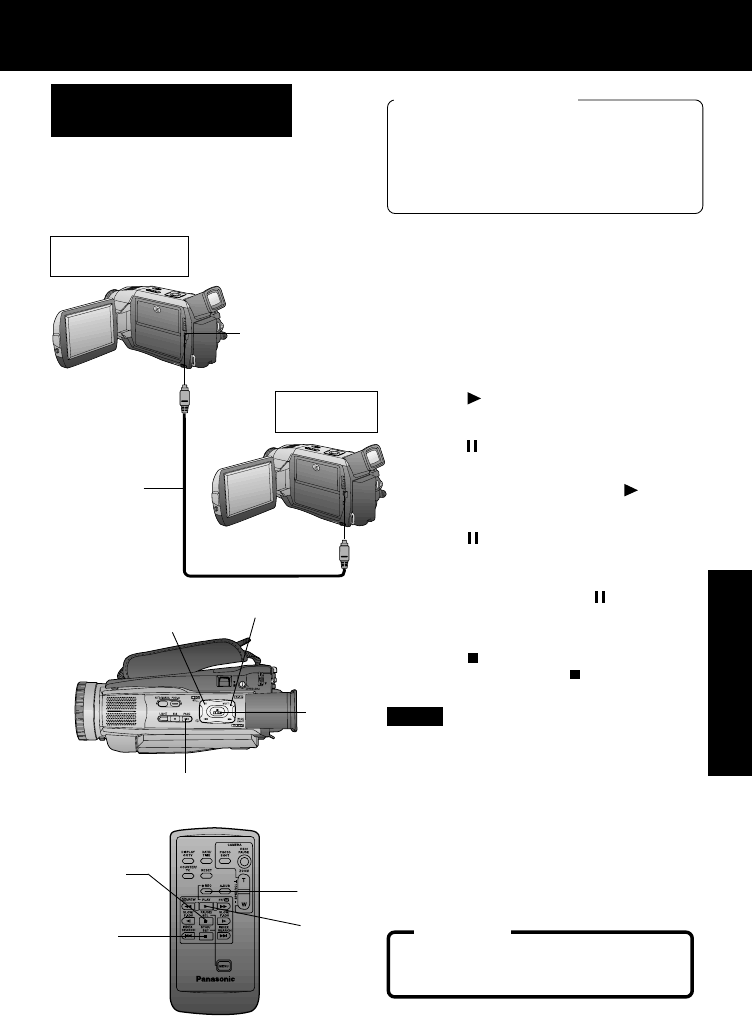
Source (Playing)
Palmcorder
Recording
Palmcorder
DV Interface
Cable (i.LINK)
(optional)
DV Input/Output
(i.LINK) Connector
Copying from Digital
Equipment (dubbing)
Note
3, 4, 5
PAUSE
Before you begin
• Connect both Palmcorders to their
power sources.
• Connect the two Palmcorders using the
DV interface cable (i.LINK)
(4-pin to 4-pin).
• Turn both Palmcorders ON.
6
STOP
4
REC
PV-DV52 / PV-DV52-S / PV-DV102 / PV-DV202 / PV-DV402
51


