46
For assistance, please call : 1-800-211-PANA(7262) or send e-mail to : consumerproducts@panasonic.com
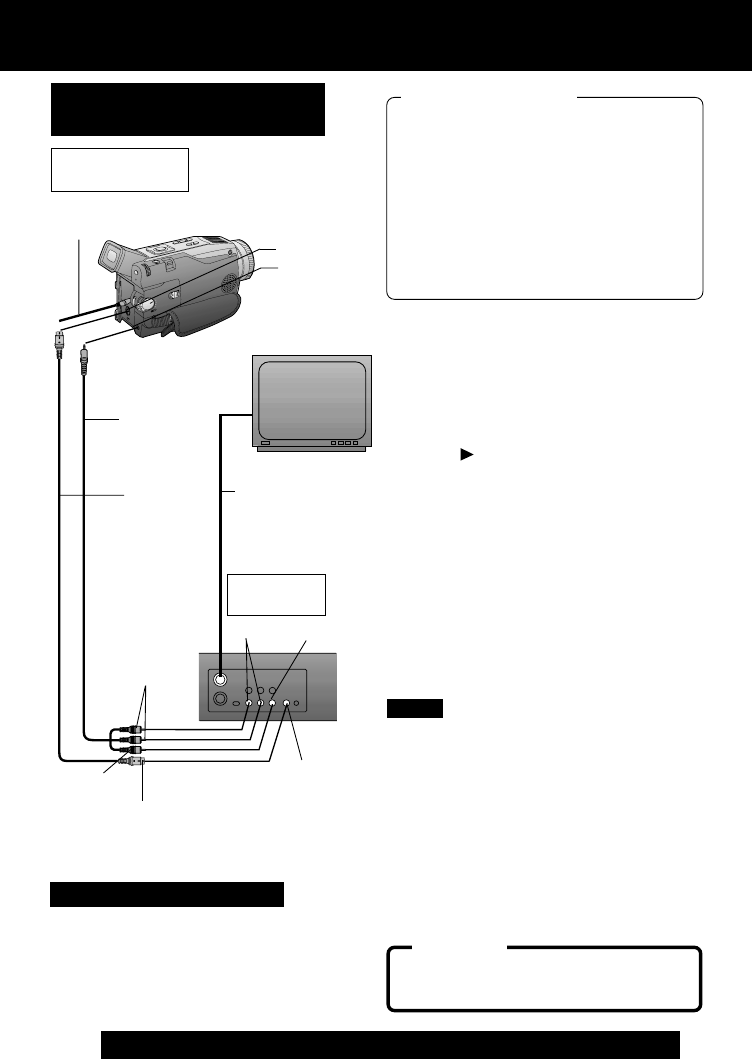
Editing Features
Video In
S-Video In
VHF Connecting
Cable (not
supplied)
TV
(To View)
A/V Cable
(Supplied)
To Audio In
To Video In
Recording:
VCR (Rear)
To S-Video In
(If there is S-Video In)
• For technical reasons, dubbing a tape
may reduce its quality.
• Press DISPLAY ON TV on the
Palmcorder Remote Control to eliminate
EVF/LCD Monitor indications.
• If the Time Code is displayed in the EVF
or LCD monitor, it cannot be reset.
• Only the DATE/TIME, when displayed,
will be recorded on the tape.
CAUTION:
Unauthorized exchanging and/or
copying of copyrighted recordings may
be copyright infringement.
A/V OUT
S-VIDEO OUT
Source (Playing)
Palmcorder
Copying your Tapes to
S-VHS or VHS Cassette
Monitor with your TV
1
Insert a pre-recorded tape
into the source (playing) Palmcorder
and a blank tape, with record tab in
place, into the target VCR (Recorder).
2
Press (PLAY) on the Palmcorder.
When the tape reaches the point you
want to start dubbing, press PAUSE.
3
Place the VCR into REC/PAUSE
mode. (See VCR manual.)
4
Simultaneously, press PAUSE on
both units to begin copying.
5
Press STOP on both units when
copying is completed.
S-Video
Cable (not
supplied)
Audio In
Note
• Turn the TV ON and select its VCR
channel (either CH3 or CH4).
• Set the VCR/TV Selector on the
recording VCR to VCR.
Before you begin
• Connect both Palmcorder and VCR to
their power sources.
• Connect the Palmcorder to a VCR as
illustrated left.
• Turn ON both units.
• Set the recording VCR’s Input Signal
Selector to LINE.
• Set the Palmcorder POWER to VCR.
• Before using S-VIDEO Connector,
insert the DC Cable into the DC IN
Terminal. (p. 15)
DC Cable
(Supplied)
PV-DV52 / PV-DV52-S / PV-DV102 / PV-DV202 / PV-DV402
50


