


Pelco Manual C1902M (11/96) 9
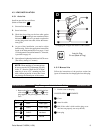
D
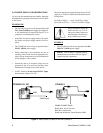
Auto Iris Plug
Pin-out (Back of Plug)
42
13
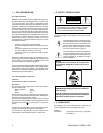
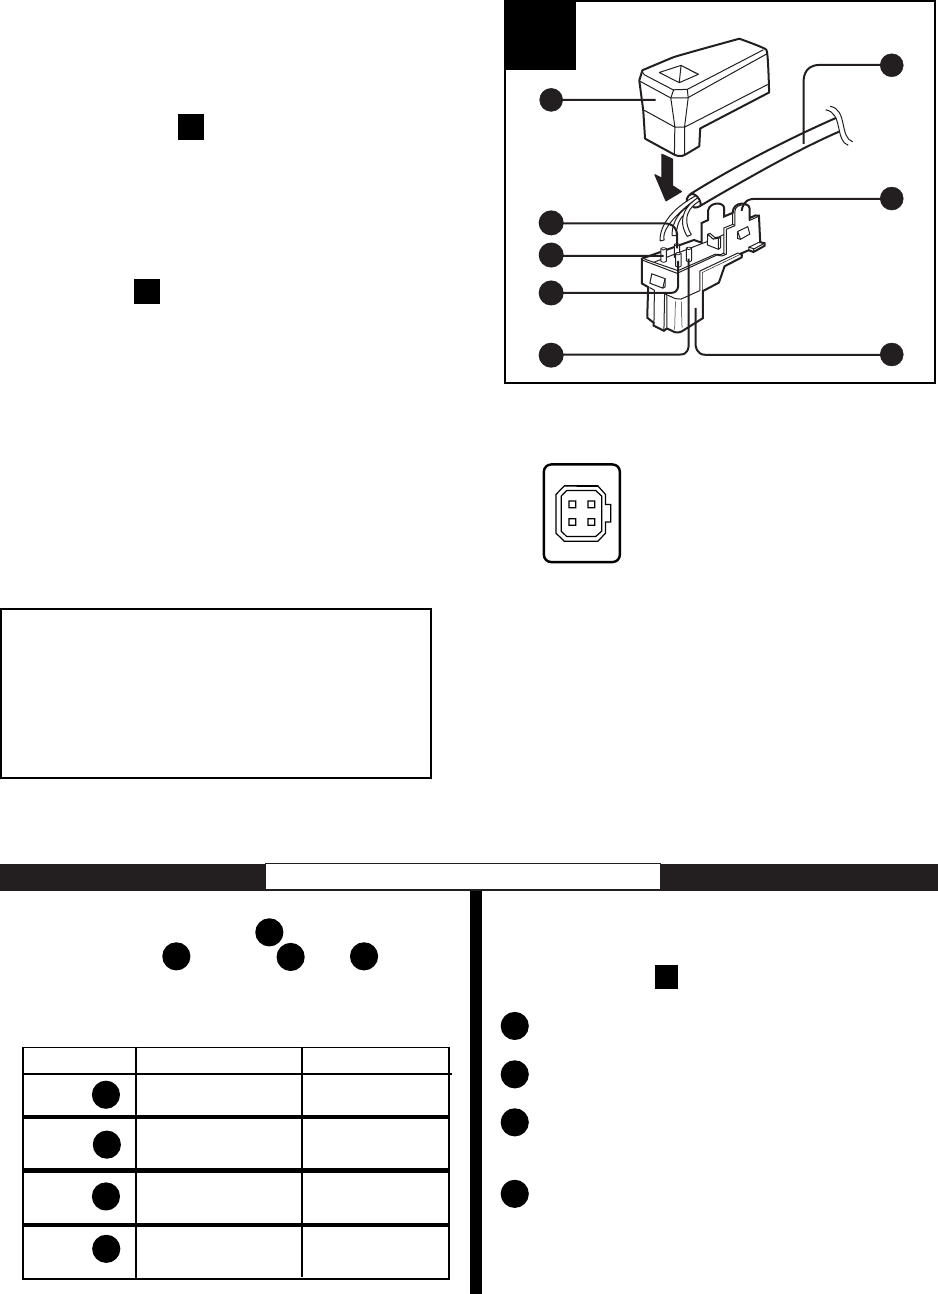
Changing the Plug on an Auto Iris Lens Cable
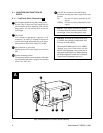
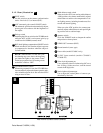
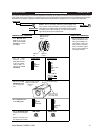
4.3 LENS INSTALLATION
4.3.1 Auto Iris
Install an auto-iris lens as follows:
(Refer to Illustration E )
1. Unscrew lens mount cap.
2. Screw in the lens.
NOTE: When attaching a C-mount type lens,
be sure to turn the C/CS adjustment ring fully
in the “C” direction. When the C/CS adjust-
ment ring is set to “CS,” mounting any lens
with a mount projection of more than 4 mm
may damage the internal parts of the camera.
Pin # DC-servo Lens VS-servo Lens
Pin 3: DRV+ Video signal
Pin 1: CONT- Power supply
Pin 2: CONT+ Not Used
Pin 4: DRV- Ground
7
6
5
8
1. Remove the plug cover and solder the lens
cable wires to the pins thru on the
plug supplied. The pin assignments are as fol-
lows:
8
5
1
2
3
4
1
2
2. Put the cover on the plug.
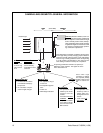
ILLUSTRATION D ELEMENTS
Cover
Auto-iris cable
Rib (If the cable is thick and the plug cover
does not seat properly, cut away this rib.)
Lens plug
2
3
4
1
8
7
6
5
3. Check the plug wiring on the lens cable against
Illustration and the pin-outs mentioned in the
Information Box below. If you need to replace the
existing plug on the lens cable, follow the instruc-
tions given.
4. As part of lens installation, you need to adjust
backfocusing. Follow the appropriate instructions
found in the Information Boxes on pages 11 and
12. Background “General Information”, if needed,
is provided on page 10.
5. Once adjusted, tighten the backfocus LOCK screw.
(The factory setting is C-mount.)
D
4.3.2 Manual Iris
Follow the instructions of the previous section but
ignore all instructions for changing the lens cable plug.
Information Box
Information Box
Plug Change on Auto Iris Lens Cable