


4 Pelco Manual C1902M (11/96)
2.1 LOCATION AND FUNCTION OF
PARTS
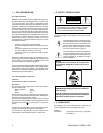
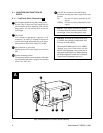
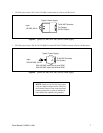
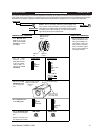
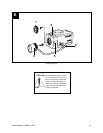
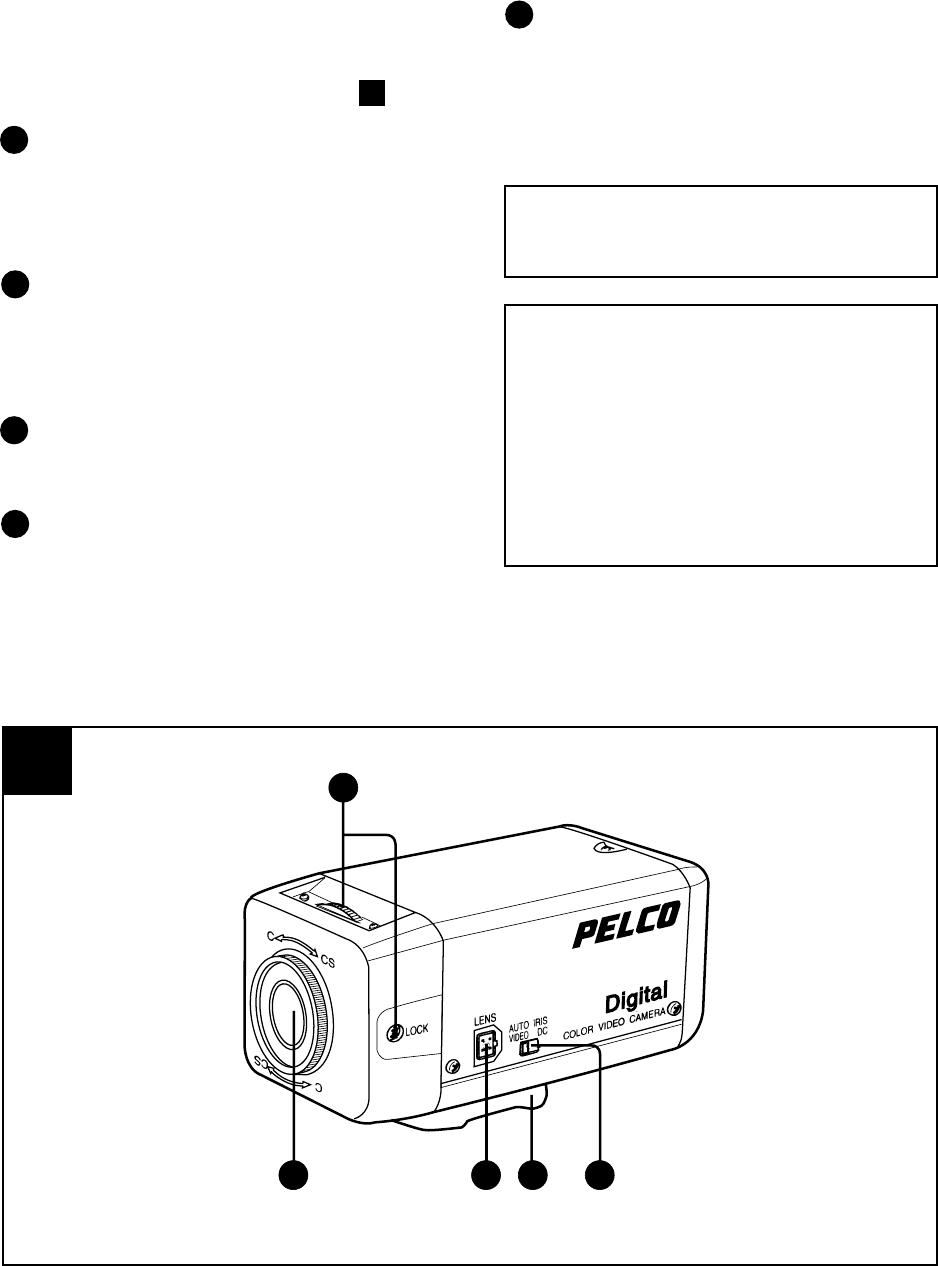
2.1.1 Top/Front/Side (Illustration A )
Focal length adjustment ring and locking screw
Use this ring to adjust the focal length (the dis-
tance between the lens mounting plane and the
image plane). Use the locking screw to lock the
focal length.
Lens mount
Use to mount an appropriate C-mount or a CS-
mount lens. To attach a C-mount/CS-mount lens,
turn the focal length adjustment ring to the appro-
priate position. The factory setting is C mount.
Lens connector (4 pin socket)
Supplies power and control signals to an auto iris
lens.
Camera mounting bracket
The mounting bracket can be attached to either the
top or bottom of the camera using the four attached
screws (1/4" UNC-20).
Auto iris lens selection switch (DC/Video)
Switch for selecting the control signal for the auto
iris lens.
DC: For auto iris lenses controlled by DC
signals
VIDEO: For auto iris lenses controlled by video
signals
NOTE: If you use the electronic iris function
in locations where the camera is exposed to fluo-
rescent light, a slow color change may occur.
NOTES: When the DC/VIDEO switch is set
to VIDEO, the backlight compensation func-
tion may not work properly.
When the DC/VIDEO switch is set to VIDEO,
“hunting” may occur. If this occurs, use the
LEVEL L/H adjustment screw on the lens to
change the incident light level. When adjusting
the incident light level, set the ALC (Automatic
Light Control) adjustment screw to Av.
2
4
A
1
2 3 4 5
1
3
5
Top/Front/Side View of CC4600 Series Camera