


Operating Instructions
57
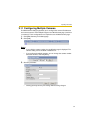
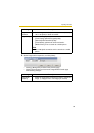
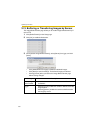
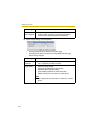
When you set [FTP] for Transfer Method
Select [FTP], and click [Next>]. The following page is displayed.
• Clicking [<Back] takes you back to the previous page.
• Clicking [Cancel] takes you back to the Image Buffer/Transfer page
without saving changes.
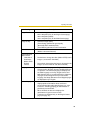
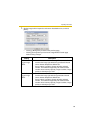
Setting Description
Server IP
Address or
Host Name
*1
*1
But [Space], ["], ['], [&], [<] and [>] are not available.
• If you set the server IP address, set 4 digits (0—255) and 3
periods such as "192.168.0.253". But "0.0.0.0" and
"255.255.255.255" are not available. Or set a host name (1—
255 characters).
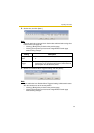
Port No. • Enter the number (1—65535). Usually set to 21.
Login ID
*1
• If your ISP requires a login ID, set it (0—63 characters).
Password
*1
• If your ISP requires a password, set it (0—63 characters).
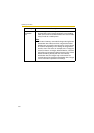
Login Timing • Select the login timing to an FTP server. If you set [One Time]
during 1-minute transfer, the camera logs in to the server only
once, and can reduce the time to log in or log out.
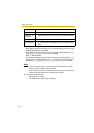
Upload File
Name
*1
• Set the file name to save on an FTP server. Enter 1—234
characters. Entering "\" creates directories for a file. (E.g.
NetworkCamera\image.jpg)
Overwrite
setting
• Selecting [Overwrite File] saves and overwrites the image on
the server. Selecting [Save as New File with Time Stamp]
saves the image attaching time stamps on the file name, and
the images are not overwritten.
Data
Transfer
Method
• Select [Passive Mode] normally. If FTP does not work, select
[Active Mode] and check the operation.