


8 LS 785 High Throughput Lens Spectrograph User Manual
WinSpec Software and the LS 785
Software Installation
1. Verify that the detector (and controller) is connected to the computer and that the detector is turned on.
2. Turn on your computer.
3. If WinSpec/32 was purchased with the LS 785, install WinSpec/32 using the installation disk and
password supplied.
4. When prompted to “Select Installation Type, select “Complete” to insure installing necessary
components.
5. If using a previously installed version of WinSpec, check the “Tools” pull down menu and insure that
“HTS Calibration” is present. If it is not present and the version of WinSpec is 2.5.23 or greater, reinstall
WinSpec and select “Complete” install. If the version number is less than 2.5.23, contact Princeton
Instruments to purchase an upgrade to the latest version of WinSpec.
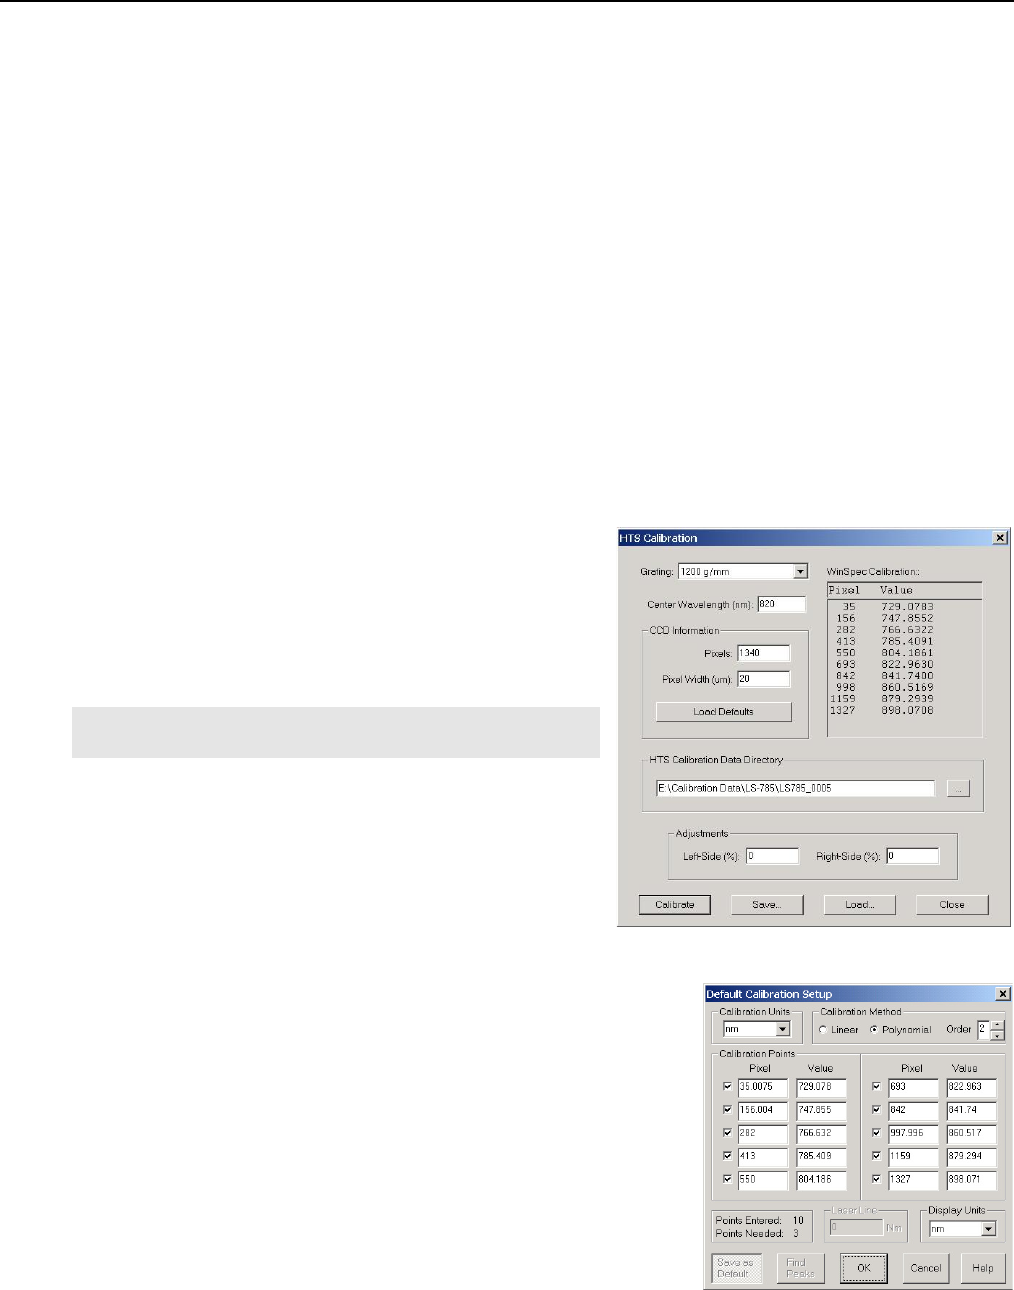
LS 785 Calibration
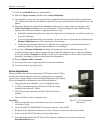
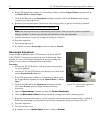
1. Start WinSpec and select “HTS Calibration” from the
“Tools” menu. If not already set up, set the grating to 1200
g/mm and enter the center wavelength you are using.
2. Set the CCD Information parameters to match the ones for
your detector. For example, if you are using a PIXIS
detector, set the pixels to 1340 and the pixel width to 20.
Note: “Load Defaults” will load the pixels and pixel
width information for the currently active detector.
3. Under HTS Calibration Data Directory, use the button
beside the window to browse to the LS 785 calibration
disk supplied. Click on "Calibrate". Based on the Center
Wavelength you entered, this loads the WinSpec
calibration values.
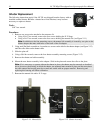
4. Now, select "Setup" from the WinSpec "Calibration" menu.
On the Default Calibration Setup dialog, set the units to nm
and the calibration method to Polynomial, Order 2. Check the
calibration points listed and compare them to the ones in the HTS
Calibration dialog from above. The pixel values will have greater
resolution in the Default Calibration Setup dialog, but other than
that, they should match. If they do match, click “OK” to close the
Calibration Setup window and click “Close” to close the HTS
Calibration window. If they do not match, set the default calibration
values in the Default Calibration Setup dialog to match those of the
HTS Calibration dialog.
Figure 2-1. HTS Calibration dialog
Figure 2-2. Default Calibration
Setup dialog