


29
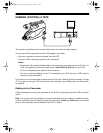
4. Set
AV OUT/IN
inside the
AUDIO/VIDEO
OUT/IN
jack compartment to
OUT
.
5. Slide
POWER
to
VCR
.
6. Insert a cassette into the camcorder.
7. Set your VCR to its audio/video mode.
Note:
Some VCRs have a manual input-
select switch, while others automatically
“sense” when you connect another audio/
video source to the VCR’s audio/video
input jacks. Check your VCR’s owner’s
manual for more information about your
VCR.
8. Press
PLAY
on the camcorder to find the
portion of the tape you want to dub. Then
press
REC/PAUSE
to pause it.
9. Set the VCR to record, then press the
VCR’s record button to begin recording.
10. Press
REC/PAUSE
on the camcorder to play
the portion of the tape you want to dub.
11. Press
REC/PAUSE
on the camcorder to stop
dubbing.
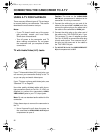
Adding Titles onto an Existing
Recording
Note:
You need a separate VHS VCR to super-
impose titles over an existing recording.
1. Connect the camcorder and VCR (see
“Dubbing from the Camcorder” on Page
28.).
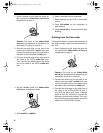
2. Press
TITLE
to select the title you want to
record. Then, if the title you want to record
does not appear, press
PAGE
to select the
other title page.
3. Press
TITLE
to remove the title from the
viewfinder. The title disappears.
4. Load a blank cassette, or one you want to
record onto, into the VCR. Then set the
VCR to its recording mode.
5. Load the cassette you want to record from
into the camcorder, then press
PLAY
to play
it back.
6. When you see the scene where you want to
record the title, press
TITLE
. The cam-
corder plays the title and superimposes it
over the recording.
7. When you want to stop recording the title
onto the tape, press
TITLE
. The title disap-
pears.
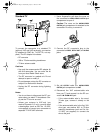
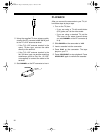
AUDIO EDITING
The camcorder’s audio editing feature lets you
record a new soundtrack onto a previously re-
corded tape without erasing the original picture.
When you use audio editing, you replace the au-
dio on the tape with new sound. You can use
sounds picked up by the camcorder’s built-in mi-
crophone or signals from an audio source con-
nected to the camcorder’s
AUDIO
jack.
Notes:
• If you connect an audio source, always use
video quality shielded cables with phono-
type connectors (such as Cat. No. 15-1540,
not supplied) to connect the camcorder’s
AUDIO
jack to the audio source’s AUDIO
OUT jack.
• Do not use a standard audio cable for this
connection.
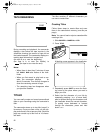
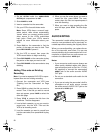
1. If you are not using the camcorder’s built-in
microphone as an audio source, connect
the audio source’s AUDIO OUT jack to the
camcorder’s
AUDIO
jack.
16-830.fm Page 29 Wednesday, July 21, 1999 9:32 AM