


Recording
19
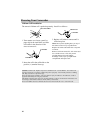
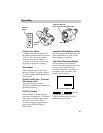
• Press and release the the thumb
trigger again to stop recording. The
camcorder is now in record pause.
PAUSE appears in the viewfinder.
• The camcorder will automatically
turn off if it remains in record pause
for three minutes. Slide the POWER
switch upward to turn the camcorder
back on.
7. Use the zoom feature.
• Zoom in and out using the zoom
control.
8. Review what you have recorded.
• Press and release REW to review the
last few seconds of the recording.
• Press and hold REW or FFWD to
visually see what you have recorded.
Release the button to begin recording
at that point.
9. When you are finished, slide the
POWER switch upward to turn off
the camcorder. Replace the lens
cap.
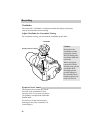
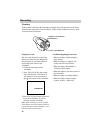
To Make a Recording:
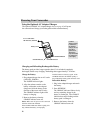
1. Attach a power supply.
Attach the adapter, charged battery, or
install optional “AA” alkaline
batteries.
2. Remove the lens cap and attach it to
the handstrap.
3. Slide the POWER switch upward to
turn on the camcorder.
The CAM indicator will light and the
camcorder will enter the record pause
mode. PAUSE appears in the
viewfinder
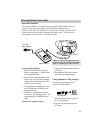
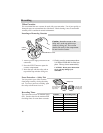
4. Insert a video tape.
• Press EJECT.
• Insert the cassette with safety tab
facing up and the tape window facing
out.
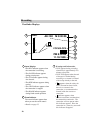
5. Adjust the viewfinder and eyepiece
focus control for your vision.
6. Start and stop recording.
• Press and release the thumb trigger
(REC START/STOP button) to start
recording. REC appears in the
viewfinder.
Making a Recording
The steps below tell you how to make a recording and suggest using some of the
recording features. Each feature is described in detail on the following pages.
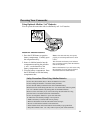
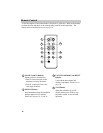
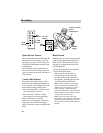
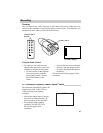
PLAYREW F FWD
STOP PAUSE
EJECT
DISPLAY BLANK REC
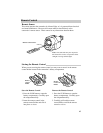
EJECT Button
REW Button
Eyepiece
Focus Control
Zoom Control
Thumb Trigger
CAM (Camera) Indicator
POWER Switch