English _15
CONNECTING WITH OTHER DEVICE
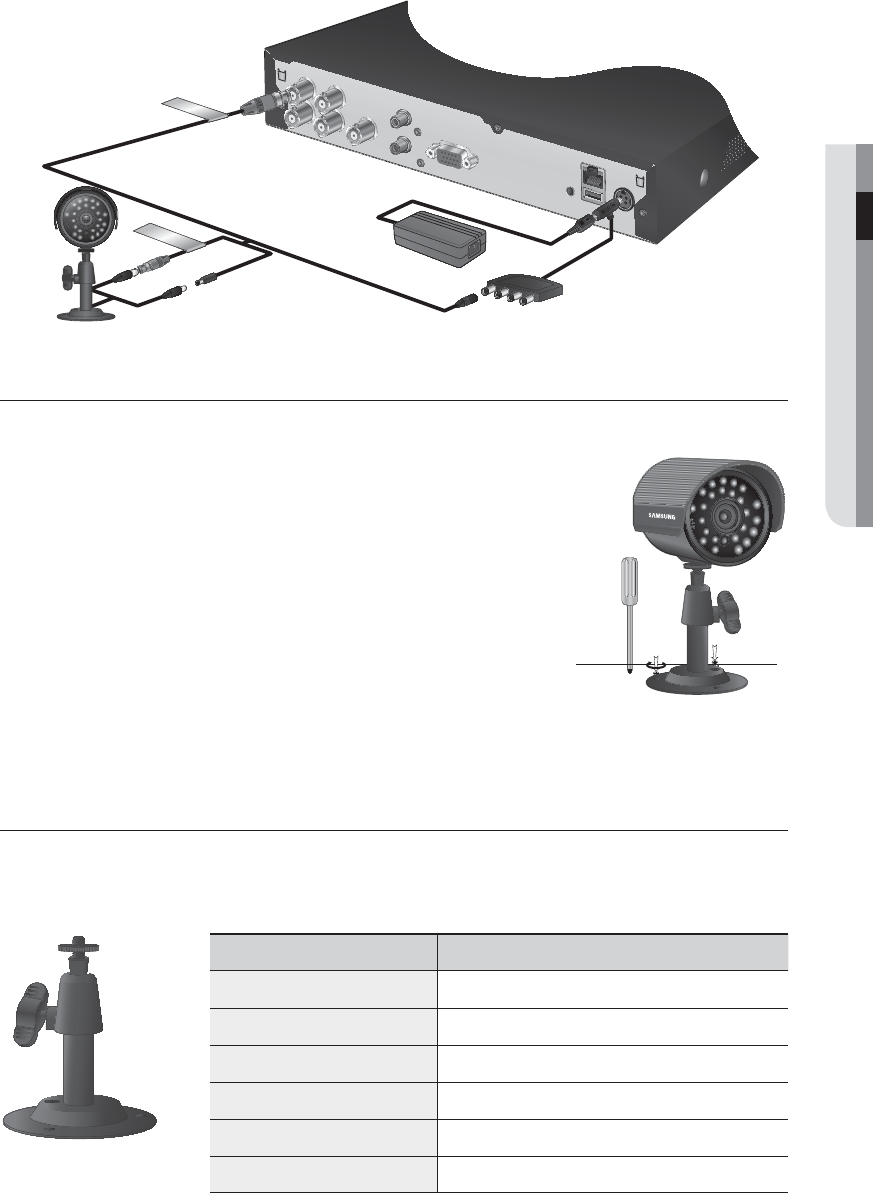
Connecting with DVR
Installing the camera
The camera can be installed on the wall, ceiling, shelf or a desired position using the provided bracket.
1. Select a position where you want to install the camera.
Make sure the selected position can sustain the weight of the camera.
2. Use the screw bolts (M3.5 X L25) to mount the camera bracket onto
the wall or ceiling.
3. Place the camera on the selected position and fit the hole either on the
top or the bottom of the camera into the fixing bolt of the bracket, and
turn the camera clockwise.
J
You should be careful when installing the BOX camera outdoors because
the cable connectors may be wet with moisture or pile up with impurities.
The camera satisfies the IP65 standard, and direct exposure to water or
moisture may cause problem such as condensation.
Camera Bracket
The camera bracket can be used to install the camera on the wall, ceiling or shelf.
Camera Bracket Specification
Name Description
Use
Indoor /
Outdoor
Installation
Wall or Ceiling
Dimensions
Ø60 x H72mm (Ø2.36 x H2.83 inch)
Weight
85g (0.19 lbs)
Operating Temperature
-10˚C ~ 50˚C (14˚F ~ 122˚F)
Accessories
SCREW (M3.5 X L25): 3 pcs for each bracket
1
234G
1
COM
G
ALARM IN
ALARM OUT
NETWORK
USB
CONSOLE
VGA
AUDIO IN
AUDIO OUT
VIDEO OUT
DC 12V
TO CAMERA SIDE ONLY
TO DVR SIDE ONLY
M3.5 X L25
sized screws
wall or ceiling


