99-00864-20 D0 Using the Document Camera 15
Displaying Printed Materials Using the Stage
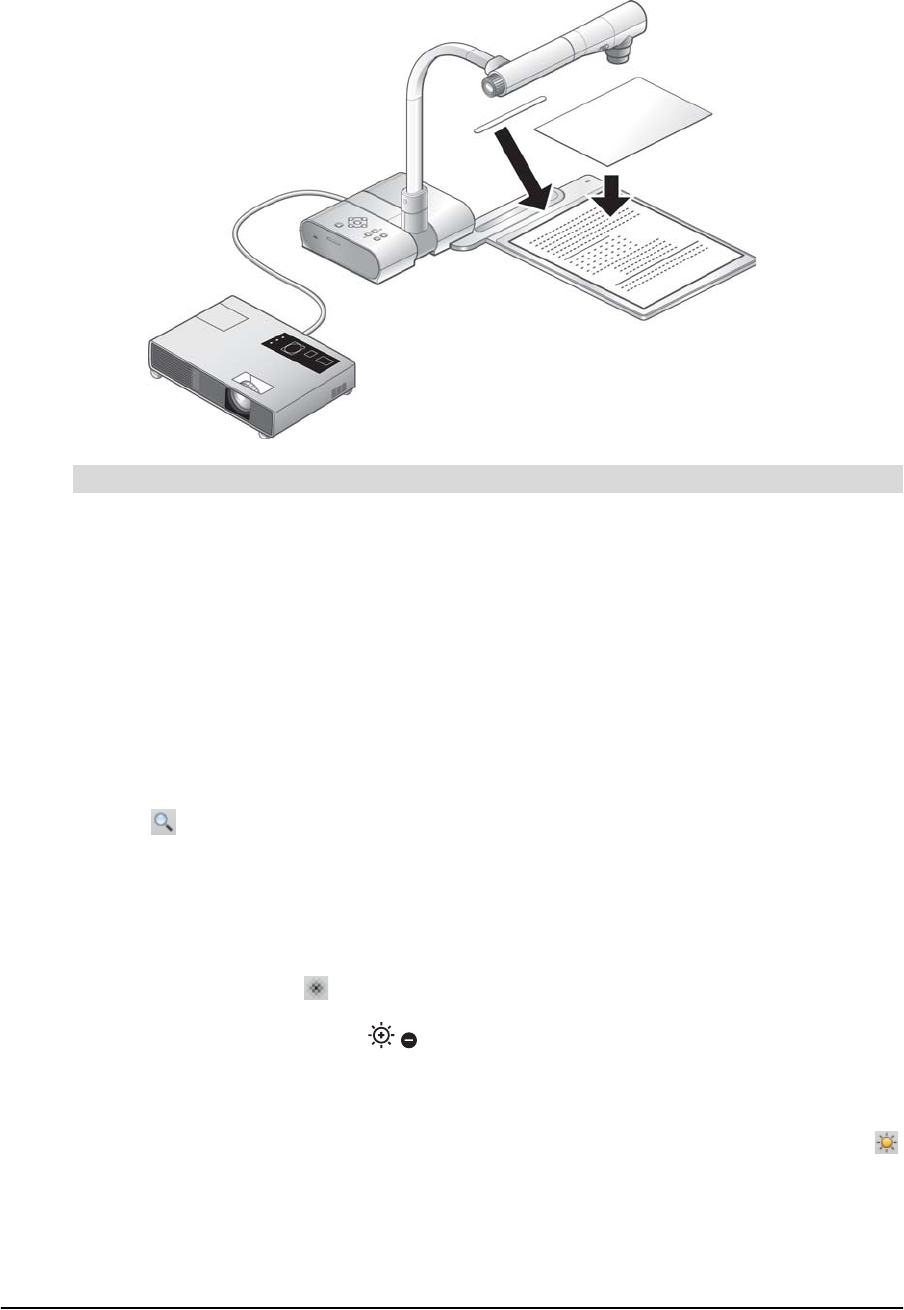
You can set up the document camera to display printed materials using the included stage,
magnetic sheet and anti-glare sheet.
1. Set up the document camera and connect it to your computer (see page 7).
2. Align the stage with the document camera using the stage positioning as a guide.
3. Place a document on the stage. Attach the document to the stage with the magnetic sheet.
4. If glare makes the document difficult to see, cover the affected area with the
anti-glare sheet.
5. Rotate the zoom dial on the camera until the document image is at the desired
magnification.
OR
In SMART Notebook, press the plus or minus buttons to the right of the magnification
icon until the document image is at the desired magnification.
6. Press the AF button on the document camera to focus the image.
OR
In SMART Notebook, press the AF button in the SMART Document Camera window to
focus the image. You can also fine tune the focus with the plus or minus buttons to the
right of the focus icon .
7. Press the brightness buttons on the document camera control panel to adjust the
image brightness.
OR
In SMART Notebook, press the plus or minus buttons to the right of the brightness icon
to adjust the brightness.
To display printed materials using the stage
