


24
25
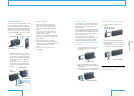
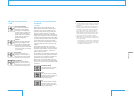
To replace the button battery in the remote
1
Pull out the battery holder from the
remote.
Depress here to pull
out the battery holder.
2
Install a new battery (CR2025 lithium
battery) as illustrated below. Reinsert the
battery holder.
Use of batteries other than the CR2025
may present a risk of fire or explosion.
With the “+” side facing forward
Note
• Batteries may explode if mistreated. Do no recharge,
disassemble or dispose of in fire.
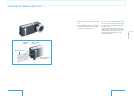
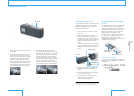
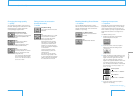
To use the remote
Aim the remote at the remote sensor on the
front of the timer remote unit. The red timer
lamp lights up for 2 seconds before the
picture is taken.
The range of the remote is approximately 5
m (16 ft) when aimed straight ahead at the
remote sensor and 15 degrees to each side.
Before using the unit for the first time, pull
out the insulation sheet.
If the range of the remote becomes
noticeably shorter or the timer remote unit
no longer responds to remote operation,
replace the button battery in the remote.
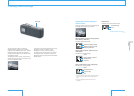
To replace the button battery in the timer
remote unit
1
Press the release button and then pull
out the battery holder from the timer
remote unit.
Release button
2
Install a new battery (CR1616 lithium
battery) as illustrated below. Reinsert the
battery holder.
Use of batteries other than the CR1616
may present a risk of fire or explosion.
With the “+” side facing forward
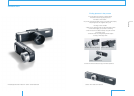
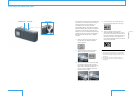
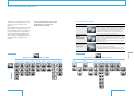
Using the self-timer
Use the timer remote unit (supplied) to take
pictures using the self-timer or remote
control. The timer remote unit is equipped
with a terminal for attaching the flash unit or
video-out unit. You can use flash with the
self-timer or take pictures using the remote
control while viewing them on a TV screen.
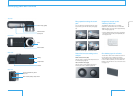
Power button
Timer remote unit Remote
Button
Timer button
Remote
sensor
Timer lamp
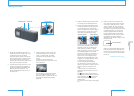
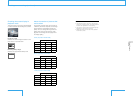
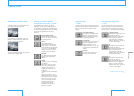
1
Remove the terminal cover of the
camera and attach the timer remote unit
to the camera. To steady the camera,
attach a tripod (available commercially)
to the tripod screw hole of the timer
remote unit.
To detach the timer unit, loosen the
locking screw and pull the timer unit
straight out while pressing the release
button.
Timer
remote unit
Tripod screw hole
Remove the
terminal cover.
Tighten the
locking screw.
Release button
Taking pictures (continued)
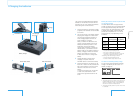
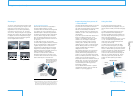
2
Turn on the camera.
3
Press the power button on the timer
remote unit so that the power lamp
lights up (green). Before using the unit
for the first time, pull out the insulation
sheet.
If you do not use the timer remote unit
for approximately 10 minutes, the unit
will turn off automatically.
If the power lamp does not light up when
you press the power button, replace the
button battery.
4
Press the timer button on the timer
remote unit. The red timer lamp flashes
for about 10 seconds then lights steadily
for 2 seconds before the picture is
taken.
To cancel the shot, press the timer
button again.
Taking & Reviewing
Pictures