Deleting unwanted images
— delete/all delete
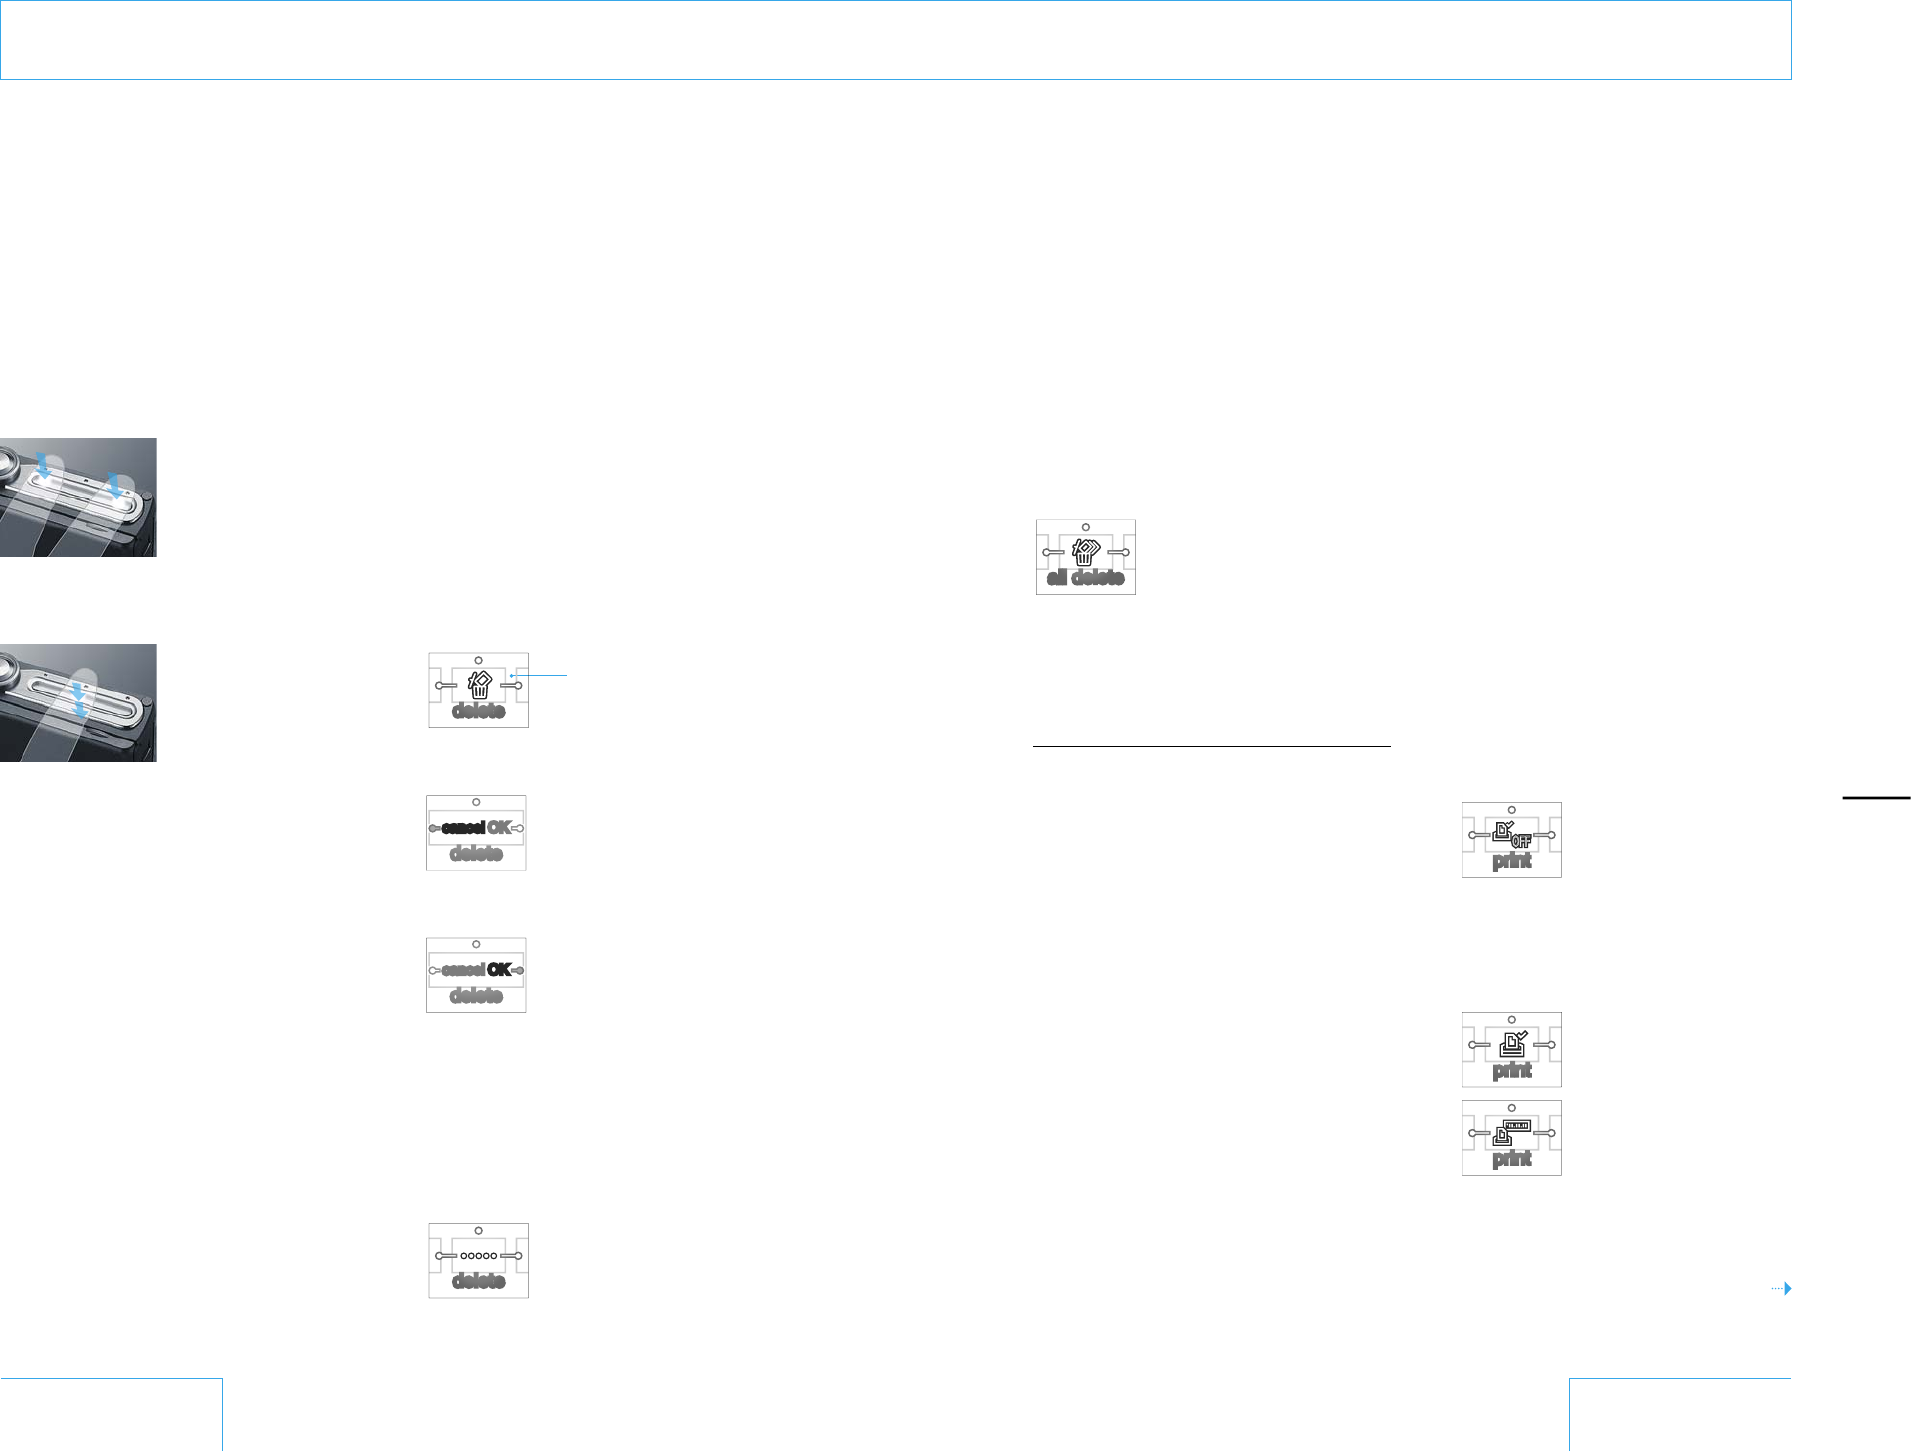
To delete one image — delete
You cannot recover an image once you
delete it. You should always check the image
before deleting it.
1
Display the image that you want to delete
on the screen. Touch both ends of the
touch pad for about 2 seconds to display
the playback menu. The “delete (one
image)” screen appears whenever you
display the playback menu.
The image that you
want to display is in the
background.
2
Touch the center of the touch pad to
display the confirmation screen.
3
Slide your finger from left to right on the
touch pad to select “OK.”
4
Touch the center of the touch pad for
about 2 seconds to delete the image. To
cancel, slide your finger from right to left
on the touch pad to select “cancel” and
then touch the center of the touch pad
for about 2 seconds.
5
The access indicator appears while the
image is being deleted.
Playback menu
Displaying the playback menu
In playback mode, touch both ends of the
touch pad for about 2 seconds.
If the camera is in camera mode, first switch
to playback mode by touching the center of
the touch pad twice.
The menu disappears when you press the
shutter button halfway down.
To delete all images
— all delete
You cannot recover images once you delete
them. You should always check the images
before deleting them.
Display the playback menu and slide your
finger from left to right on the touch pad to
display the “all delete” screen.
The rest of the procedure is the same as
steps 2-5 under “To delete one image —
delete” on page 40.
Only image files are deleted with “all delete.”
Note
• If you delete images using a computer after you
mark images for printing, the print settings may not
be applied correctly.
Marking images for printing
— print
Use this feature to mark the currently
displayed image for printing. When you
select On or On (with Date), the print
specification is recorded on the “Memory
Stick Duo.” This will save time when printing
at a store or with a DPOF (Digital Print Order
Format) printer at home.
The normal setting is off; to mark an image
for printing, follow the procedure below.
This option cannot be set if a “Memory Stick
Duo” is not inserted or there are no image
files in the “Memory Stick Duo.”
1
Display the image that you want to print
on the screen. Touch both ends of the
touch pad for about 2 seconds to display
the playback menu, then slide your finger
from left to right to display the “Off”
screen.
2
Touch the center of the touch pad to
display the “On” screen. If you want to
print the date on the photo, touch the
touch pad again to display the “On (with
date)” screen.
On
On (with date)
3
Touch both ends of the touch pad for
about 2 seconds to return to playback
mode.
Continued on the next page


