


68 Chapter 3 Shooting
Chapter 3 Shooting
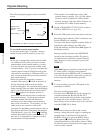
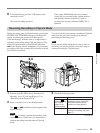
4 Press the TAKE button when you find a shot
where you would like to set a Mark IN point.
The TAKE/TALLY indicator (orange) lights in the
viewfinder and “TAKE” appears on the screen.
5 Press the TAKE button when you find a shot
where you would like to set a Mark OUT point.
The TAKE/TALLY indicator (orange) goes out in
the viewfinder and the “TAKE” disappears from
the screen.
At this time, the time code (HH:MM:SS) at the
Mark IN/OUT point for scene 001 is recorded to
the camcorder’s internal memory, and then
recorded to the cassette memory.
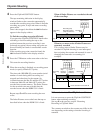
To set/clear NG
If you press the NG button before you set the next
Mark IN point, the previous scene will be
designated as “NG” (“NG” appears on the screen).
Once NG has been set, you can cancel it by
pressing the NG button again before you set the
next Mark IN point (the “NG” on the screen
disappears).
6 Repeat steps 4 and 5 as needed to record time
codes at Mark IN/OUT points, scene numbers, and
NG designations to cassette memory.
The scene number is automatically incremented
each time you specify a Mark IN point.
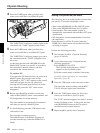
7 To finish shooting, press the VTR button on the
camcorder or lens.
This stops the recording operation.
The Index Pictures of each Mark IN point are
recorded onto the tape (when the DSBK-301 is
fitted).
Setting Cue points as you shoot
The following data is recorded onto the cassette when
you specify a Cue point to highlight a scene.
• Time codes (HH:MM:SS) for Rec IN/OUT points
• Time codes (HH:MM:SS:frame) for Cue points
• Scene number: The scene number counter is
automatically incremented with each Rec OUT point
specification.
• NG designation, cassette name/number (if set from
the camcorder)
• Index Pictures for all Rec IN points (when the
DSBK-301 is fitted): these are recorded each time
recording is stopped.
Perform the following procedure.
1 Perform steps 1 to 3 in “ClipLink Shooting”
(pages 65 and 66).
2 Access basic menu page 5 and perform the
following operations.
1) Set MARK/CUE to CUE.
The ClipLink mode indication “CLIP C”
appears on the viewfinder screen.
2) Set the cassette name or number if necessary.
For details of menu operations, see “Basic Menu
Operations” (page 78).
3 Press the VTR button on the camcorder or lens.
The camcorder starts recording, and the REC/
TALLY indicator lights in the viewfinder.
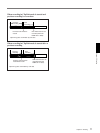
4 Press the TAKE button when you find a shot
where you would like to set a Cue point.
The “CUE” indication appears (for about 1 second)
on the viewfinder screen. At this point, the time
code (HH:MM:SS:frame) at the Cue point is
recorded into the cassette memory.
5 Repeat step 4 to specify more Cue points.
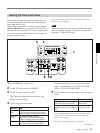
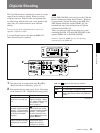
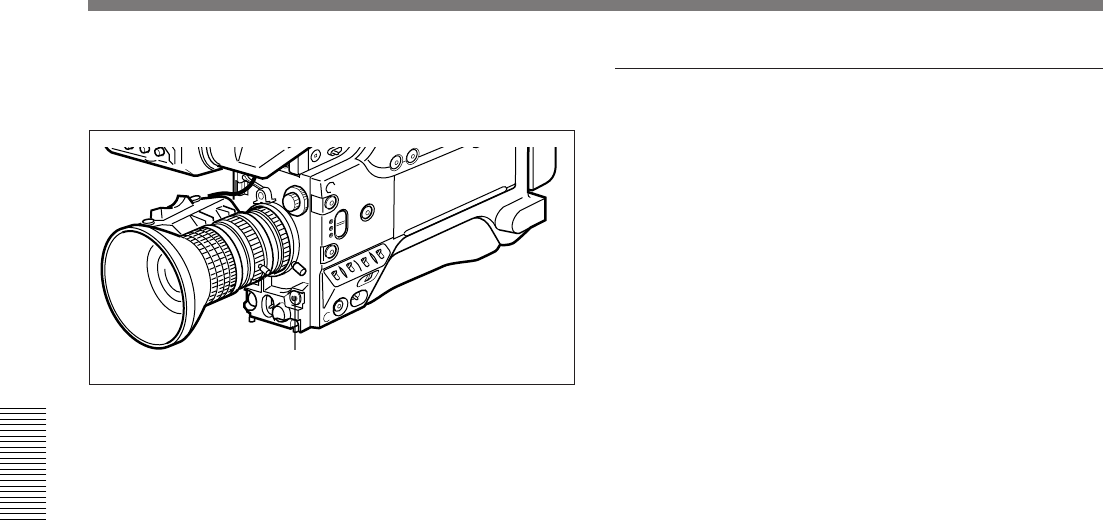
TAKE button
ClipLink Shooting