20
DCR-DVD92/DVD103/DVD203/DVD403/DVD602/DVD653/DVD703/DVD803
2-587-622-11 (1)
DCR-DVD92/DVD103/DVD203/DVD403/DVD602/DVD653/DVD703/DVD803
2-587-622-11 (1)
•
When you set the POWER switch to
(Movie) or (Still), the lens cover opens
up (Except for DCR-DVD92/DVD602).
•
After you have set the date and time
([CLOCK SET], p23), the next time you
turn on the power of your camcorder, the
current date and time will be displayed on
the LCD screen for a few seconds.
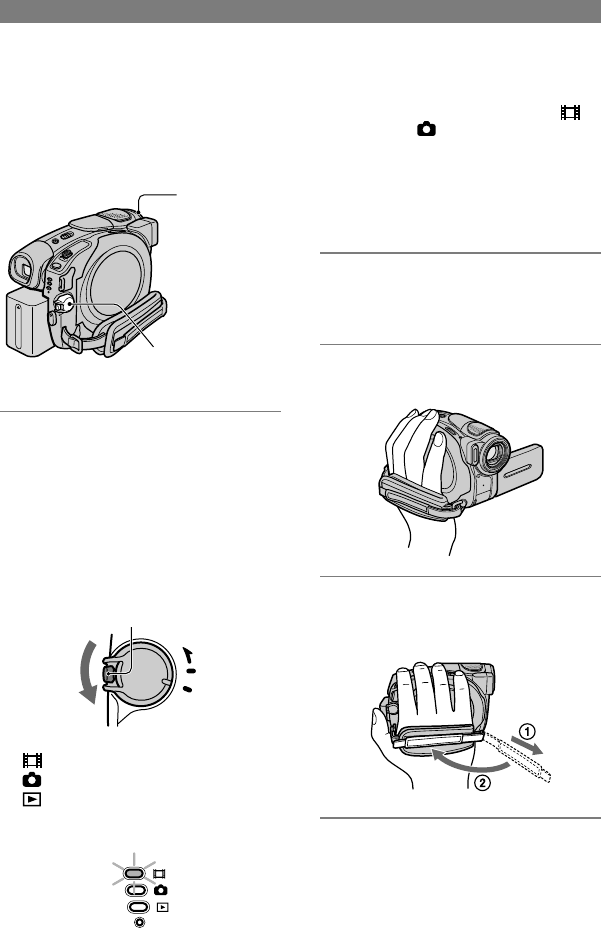
2 Remove the lens cap by pressing
both knobs on the sides of the
cap (DCR-DVD92/DVD602).
3 Hold your camcorder correctly.
4 Ensure a good grip, then fasten
the belt.
To turn off the power
Slide the POWER switch up to OFF
(CHG).
•
At the time of purchase, the power will be
set to turn off automatically if you leave your
camcorder without any operation attempted for
approximately 5 minutes, to save battery power.
([A.SHUT OFF], p.69).
Step 3: Turning the power on, and holding your
camcorder
To record or play back, slide the POWER
switch to turn on the respective lamp.
When using it for the first time, the
[CLOCK SET] screen appears (p.23).
POWER switch
Lens cover*
*Except for DCR-DVD92/DVD602
1 Turn on the power by sliding the
POWER switch in the direction
of the arrow while pressing the
green button in the center.
When you record or play back, switch
the power mode by sliding the POWER
switch in the direction of the arrow until
the respective lamp lights up.
MODE
OFF
ON
(CHG)
POWER
Green button
(Movie): To record movies
(Still): To record still images
(Play/Edit): To play back pictures on
your camcorder, or to edit them (DVD-RW:
VR mode only)
CHG


