


masterpage:Left
filename[D:\WORKS\CD200\3067951121\3067951121MVCCD200UC\02GB-
MVCCD200UC\04bas.fm]
38
model name1[MVC-CD200/CD300]
[3-067-951-12(1)]
B
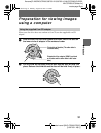
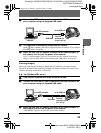
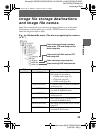
Viewing images with a computer connected with the USB cable
Once you install DirectCD included in the supplied CD-ROM, you do not need to
finalize the disc to view images on the disc.
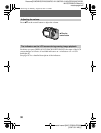
You can exchange data between the camera and a computer using the supplied USB
cable and CD-ROMs.
Installing the USB driver
Before connecting your camera to your computer, install the USB driver to the
computer. The USB driver is contained in the supplied CD-ROM (SPVD-006).
If the drive is not recognized, see “Troubleshooting” on page 93.
E.g., for Windows Me users
Do not connect the camera to the computer yet.
1
Turn on your computer and allow Windows to load.
Do not connect the USB cable in this step.
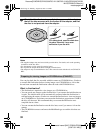
2
Insert the supplied CD-ROM (SPVD-006) in the CD-ROM drive of
your computer
If the setup screen of DirectCD appears, click [Exit] on the screen.
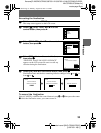
3
Open [ My Computer] on Windows and right-click the CD-ROM
drive (Example: CD-ROM (D:)), then select [Open (O)].
The file list of the CD-ROM appears. If other application software works, quit
the application software.
4
Double-click the [SONY USB] folder in the file list, and then double-
click [ SET UP].
The installer of device driver starts and the necessary files are automatically
copied to the computer.
5
Restart the computer.
If the message appears after the installation to verify that you restart the
computer, restart the computer. In other cases, restart it manually.
6
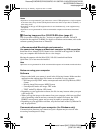
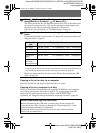
Prepare the camera before connecting the computer.
• Connect the AC power adaptor to the camera.
• Turn on the camera.
01cov.book Page 38 Monday, August 20, 2001 3:27 PM