


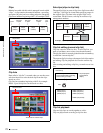


Chapter 4 Scene Selection
75
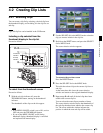
4-2 Creating Clip Lists
Load the clip list from the disc into the unit memory
(see page 78).
To return to the full-screen display
Press the THUMBNAIL button, turning off the
indicator.
3
Turn the SEL/SET dial or the MENU knob to select
the desired sub clip.
4
Hold down the SHIFT button, and press the SEL/SET
dial or MENU knob.
The sub clip operation menu appears.
To return to the thumbnail display without moving
the sub clip
Do either of the following.
• Turn the SEL/SET dial or the MENU knob to select
EXIT, and press the dial/knob.
• Press the RESET button.
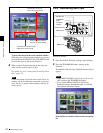
5
Turn the SEL/SET dial or the MENU knob to select
MOVE, and press the dial/ knob.
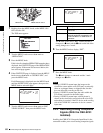
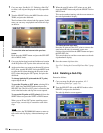
The sub clip movement screen appears. The sub clip
selected in step 3 appears surrounded by a frame.
To return to the previous screen
Press the RESET button.
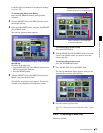
6
Turn the SEL/SET dial or the MENU knob to move the
cursor to the position where you want to move the
selected sub clip.
To return to the previous screen
Press the THUMBNAIL button.
7
Press the SEL/SET dial or the MENU knob.
The sub clip thumbnail display appears, and you can
check the new position of the sub clip.
8
Save the current clip list to disc.
See 4-2-6 “Saving the Current Clip List to Disc” (page
77).
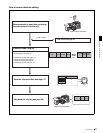
4-2-3 Trimming a Sub Clip
Proceed as follows.
Indicates that the third sub clip will be
moved to the position of the eighth sub clip.
Cursor indicating the move destination
for the selected sub clip