


Chapter 4 Scene Selection
76
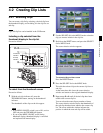
4-2 Creating Clip Lists
1
Carry out steps 1 to 4 of 4-2-2 “Deleting a Sub Clip”
to select a sub clip and display the sub clip operation
menu.
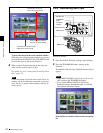
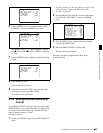
2
Turn the SEL/SET dial or the MENU knob to select
TRIM, and press the dial/knob.
The first frame of the selected sub clip appears. In this
state, you can carry out playback and search all clips
on the disc.
To cancel the trim and return to the previous
screen
Hold down the SHIFT button and press the SEL/SET
dial or MENU knob.
3
Carry out playback and search to find the new location
of the IN point or OUT point of the selected sub clip.
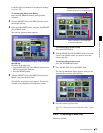
4
At the point where you want to set the new IN point or
OUT point, turn the SEL/SET dial or the MENU knob
to select the IN (when changing the IN point) or the
OUT (when changing the OUT point), and press the
dial/knob.
To change both the IN point and the OUT point,
repeat steps 3 and 4.
To reset the IN point or OUT point, selecting IN or
OUT, hold down the RESET button and press the
SEL/SET dial. The IN or OUT point is restored to the
value it had before the sub clip trim screen opened.
To cue up the IN point or OUT point, hold down the
SHIFT button and press the NEXT or PREV button.
When you set IN and OUT points stretching across
several clips, one sub clip is created for each of the
clips.
Note
You can press the THUMBNAIL button to return to
full-screen sub clip display, without trimming a sub
clip.
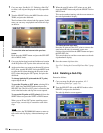
5
When the new IN and/or OUT points are set, hold
down the SHIFT button and press the SEL/SET dial or
MENU knob.
This carries out the trimming, and the screen returns to
the sub clip thumbnail display.
To cancel the trim operation
Reset the IN point and the OUT point to return to the
state before the sub clip trimming screen was
displayed, then hold down the SHIFT button and press
the SEL/SET dial.
This cancels the trim, and the screen returns to the sub
clip thumbnail display.
6
Save the current clip list to disc.
See 4-2-6 “Saving the Current Clip List to Disc” (page
77).
4-2-4 Deleting a Sub Clip
Proceed as follows.
1
Carry out steps 1 to 4 in the procedure, 4-2-2
“Reordering Sub Clips” (page 74).
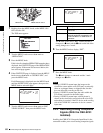
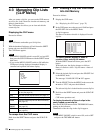
2
Turn the SEL/SET dial or the MENU knob to select
DELETE, and press the dial/knob.
The sub clip deletion screen appears.