


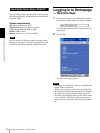

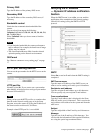
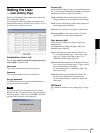


Administrating the Camera
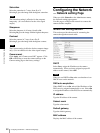
Configuring the Network — Network setting Page
22
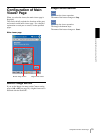
Saturation
Select the saturation in 7 steps, from –3 to 3.
Selecting 3 gives the image with the highest saturation.
Note
The Saturation setting is effective for the computer
image only. (It is not effective for the video signal
output.)
Sharpness
Select the sharpness in 16 steps, from 1 to 16.
Selecting 16 gives the image with the highest sharpness.
Contrast
Select the contrast in 7 steps, from –3 to 3.
Selecting 3 gives the image with the highest contrast.
Note
The Contrast setting is effective for the computer image
only. (It is not effective for the video signal output.)
Camera reset
Click Apply, and “Camera reset OK?” appears. Click
OK on the dialog to reset the camera settings on the
Camera setting page to the factory settings.
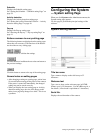
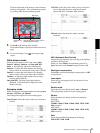
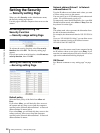
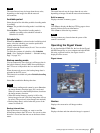
Configuring the Network
— Network setting Page
When you click Network on the Administrator menu,
the Network setting page appears.
Use this page to configure the network to connect the
camera and the computer.
Wired LAN setting Section
This section provides the menus for connecting the
camera through the network cable.
DHCP
Select On to assign the IP address to the camera
automatically. When you have assigned a proper IP
address to the camera, select Off.
Note
When you set DHCP to On, make sure that there is an
DHCP server on the network.
DNS auto acquisition
When DHCP is set to On, select if the IP address of the
DNS server is assigned automatically or not. Select On
to assign the IP address of the DNS server automatically.
IP address
Type the IP address of the camera.
Subnet mask
Type the subnet mask.
Default gateway
Type the default gateway.
MAC address
Displays the MAC address of the camera.