Administrating the Camera
Recording Images in Memory — Image memory setting Page
36
Capacity warning
Select On to send a warning mail to the Administrator
when the built-in memory space is low or the memory is
full due to activation of the image memory function.
Select Off if you do not want to send a warning mail.
If On is selected, the SMTP server name and
Administrator e-mail address menus appear.
SMTP server name
Type the name or IP address of the SMTP server you
want to use for sending the E-mail, up to 64 characters.
Administrator e-mail address
Type the E-mail address of the recipient of the warning
mail (E-mail address of the Administrator), up to 64
characters.
Mode
Select the mode of the Image memory function.
Manual: Records a still image in the memory manually.
In this mode, when you click the (Trigger)
button on the main viewer page, a still image is
captured and recorded in the memory. (See
“Controlling the Application Manually” on page 12.)
Alarm: Records a still image in the memory by
synchronizing with an external sensor input or the
built-in activity detection function. When you select
Alarm, the Alarm mode setting section appears (see
page 36).
Note
If the Suffix menu is set to None, you cannot select
the Alarm mode. When you want to use the Alarm
mode, set the Suffix menu to Date/Time or
Sequence number.
Periodical recording:Records still images in the
memory periodically. When you select Periodical
recording, the Periodical recording mode setting
section appears (see page 37).
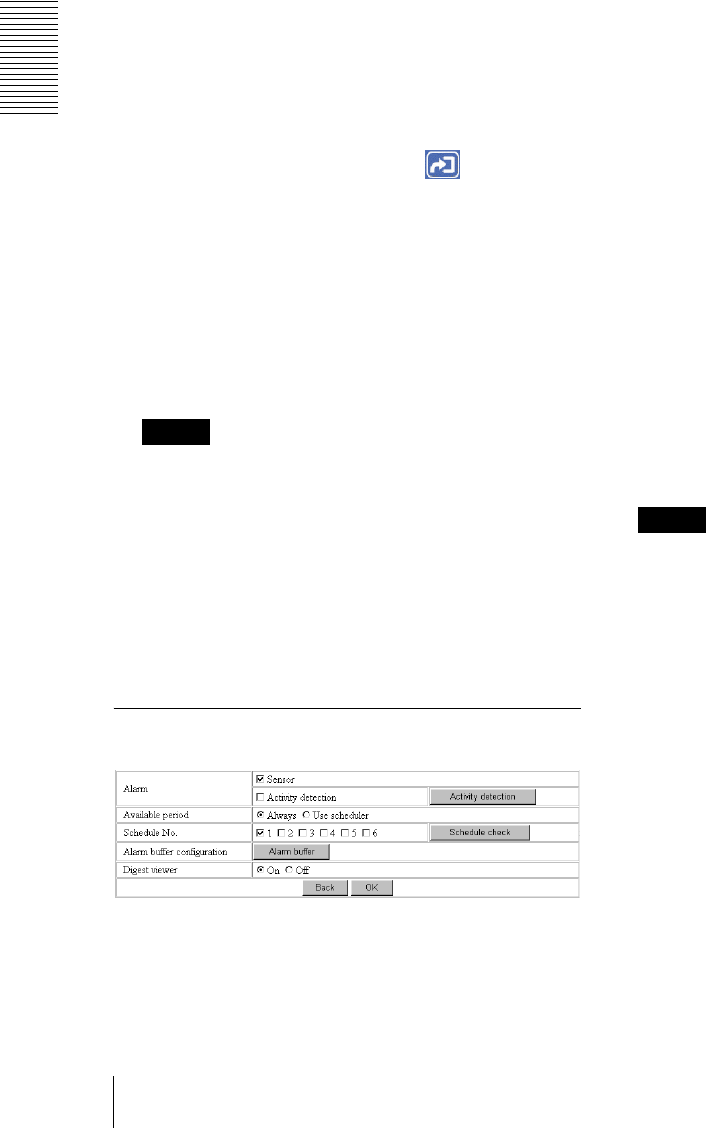
Alarm mode setting Section
Alarm
Select the alarm to link the Image memory function. If
the selected alarm is detected, a still image is captured
and recorded in the selected memory.
Sensor: External sensor connected to sensor input of the
camera I/O port
Activity detection: The activity detection function built
in the camera.
To set the activity detection function, click Activity
detection. The Activity detection setting page
appears (see page 40).
Available period
Select the period for which the alarm mode is available.
Always: The alarm mode is available any time.
Use scheduler: The alarm mode is available according
to the schedule selected in the Schedule No. menu
below.
Schedule No.
When Use scheduler is selected on the Available period
menu, select the schedule you want the alarm mode
being available.
Click to select the check box(es) 1 to 6. You can select
multiple schedules.
To check the contents of schedules, click Schedule
check. (See “Setting the Schedule — Schedule setting
Page” on page 39.)
Alarm buffer configuration
Click Alarm buffer to display the Alarm buffer setting
page.
For details, see “Setting the Alarm Buffer — Alarm
buffer setting Page” on page 38.
Note
If an alarm occurs during the Alarm buffer processing,
that alarm is ignored.
Digest viewer
If you select On, an HTML file (.html) and a Java Script
file (.js) are added each time the selected alarm is
detected.
When you open the added HTML file using a general
browser, the digest viewer runs and you can view the
still pictures in the alarm buffer in sequence (quasi-
animation).
See “Operating the Digest Viewer” on page 29.


