190
(11) Follow the on-screen messages so that the Add Hardware Wizard recognizes
that the USB drivers have been installed. The Add Hardware Wizard starts
three times because three different USB drivers are installed. Be sure to allow
the installation to complete without interrupting it.
For Windows 2000 Professional, Windows XP Home Edition/Professional users
(12) After the “File Needed” screen appears.
Open “Browse...” t “My Computer” t “ImageMixer” t “Sonyhcb.sys”,
and click “OK.”
Viewing images recorded on a “Memory Stick”
Set USBCONNECT in to NORMAL in the menu settings. (The default setting is set
to NORMAL.)
(1) Insert a “Memory Stick” into your camcorder.
(2) Connect the AC power adaptor and set the POWER switch to MEMORY/
NETWORK (DCR-TRV950 only).
(3) Connect the
(USB) jack on your camcorder to the USB connector on your
computer using the supplied USB cable.
USB MODE appears on the LCD screen of your camcorder. Your computer
recognizes the camcorder, and the Add Hardware Wizard starts.
(4) Follow the on-screen messages to make the Add Hardware Wizard recognize
that the USB drivers have been installed. The Add Hardware Wizard starts
two times because two different USB drivers are installed. Be sure to allow
each installation to complete without interrupting it.
You cannot install the USB driver if a “Memory Stick” is not in your camcorder.
Be sure to insert a “Memory Stick” into your camcorder before installing the USB
driver.
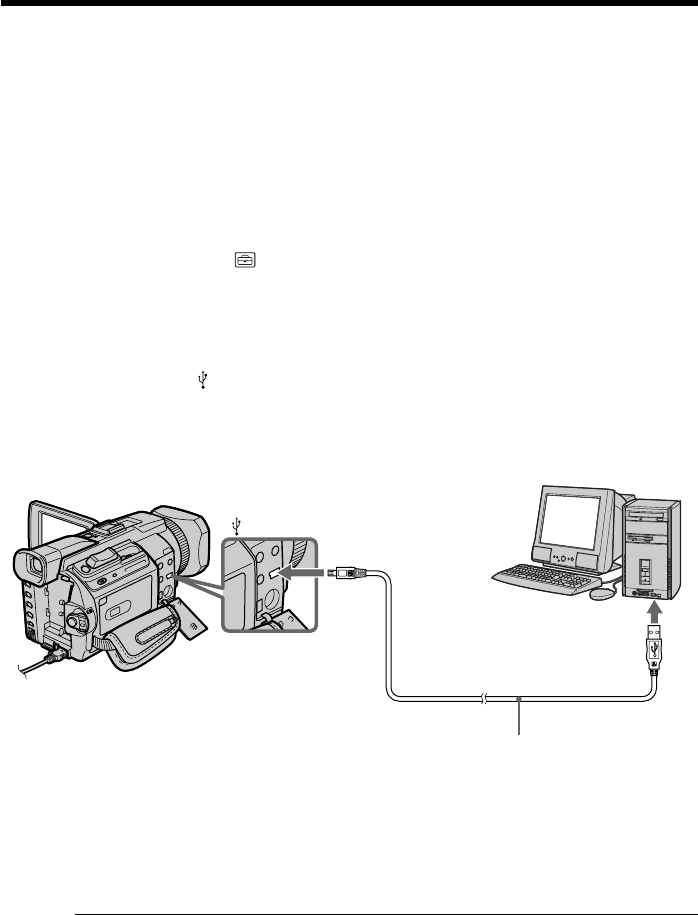
Connecting your camcorder to your computer using the USB cable
– For Windows users
USB connector
(USB) jack
USB cable (supplied)
Push into the end


