– 18 –
Getting started
11
NP-F330 (supplied)/F550 (not supplied) battery pack
When you record images in an extremely cold location or using the LCD screen, the
operating time becomes short.When using thecamera inan extremely cold location,
place the battery pack in your pocket or other place to keep it warm, then insert the
battery pack into the camera just before recording. Whenusing a pocket heater, take
care not to letthe heater directly contact the battery.
Auto power-off function
If you donot operatethe camera forabout three minutes during recording, the camera
turns off automatically to prevent wearing down the battery pack. To use the camera
again, slide the POWER switch to the right to turn on the cameraagain.
Note on the POWER ON/OFF (CHG) lamp during charging
The POWER ON/OFF (CHG) lamp may flash:
• When a malfunction occurs in the battery pack.
The POWER ON/OFF (CHG) lamp does not lightup:
• When thebattery pack is notinstalled properly.
Approximatetime to charge a completely discharged battery pack at atemperature of
25°C(77°F).
STILL mode recording/playback when using floppy disks
Charging time
Battery pack Full charge (min.)
NP-F330 (supplied) Approx. 150
NP-F550 Approx. 210
Battery life and number of images that can be recorded/played back
NP-F330 (supplied) NP-F550
Battery life
(min.)
Number of
images
Battery life
(min.)
Number of
images
Continuous
recording*
Approx. 70 Approx. 750 Approx. 150 Approx. 1600
Continuous
playback**
Approx. 80 Approx. 2200 Approx. 170 Approx. 4800
12
STILL mode recording/playback when using “Memory Stick”s
Approximate battery life and number of images that can be recorded/played back at a
temperature of 25°C(77°F) with a fully charged battery pack, 640×480 image size
and inNORMAL recording mode.
∗ Recording at about 5-second intervals when using a floppy disk, or at about 3-second intervals
when using a “Memory Stick”
∗∗Playing back single images continuously at about 2-second intervals
MOVIE mode recording when using floppy disks
MOVIE mode recording when using “Memory Stick”s
Approximate timethatcan be recorded ata temperatureof25°C(77°F) and 160×112
image size with a fully charged battery pack.
Notes
•The battery lifeand number ofimages will bedecreased when using at low temperature,using
the flash, turning the power on/off frequently, or using the zoom.
•The capacity of thefloppy disk or “Memory Stick” is limited. The above figures are as a guide
when you continuously record/play back by replacing the floppy disk or “Memory Stick.”
•If sufficient battery remaining time is indicated but the power runs out soon, fully charge the
battery so that the correct battery remaining time appears.
•Do not short the DC plug of the AC power adaptor with a metallic object, as this may cause a
malfunction.
NP-F330 (supplied) NP-F550
Battery life
(min.)
Number of
images
Battery life
(min.)
Number of
images
Continuous
recording*
Approx. 80 Approx. 1600 Approx. 170 Approx. 3400
Continuous
playback**
Approx. 100 Approx. 3000 Approx. 230 Approx. 6900
NP-F330 (supplied) NP-F550
Battery life (min.) Battery life (min.)
Continuous recording Approx.85 Approx.180
NP-F330 (supplied) NP-F550
Battery life (min.) Battery life (min.)
Continuous recording Approx.90 Approx.190
Getting started
13
Using the AC power adaptor
Using a car battery
Use Sony DC adaptor/charger.
Using your camera abroad
For details, see page 74.
When using the AC power adaptor
Be sure to use it near a wall outlet. If a malfunction occurs, disconnect the plug from
the wall outlet.
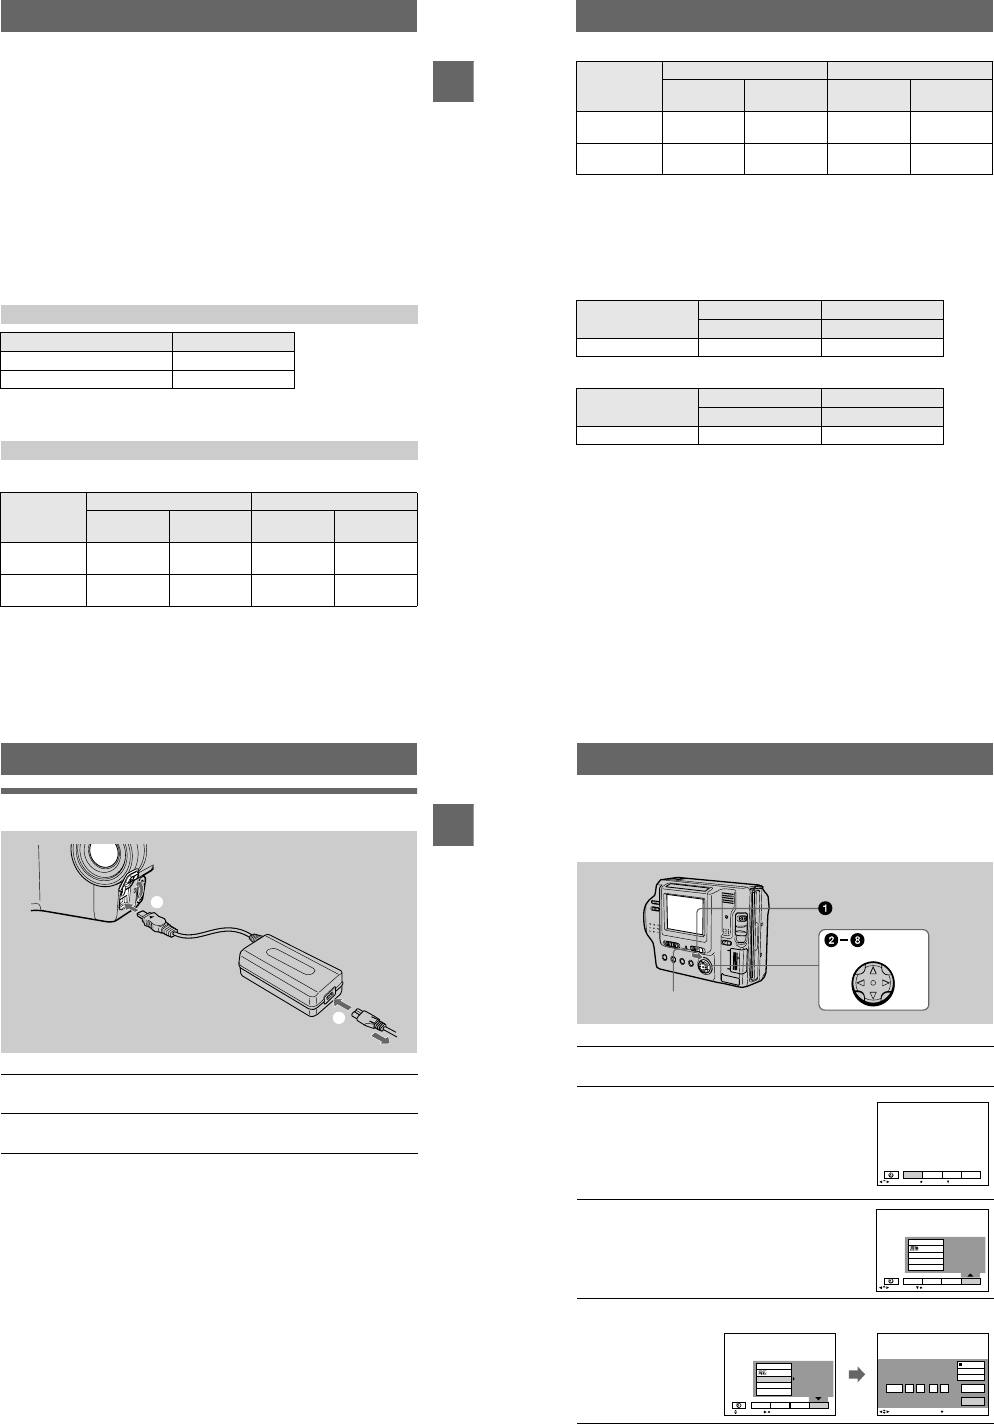
1
Open the DC IN cover and connect the AC power adaptor tothe DC
IN jack of your camera with the
v
mark facing up.
2
Connect the power cord (mains lead) to the AC power adaptor and
then to a wall outlet (mains).
1
2
AC-L10A/L10B/L10C
AC power adaptor
to DC IN jack
Power cord
(mains lead)
to a wall outlet (mains)
14
Setting the date and time
When youfirst use your camera,set the date and time.If these are not set, the
CLOCK SET screen appears whenever you turn on your camera.
1
Slide the POWER switch to the right to turn on the power.
The POWER ON/OFF (CHG) (green) lamplights up.
2
Press
v
on the control button.
The menu bar appears on the LCD screen.
3
Select [SETUP]with
B
on thecontrol button,
then press the center
z
.
4
Select [CLOCK SET] with
v
/
V
on the control button, then press the
center
z
.
Control button
POWER ON/OFF
(CHG) lamp
EFFECT FILE SETUP
CAMERA
SELECT OK
MENU BAR OFF
LCD BRIGHT
BEEP
CLOCK SET
/LANGUAGE
SELECT CLOSE
EFFECT FILE SETUP
CAMERA
VIDEO OUT
LCD BRIGHT
BEEP
VIDEO OUT
CLOCK SET
/LANGUAGE
SELECT OK
12:00:00A
M
2
0
0111
EFFECT FILE SETUP
CAMERA
2001 :/ / 1 1 12 00 AM
D/M/Y
ENTER
CANCEL
M/D/Y
Y/M/D
CLOCK SET
SELECT
OK
