– 19 –
Getting started
15
To cancel the date and time setting
Select [CANCEL] with
v
/
V
/
b
/
B
on the control button, then press the center
z
.
5
Select the desired date display format with
v
/
V
on the control button, then press the
center
z
.
Select from[Y/M/D] (year/month/day), [M/D/Y]
(month/day/year), or [D/M/Y] (day/month/year).
6
Select the year, month, day, hour or minute
itemyouwanttosetwith
b
/
B
on the control
button.
The item to be setis indicated with
v
/
V
.
7
Set the numeric value with
v
/
V
on the
control button, then press the center
z
to
enter it.
After entering thenumber,
v
/
V
moves to the next
item. If you selected [D/M/Y] in step
5
,setthe
time ona 24-hour cycle.
8
Select [ENTER]with
B
on thecontrol button,
then press the center
z
at the desired
moment to begin clock movement.
The date and time are entered.
2001 : 1 1 12 00 AM//
D/M/Y
ENTER
CANCEL
M/D/Y
Y/M/D
CLOCK SET
SELECT/ADJUST
OK
2001 :/ / 1 1 12 00 AM
D/M/Y
ENTER
CANCEL
M/D/Y
Y/M/D
CLOCK SET
SELECT/ADJUST
OK
2001/ :/ 1 7 12 00 AM
D/M/Y
ENTER
CANCEL
M/D/Y
Y/M/D
CLOCK SET
SELECT/ADJUST
OK
2001/ :/ 4 7 10 30 PM
D/M/Y
ENTER
CANCEL
M/D/Y
Y/M/D
CLOCK SET
SELECT
OK
16
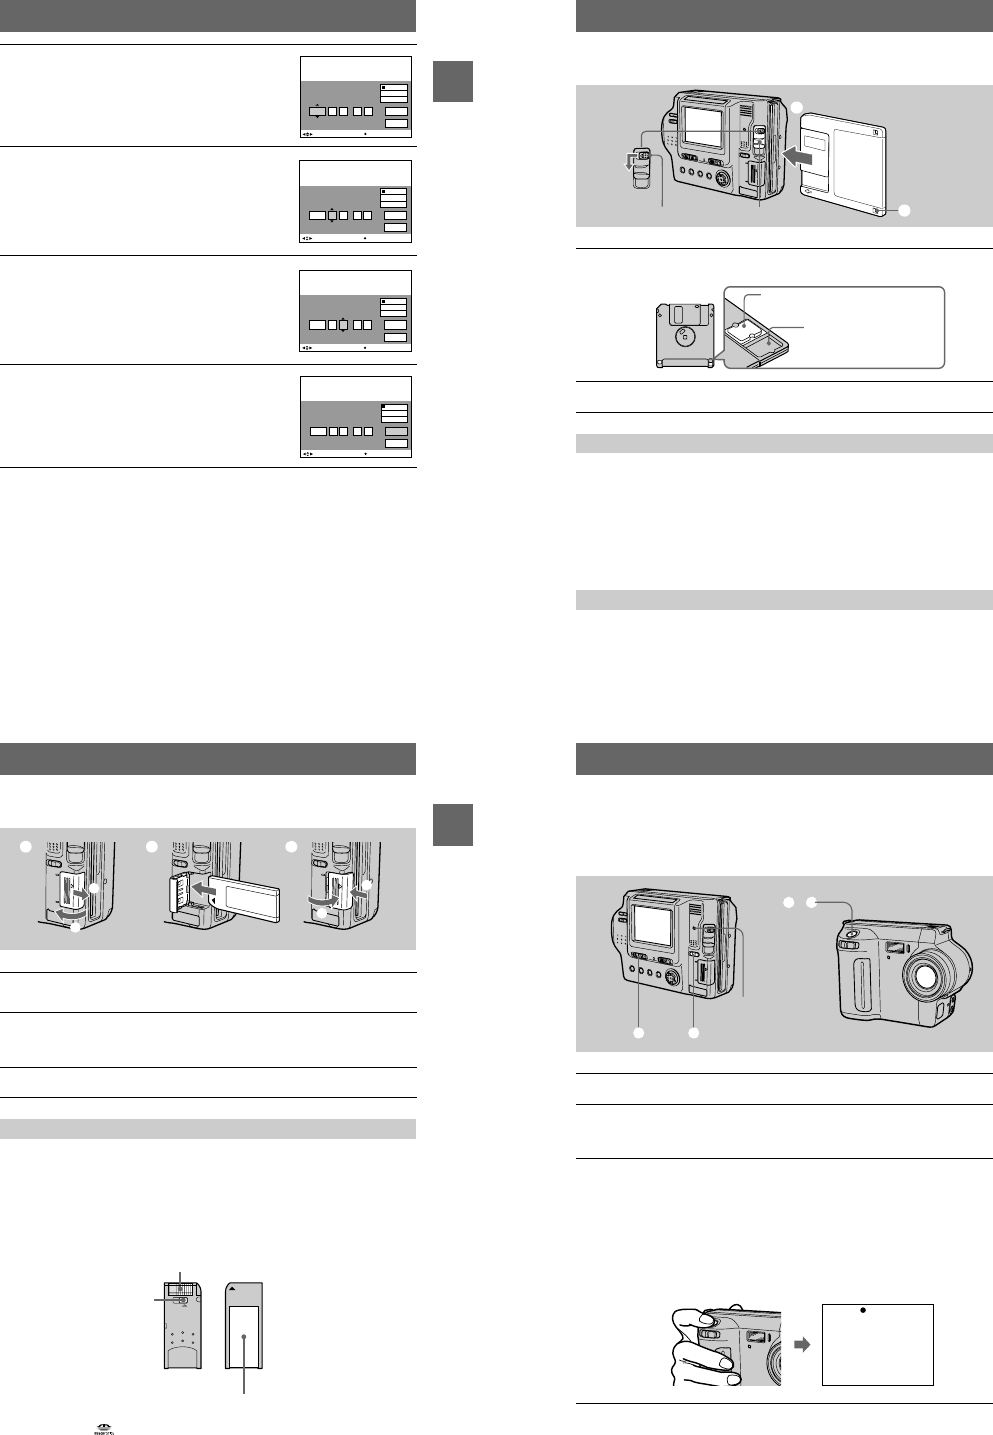
Inserting a floppy disk
• Size: 3.5 inch
• Type: 2HD (1.44 MB)
• Format: MS-DOS format (512 bytes × 18 sectors)
Notes
•Do not insert the media other than the floppy disks described above.
•You cannot use the optional MSAC-FD2M/FD2MA Floppy Disk Adaptor for Memory Stick.
•Never remove thefloppy disk, turn off the power, or change the position of the MS/FD selector
while theaccess lamp islit up.
While sliding the EJECT lockto the left, slide down the DISK EJECT lever.
1
Check that thewrite protect tab isset to the recordable position for
recording.
2
Insert the floppy disk until it clicks.
Usable floppy disks
Removing the floppy disk
1
2
DISK EJECT lever
EJECT lock
Unrecordable/unerasable
Recordable/erasable
Getting started
17
Inserting a “Memory Stick”
Open the “Memory Stick” cover, then push the “Memory Stick” once lightly.
Notes
•If you do not insert the “Memory Stick” firmly until it clicks, a message such as “MEMORY
STICK ERROR” will be displayed.
•Never remove the “Memory Stick,” turn off the power, or change the position of the MS/FD
selectorwhile the access lamp is lit up.
•You cannot record or edit imageson a “Memory Stick” if the write-protect switch is set to the
LOCK position.
The position or shape of the write-protect switch depends on the type of the “Memory Stick.”
“Memory Stick” and are trademarks ofSony Corporation.
1
Open the “Memory Stick” cover.
Slide the cover in the direction of the arrow.
2
Insert the “Memory Stick.”
Insert the “Memory Stick” with the
B
mark facingtoward the “Memory Stick”
slot as illustrated until it clicks.
3
Close the “Memory Stick” cover.
Removing the “Memory Stick”
1 2 3
1
2
2
1
LOCK
Termin al
Write-protect
switch
Label space
18
Basic operations
B Recording
Recording still images
Still images are recorded in JPEG format.
To record still images,slide the POWER switch to the right to turn on the power and
insert a floppy disk or a “Memory Stick.”
1
Set the PLAY/STILL/MOVIE selector to STILL.
2
Select the recording media using the MS/FD selector.
MS: Whenrecording on the “Memory Stick.”
FD: When recording on the floppy disk.
3
Press and hold the shutter button halfway down.
The beeps sound and the image is frozen. However, the image has notbeen
recorded yet. While the AE lock indicator
z
is flashing, the camera
automatically adjusts the exposure andfocus of the captured image. When the
camera finishes the automatic adjustments, theAElockindicator
z
zz
z
stops
flashing, then lights up, and the camera is ready for recording.
If you release the shutter button, the recording will be canceled.
1 2
3, 4
Access lamp
AE lock indicator (green)
flashes t lights up


