– 30 –
B
BB
B Various playback
59
B
Various playback
Playing back six
images at once
(INDEX)
To display the next
(previous) index screen
Select
v
/
V
at the lower-left on the
LCD screen.
To return to normal playback
(single image)
• Select the desired image with the
control button.
• Select (Return).
Note
When viewing an image recorded in Clip
Motion or TEXT mode on the INDEX
screen, the image may appear different from
the actual image.
1
Set the PLAY/STILL/MOVIE
selector to PLAY.
2
Select [INDEX] on the LCD
screen.
Six images are displayed at once
(index screen).
Onlythe firstframe of ClipMotion
filesisdisplayed.
The following marks are displayed
on each image according tothe
image type and settings.
:Movingimagefile
:VOICEmodefile
:E-mailfile
:Printmark
-
:Protectmark
TEXT: TEXT file
TIFF:TIFF file
CLIP: Clip Motion file
(No mark): Normal recording (no
settings)
1
2
2001 7 4 12:30PMMVC-001F
SELECT SINGLE DISPLAY
DELETE
FILE SETUPTOOL
This shows the position of the
currently displayed images relative
to all the recorded images.
Displays the previous index
screen.
Displays the next index screen
60
Enlarging a part of the
still image (Zoom and
trimming)
To return to the normal size
Zoomout with the zoom lever until the
zoom scaling indicator ( ×1.1)
disappears from the screen, orsimply
press the center
z
.
To record an enlarged image
(trimming)
1
Enlarge the image.
2
Press the shutter button. The image
is recorded at 640×480 size and the
imageon theLCD screen returnsto the
normal size after recording.
Notes
•Youcannot trim moving images, still
images recorded in ClipMotion, TEXT
mode, or uncompressed images.
•Zoomscalingisupto5× regardless ofthe
original image size.
•The quality of enlarged images may be
deteriorated.
•The originaldata is left even ifyou enlarge
the image.
•The enlarged image is recorded asthe
newest file.
1
Set the PLAY/STILL/MOVIE
selector to PLAY.
2
Displaytheimagetobe
enlarged.
3
Zoom in/out the image with
the zoom lever.
The zoom scaling indicator
appears on the LCD screen.
4
Press the control button
repeatedly to select the
desired portion of the image.
v
: The image moves downward
V
: The image moves upward
b
: The image moves rightward
B
: The image moves leftward
1
4
3
B
BB
B Various playback
61
Playing back the still
images in order
(SLIDE SHOW)
This function is usefulfor checking the
recorded images or for presentations,
etc.
To cancel the slide show
Select [CANCEL] in step 2 or 3.
To skip to the next/previous
image during the slide show
Select
\b
/
B\
at the lower-left on the
LCD screen.
Note
The interval setting time may vary
dependingon theimagesize.
1
Set the PLAY/STILL/MOVIE
selector to PLAY.
2
Select [FILE] andthen [SLIDE
SHOW] from the menu.
Set the following items.
INTERVAL
You can select from 1 min (one
minute),30sec(30seconds),
10 sec (10 seconds), 5 sec
(5 seconds), or 3 sec (3 seconds).
REPEAT
ON: Plays back images in a
continuous loop (When using the
floppy disk, the slide show stops
approximately 20 minutes*) until
[RETURN] is selected.
OFF: After all images have been
played back, the slide show ends.
∗ The slide show does not end until all
the images are played back, even if it
takes more than 20 minutes.
3
Select [START].
The slide show begins.
1
2, 3
62
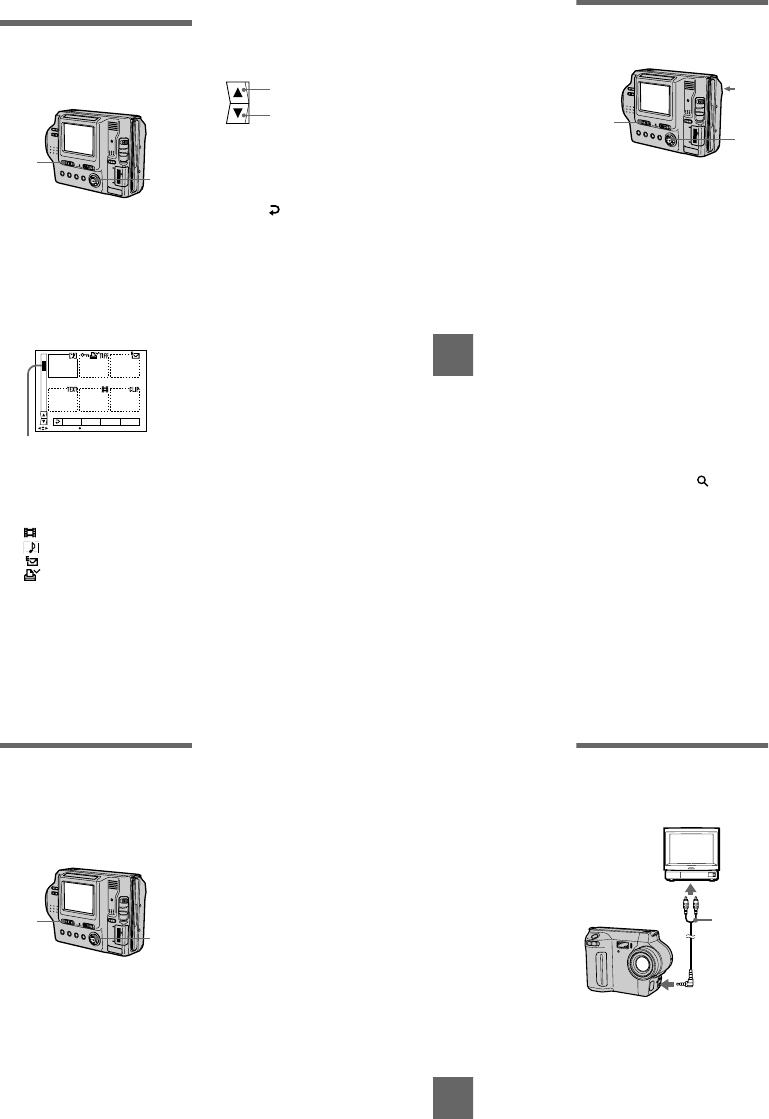
Viewing images on a
TV screen
Before connecting your camera, be
sure to turn off the TV.
Note
You cannot use a TV thathas an antenna
(aerial)connector only.
1
Connect the A/V connecting
cable tothe A/V OUT (MONO)
jack of your camera and to
the audio/video input jacks of
the TV.
If your TV has stereo type input
jacks, connect theaudio plug ofthe
A/V connectingcable to the Lch
jack.
2
Turn on the TV and start
playback on your camera.
Theplaybackimageappearsonthe
TV screen.
Set the TV/VIDEO
switch to
“VIDEO”.
A/V
connecting
cable
to A/V OUT (MONO)
jack


