Setup
Confirmation After Setup
38
3
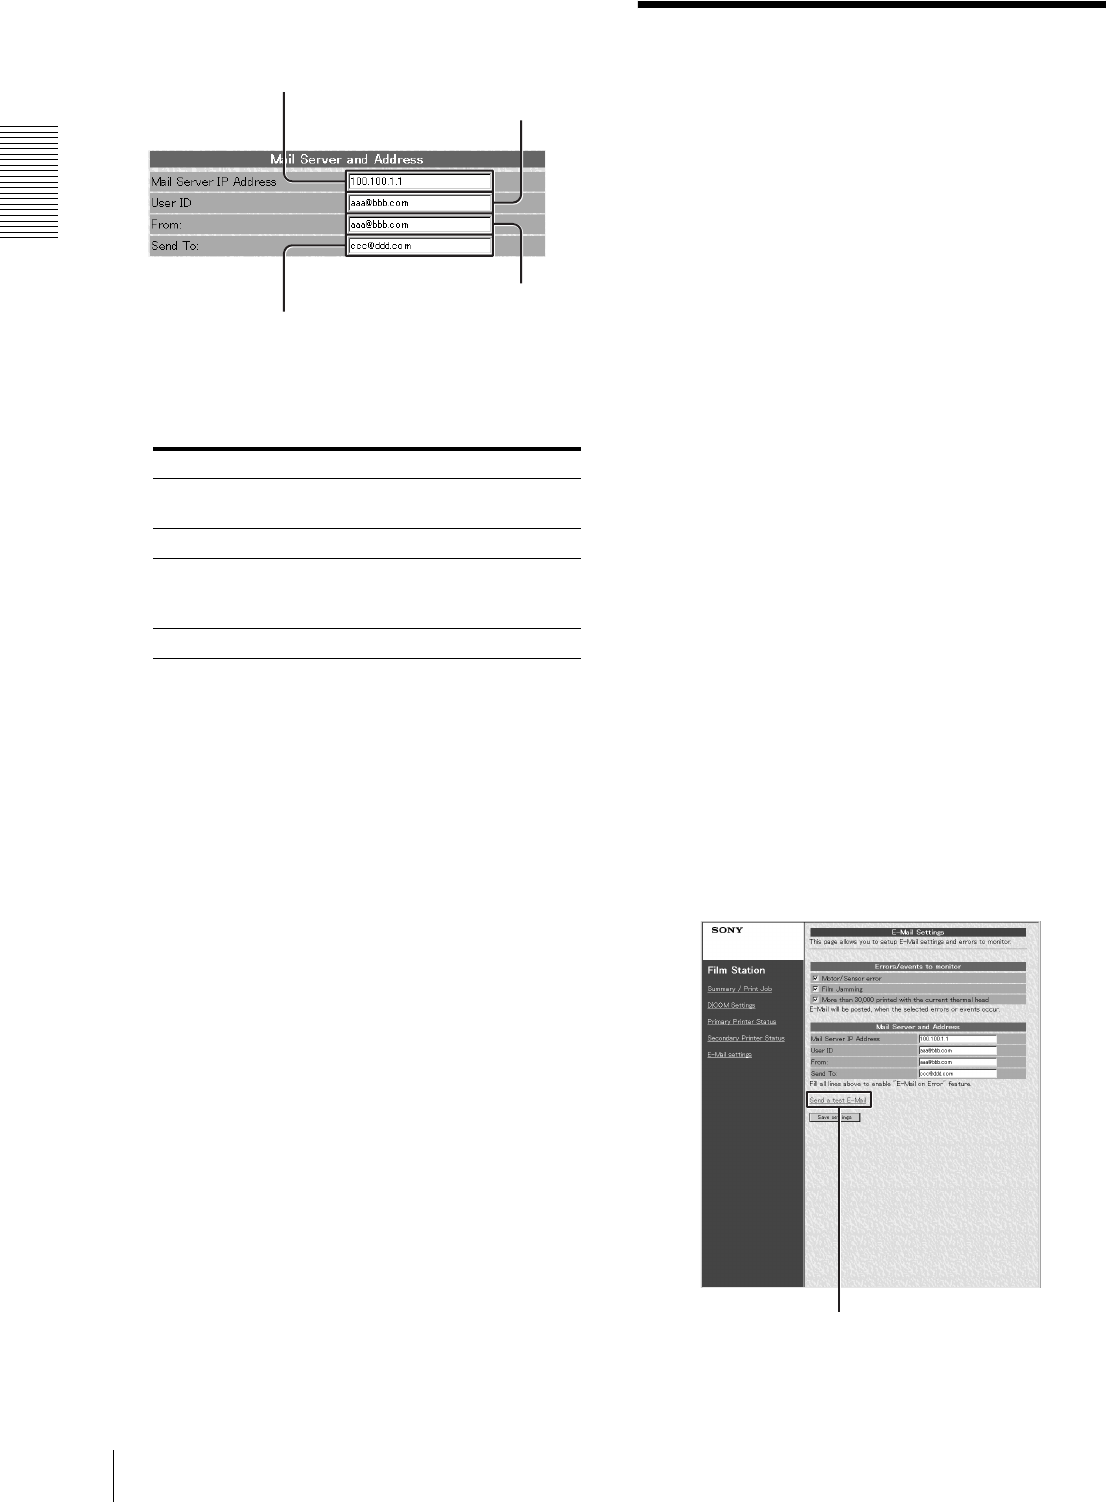
Perform the settings related to e-mail.
Enter addresses in the corresponding text boxes.
a) Use only numerical characters for the IP
address.
4
Click the [Save settings] button.
The settings are saved.
Confirmation After
Setup
After all of settings have been completed
Turn off the power of the UP-DF500 and disconnect the
UP-DF500 and the personal computer for setup.
Proceed as follows to confirm the operation of the UP-
DF500.
1
Connect the UP-DF500 to the network.
2
Turn on the power of the UP-DF500.
3
Insert a film tray in which film sheets have been
loaded.
4
Send the image data from a modality.
The unit starts printing.
When the image data is not sent
Check whether or not the IP address of the modality side
is correct.
When setting up an E-mail
Confirm the settings for an E-mail as follows.
1
Click E-mail settings in the page selection area to
open the E-mail settings page.
When this page is opened after E-mail settings have
been completed, the Send a test E-Mail button
appears.
2
Click the [Send a test E-Mail] button.
A test e-mail message is sent if settings have been
correctly performed.
Enter item Content
Mail Server IP
Address
IP address of the mail server
a)
User ID User ID
From Return address of the E-mail
notification when an error occurs and
an e-mail message is sent.
Send to Destination address of the E-mail.
Mail Server IP Address text box
User ID text box
Send to text box
From text box
Send a test E-Mail button


