


29944AG 69
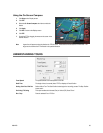
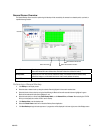
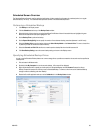
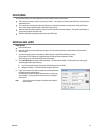
Scheduled Screen Overview
The Scheduled Backup Screen is used for performing bulk backup of video recorded by all cameras for a selected period, on a regular
scheduled basis (1-24 hours). The Scheduled Backup Screen is similar to the General Backup Screen.
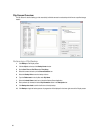
Performing a Scheduled Backup
1. Click Backup on the Display screen.
2. Click the Schedule tab at the top of the Backup Center window.
3. Select the blocks of time to back up using the Hour/Minute Grid. Blocks of time with recorded video are highlighted in green.
Blocks of time selected for backup are highlighted in red.
4. Set the Backup Time to perform the backup.
5. Set the Repeat Backup(Daily) time to specify the number of hours between backup procedures (between 1 and 24 hours).
6. Select the Backup Drive to save the backup video under Select Backup Media or click Network Drive. To save to a local drive
or partition you must first rename the location “Backup”.
7. Select the Overwrite on Disk Full check box to overwrite previous backup files when the disk becomes full.
8. Click Save Backup Setting to save the current backup setting and return to the Display screen.
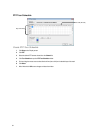
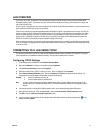
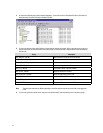
Specifying Scheduled Backup Drives
In order to use the Scheduled Backup feature one or more storage drives or partitions connected to the recorder must be specified as
a backup drive.
1. Exit and restart in Windows mode.
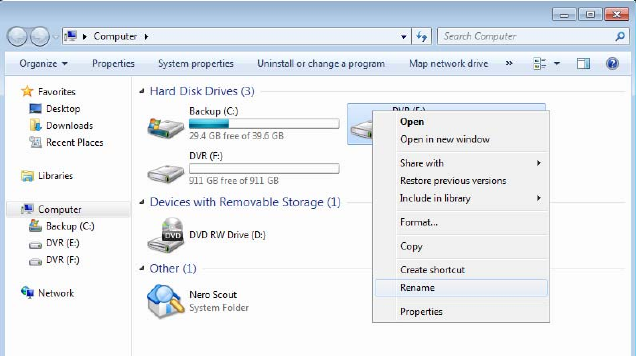
2. Double click the My Computer icon on the recorder desktop. A file menu will be displayed.
3. Right-click the desired drive to specify as a backup drive for Scheduled Backup and click Rename. Rename the drive to
‘Backup’. Repeat this process for all drives to use for Scheduled Backup. To remove a drive from use for Scheduled Backup,
change its name to something other than ‘Backup’.
4. Restart the Surveillix application and return to the Schedule tab in the Backup Center window.