


26
DOWNLOADING THE PHOTOS/VIDEOS
To download your photos/videos to a PC or Mac*, first make sure the Trophy
Cam power switch is in the OFF position. Connect the supplied cable to the
camera’s USB port, then directly to a main USB port on your computer-do
not use front panel/keyboard USB ports or unpowered “hubs”.
The Trophy Cam will be recognized as a standard “USB Mass Storage”
device (this may take several seconds the first time you connect it). If you
would rather leave your camera in the woods and just pull its SD card out, an
SD card reader works the same way as described in this section once the
card is inserted and the reader is connected to your computer.
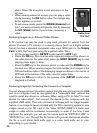
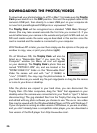
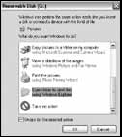
With Windows XP or later, you can then simply use the options in the pop-up
window to copy, view, or print your photos (right).
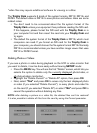
On all Windows OS, the Trophy Cam will also be
listed as a “Removable Disk” if you open the “My
Computer” window (on Macs, an icon will appear
on your desktop). The Trophy Cam’s photo files are
named “PICT0001.JPG” etc, and are located in the
“DCIM\100EK113” folder on this “Removable Disk”.
Video file names will end with “.avi” (119466) or
".mov" (119467). You may copy the photos/videos to
your hard drive as you would any file-just copy/paste or drag the file names
or icons to your drive or desktop.
After the photos are copied to your hard drive, you can disconnect the
Trophy Cam. (On Mac computers, drag the “disk” that appeared on your
desktop when the camera was connected into your Trash to “eject” it before
disconnecting.) The .jpg standard files from the Trophy Cam may be viewed
and edited with any photo software you choose to use. The .avi or .mov video
files may be viewed with the Windows Media Player on PCs with Windows 7.
If your computer is running an older version of Windows, or you are on a Mac,
and you don’t already have a compatible video player, you can download a
free version of the DivX player from http://www.divx.com/.