33
Taking Pictures
Two-Stage Shutter Button
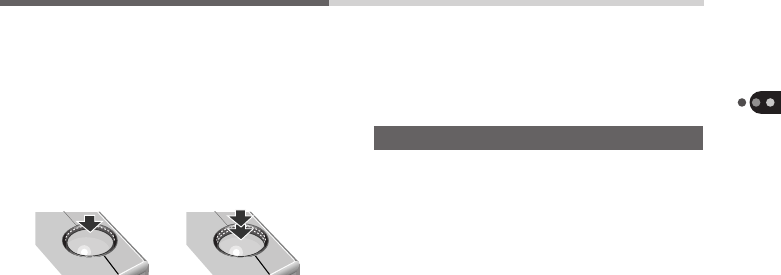
The camera features a two-stage shutter
button. Press the button lightly (depress to the
halfway point) to activate the first stage, the
focus and auto exposure lock. Pressing more
firmly to the second stage will activate the
shutter, recording an image.
Previewing an Image Before Shooting
Press the LCD/VIDEO button to turn on the
LCD panel. Press it again to turn off the LCD
panel (p. 54).
Indicator Behavior After a Shot
The indicator beside the optical viewfinder
flashes green after a shot is taken, indicating
that the image is being recorded on the CF
card. Do not open the battery cover or CF
card slot cover while this indicator is flashing.
Press Halfway Press Fully
However, the next shot can usually be taken
while the green light is flashing (p.47).
Other Shooting Features
Using the LCD Panel to Compose a Shot .. p. 54
Reviewing an Image on the LCD Panel .......
p. 86
Focusing on an Object at the Edge of a
Composition ........................................ p. 48
Shooting Close-Ups (Macro Mode) ......... p. 52
Shooting Telephoto Shots ....................... p. 49
Shooting at the Slow Shutter Speed ....... p. 74
Shooting Continuous Frames.................. p. 49
Shooting with the Self-Timer .................. p. 49
Shooting with the Flash On or Off .......... p. 51
Shooting in Backlit or Bright Conditions
(Exposure Compensation) .................... p. 72
Shooting in Natural or Artificial Lighting
(White Balance) .................................... p. 73
Changing the Image Quality and Size ..... p. 70
Shooting Images for Merging into Panoramas
(Stitch Assist Mode) ............................. p. 61


