


•
ISO bracketing value [0 – 100]
Set this value to bracket via ISO. This value is multiplied by the Value factor below to arrive at
the final ISO value that will be used for bracketing. A value of 2, with a Value factor of 10, will
increase or decrease the ISO by 20 for following exposures.
•
Value factor [Off, 1, 10, 100]
Used as a multiplier for the ISO bracketing value.
•
Bracketing type [+/-, –, +]
With all bracketing types the first exposure uses the current exposure settings of the camera. On
following exposures the exposure settings are adjusted as described below.
+/-
This bracketing type will alternatively apply the bracketing value by first subtracting then
adding. The sequence goes like this…
0 Ev, -1Ev, +1Ev, -2Ev, +2Ev, -3Ev, +3Ev, etc. Bracketing will continue until you release the
shutter. So for example lets say you set the TV bracketing to “2 Ev”, and when you half-press
the shutter you notice an exposure time of 1 second. When you fully depress the shutter you will
get exposures at these times: 1 sec, ¼ sec, 4 sec, 1/15 sec, 15 sec, 1/60 sec, 15 sec, 1/250 sec, 15
sec, etc.
–
This bracketing type works as above but will only reduce the exposure value. Using the above
example, the exposure times would be 1 sec, ¼ sec, 1/15 sec, 1/60 sec, 1/250 sec, etc.
+
This bracketing type works as above but will only increase the exposure value. Using the above
example, the exposure times would be 1 sec, 4 sec, 15 sec. Once the camera’s limit is reached,
subsequent exposures will occur at the maximum (or minimum) setting.
•
Clear Bracket Values on Start ! ! Enable [•] / Disable [ ]
Enable this option to turn off bracketing when the camera is turned off.
•
Add raw-suffix Enable [•] / Disable [ ]
In bracketing mode you now have the option to add a suffix to the raw filename, so that later you
can easily identify the RAWs that were created during bracketing, it is disabled at default.
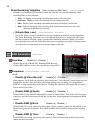
Custom Auto ISO < Extra Photo Operations < Main Menu
!
This feature has 2 purposes: Allow the user to define the exact ranges of ISO used in
AutoISO and Auto-HI. As an example: Expand the AutoISO range from 80-200 to 50-400.
Give additional information to the camera to allow it to select the optimal shutter speed (to avoid
blur or get the right artistic exposure) and ISO instead of some sub-optimal default...
As an example: Use a faster shutter and higher ISO when shooting sports, but go for a slower
shutter and minimal ISO when shooting still landscapes) Method: The camera will try to
maintain lowest ISO as long as shutter speed is no-slower than user defined (more below).
Custom AutoISO will kick-in whenever ISO HI/AutoISO is chosen. This allows a quick manual
override by choosing a specific ISO value.
12