45
PLAYBACK
Screen Saver
The screen saver function automatically activates Auto Play
(which automatically scrolls through images) whenever you
do not perform any operation for about five minutes in the
Playback Mode. This protects the camera’s monitor screen
and the screen of a connected TV against “burn in” of a static
image that is left displayed too long.
IMPORTANT!
• The screen saver is enabled only when the camera is
being powered by its optional AC adaptor. If you do
not perform any operation for five minutes under bat-
tery power, camera power automatically turns off
(Auto Power Off).
• The screen saver is disabled (it does not activate) if
there are no images stored in memory.
Setting the Auto Play Interval
You can use the following operation to set the amount of
time that should be allowed between each image during
Auto Play (the Auto Play interval).
1.
Start Auto Play using the operation under “To
start Auto Play” on page 44.
2.
Press MENU.
• Be sure to wait for the im-
age on the screen to stop
before performing any but-
ton operation.
3.
Use [+] and [–] to set the Auto Play interval
value you want and then press the shutter but-
ton.
• You can set the Auto Play interval to any value in the
range of 1 to 30 (seconds).
• After you make the above setting, Auto Play resumes
using the interval you set.
46
PLAYBACK
5.
Use [+] and [–] to select ON, and then press the
shutter button.
• To turn off the screen saver, perform the above proce-
dure and select OFF in step 5.
• The screen saver activates if you do not perform any
operation for about five minutes in the Playback
Mode.
• To stop an ongoing screen saver operation, press the
shutter button.
• When changing between images, the screen saver
uses the interval that is specified for Auto Play (page
45). To change the interval, press MENU while a
screen saver operation is in progress, and then
specify the interval time you want.
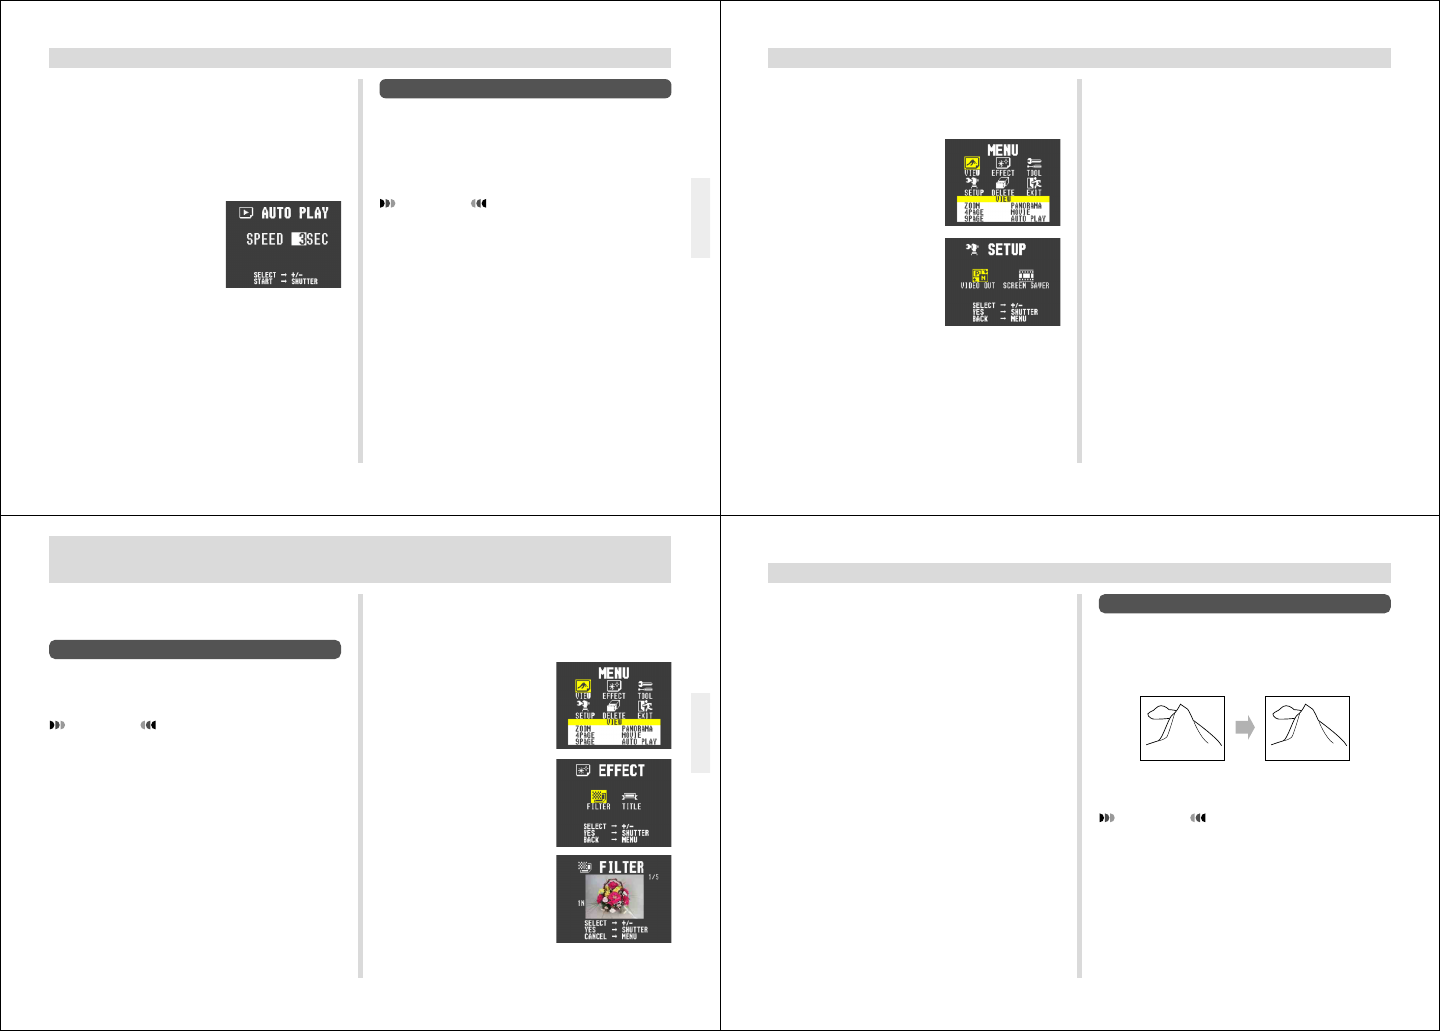
To turn the screen saver on and off
1.
Slide the Function Switch to PLAY.
2.
Press MENU.
3.
Use [+] and [–] to select
SETUP, and then press
the shutter button.
4.
Use [+] and [–] to select SCREEN SAVER, and
then press the shutter button.
47
EDITING IMAGES
A selection of powerful built-in editing tools helps you to cre-
ate the effects you want.
Using Image Filters
Use the following operation to apply black-and-white, sepia,
or another filter to an image. Filters alter the appearance of
an image and create interesting effects.
IMPORTANT!
The FILTER icon is blue, indicating that the filter opera-
tion is disabled in the following cases.
• When there is not enough remaining memory to store
the result of the filter operation.
• While a movie image or panorama image is on the
monitor screen.
• When the “MEMORY FULL” message is on the moni-
tor screen.
Applying a filter to a rotated image automatically causes
the image to return to its normal (unrotated) orientation.
EDITING IMAGES
1.
Slide the Function Switch to PLAY.
2.
Use [+] and [–] to display the image to which
you want to apply the filter.
3.
Press MENU.
4.
Use [+] and [–] to select
EFFECT, and then press
the shutter button.
5.
Use [+] and [–] to select
FILTER, and then press
the shutter button.
48
EDITING IMAGES
Adding a Title to an Image
Adding a title to an image is actually a two-step process.
First you record the title into title memory, and then you su-
perimpose the title onto the image. Because of this, you
should prepare the title by printing it out on your computer or
handwriting it on a sheet of paper.
Recording the Title
IMPORTANT!
• There is space for only one title in title memory. Any
title already in memory is automatically deleted when-
ever you record a new title.
• Use the monitor screen when recording a title.
• The zoom feature cannot be used when recording a
title.
MATTERHORN
6.
Use [+] and [–] to select the type of filter you
want, and then press the shutter button to
store the filtered image.
• Each press of [+] and [–] cycles through one of the five
available filters.
• Applying a filter does not affect the original image. In-
stead, the filtered version is saved as a new image
immediately after the original image. All images fol-
lowing the original image are automatically shifted to
make room.
• The amount of time it takes the camera to apply a filter
depends on the composition of the original image and
the type of filter you select.


