


57
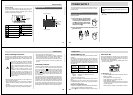
DELETING IMAGES
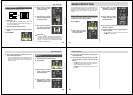
Deleting a Single Image
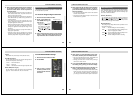
1.
Slide the Function Switch to PLAY.
2.
Press MENU.
3.
Use [+] and [–] to select
DELETE, and then press
the shutter button.
4.
Use [+] and [–] to select
PAGE, and then press
the shutter button.
Use the following operations when you want to delete im-
ages from memory. You can delete a single specific image,
or all images currently in memory.
IMPORTANT!
• Image deletion cannot be undone. Before deleting an
image, make sure you no longer need it or you have a
back-up copy saved on you computer, on diskette, or
on some other medium.
• Be especially careful with the DELETE ALL operation,
which deletes all unprotected images in memory.
• A protected image cannot be deleted. See “Image
Protection” on page 54 for details on protecting and
unprotecting images.
• The delete icon is blue, indicating that the image de-
lete operation is disabled, when all images in memory
are protected.
58
DELETING IMAGES
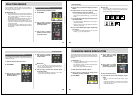
5.
Use [+] and [–] to select the image you want to
delete.
6.
Double check to make sure that you really
want to delete the image you selected.
• To abort the delete operation without deleting any-
thing, press any button besides [+], [–], or the shutter
button.
7.
To actually delete the selected image, press
the shutter button.
• The selected image is deleted and the next image in
sequence is selected.
• Deleting a single movie image deletes all the frames
that make up the image.
8.
If you want to delete more images, repeat steps
5 through 7.
• To exit the image delete operation, press any button
besides [+], [–], or the shutter button.
NOTE
The camera does not maintain open spaces in its
memory. Deleting an images causes all images follow-
ing the deleted image to be shifted up.
59
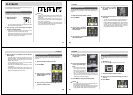
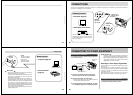
4.
Use [+] and [–] to select
ALL, and then press the
shutter button.
IMPORTANT!
The next step deletes all unprotected images in
memory. To abort this operation without deleting any-
thing, select EXIT instead of ALL.
5.
Use [+] and [–] to select ALL, and then press
the shutter button.
• The message “NO IMAGE” appears on the monitor
screen after all the images are deleted.
DELETING IMAGES
Deleting All Unprotected Images
The following operation deletes all unprotected images. See
“Image Protection” on page 54 for details on protecting and
unprotecting images.
1.
Slide the Function Switch to PLAY.
2.
Press MENU.
3.
Use [+] and [–] to select
DELETE, and then press
the shutter button.
60
The following operation changes the resolution of an image.
Note that image resolution can be changed downwards only
(from super fine to fine, from fine to normal, or from normal to
economy).
IMPORTANT!
• Changing the resolution causes the original image to
be replaced with the new one.
• The resolution of movie, panorama and protected im-
ages cannot be changed.
• The economy images cannot be changed.
1.
Slide the Function Switch to PLAY.
2.
Use [+] and [–] to display the image whose
resolution you want to change.
3.
Press MENU.
4.
Use [+] and [–] to select
TOOL, and then press
the shutter button.
5.
Use [+] and [–] to select
CONVERT, and then
press the shutter button.
6.
Press the shutter button.
7.
If you want to convert other resolution, repeat
step 6.
• After you are finished converting images, press
MENU.
• Changing the resolution of a rotated image automati-
cally causes the image to return to its normal
(unrotated) orientation.
CHANGING IMAGE RESOLUTION