


4-6
Making Settings
L
Proof Sign-off:
K. Pipa CRE Tsutagawa
K. Pipa
CRE R. Hopley
R4C7850
Rev. C
A5 size MAKESET.FM
4/27/01 Pass 3
Note:
❏ After turning on the camera and taking a flash photo,
the flash icon and the green indicator light beside the
viewfinder blink until the flash is fully recharged.
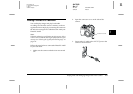
❏ When you use the external flash, the internal flash is
disabled and the flash button does not work.
❏ Slow synchro is only available in the Program or
Manual camera modes. To change the camera mode, see
“Making camera mode settings” on page 4-6.
❏ You can select a leading or trailing slow synchro
setting. To select a slow synchro setting, see “Selecting
slow synchro timing” on page 4-17.
❏ The flash is disabled when taking video clips or using
the continuous shooting feature.
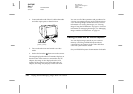
Making camera mode settings
The PhotoPC 3100Z has three camera modes to suit
your photographic needs. Each mode gives you a
different degree of control over the camera settings,
whether you are taking photos using the viewfinder
or the LCD monitor. Read this section to choose the
appropriate mode, and to change the mode if
necessary.
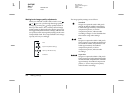
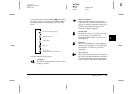
Choosing a camera mode
Choose from the camera modes described below.
Full Auto
Allows you to take photos without having to make
complex settings. The available settings include:
❏ Flash, including auto, red-eye reduction,
forced, and off
❏ Self timer
❏ Image quality
❏ Optical zoom
❏ Digital zoom
(when using the LCD monitor)
❏ Macro
(when using the LCD monitor)
❏ Quick playback of photos and messages
(when using the LCD monitor)
Program
For users who want a moderate amount of control
over the camera’s features. Available settings include:
❏ All of the settings that are available in the Full
Auto camera mode
❏ Slow synchro flash