


17
Getting Ready
16
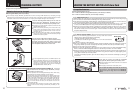
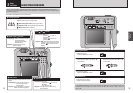
Due to the nature of Ni-MH rechargeable batteries, the time for which they can be used may
become shorter in certain situations, even when the batteries are fully charged.
In the following situations, the batteries should be discharged and then fully recharged
before use.
h When first used after purchasing the camera
h When you purchase new Rechargeable Battery NH-20 or Ni-MH rechargeable batteries
(commercially available)
h When the batteries have not been used for a long period
h When the batteries can only be used for a short time after being charged normally
●
!
The “Discharging rechargeable batteries” function can only be used with Rechargeable Battery NH-20 or Ni-MH
rechargeable batteries (commercially available).
The “Discharging rechargeable batteries” function should not be used with alkaline batteries as it will completely drain the
battery charge.
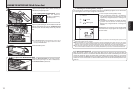
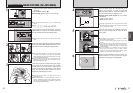
The Rechargeable Battery NH-20 or Ni-MH rechargeable batteries (commercially available) are not
discharged when the camera is set in the cradle (➡P.77) or while using the AC power adapter
(➡P.69).
Remove the cradle or AC power adapter from the camera before discharging batteries.
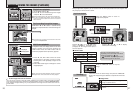
1
1Press the “MENU/OK” button to display the menu
on the LCD monitor.
2Press “d” or “c” to select “F” OPTION and
then press “a” or “b” to select “SET-UP”.
3Press the “MENU/OK” button.
01 03 02
●
!
Remove the camera from the cradle when discharging
batteries.
●
!
Do not use the procedure for discharging rechargeable
batteries with alkaline batteries.
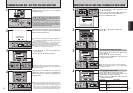
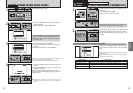
2
1Press “a” or “b” to select “DISCHARGE”.
2Press “c”.
01 02
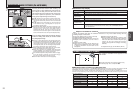
3
1Press “d” or “c” to select “OK”.
2Press the “MENU/OK” button.
The screen changes and discharging begins.
When the battery level indicator blinks red and
discharging ends, the camera turns off.
01 02
●
!
To cancel discharging, press the “BACK” button.
PROCEDURE FOR DISCHARGING RECHARGEABLE BATTERIES
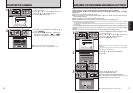
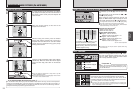
SELECTING THE LANGUAGE
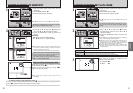
1
1Press the “MENU/OK” button to display the menu
on the LCD monitor.
2Press “d” or “c” to select “F” OPTION and
then press “a” or “b” to select “SET-UP”.
3Press the “MENU/OK” button.
1The “SET-UP” screen appears. Press “a” or “b”
to select “ ”.
2Press “c” to select “ENGLISH”, “FRANCAIS”,
“DEUTSCH”, “ESPAÑOL”, “ ” or “ ”.
Press “c” to cycle through the language settings.
●
!
The screens in this manual are shown in English.
●
!
See P.57 for more information on the “F” OPTION menu.
2
01 02
01 02
03