


j
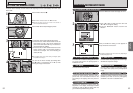
BRACKETING
A
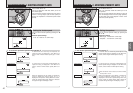
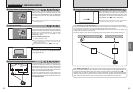
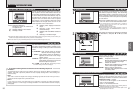
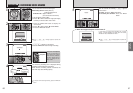
SETTING THE WHITE BALANCE
57
Advanced
Features
56
PHOTOGRAPHY MENU
STILL IMAGE MENU
Change the white balance setting when you want to
take a picture with the white balance fixed for the
surroundings and lighting when the picture is taken.
In AUTO mode, the correct white balance may not
be obtained for subjects such as close-ups of
people’s faces and shots taken under a special
light source. In such situations, select the correct
white balance for the light source. See P.107 for
more information on the white balance.
AUTO: Automatic adjustment
(Shooting to show the ambience of
the light source)
6 : Shooting outdoors in fine weather
7 :Shooting in shade
9 : Shooting under “Daylight” fluorescent
lamps
0 :Shooting under “Warm White”
fluorescent lamps
- : Shooting under “Cool White” fluorescent
lamps
8 : Shooting in incandescent light
✽ Because white balance settings (other than custom white balance settings) are ignored when you use the flash, you
should select Suppressed flash mode (➡P.44) to achieve the intended shot.
●
!
The color tones may vary somewhat depending on the shooting conditions (light source, etc.).
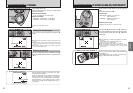
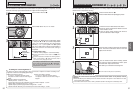
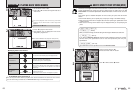
Use this mode for scenes where the brightness of
the subject and background differ markedly so that
the MULTI setting is unlikely to achieve the desired
result.
+ AVERAGE : Light metering where an average
value for the entire image is used.
_ SPOT : Light metering where the exposure is
optimized for the center of the image
(approx. 6.25%).
) MULTI : Light metering where the camera
automatically assesses the scene and
selects the optimum exposure.
●
!
In the “B”, “?” and “r” modes, light metering is fixed at
the “MULTI” setting and cannot be changed.
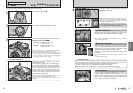
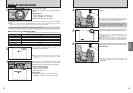
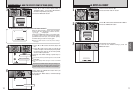
Use this feature to photograph the same image
with different exposure settings. Auto bracketing
automatically shoots 3 consecutive frames, one of
which is correctly exposed while the remaining two
are underexposed and overexposed respectively
by a set amount.
h The three available settings are ±1/3 EV, ±2/3 EV
and ±1 EV. See P.107 for more information on EVs.
●
!
If the underexposed or overexposed frame is outside the
camera’s control range, the shot is not taken with the
specified setting increments.
●
!
Flash photography cannot be used.
●
!
This feature always takes 3 shots. However, if there is
insufficient space on the xD-Picture Card for 3 shots, no
picture will be taken.
1
After setting the exposure for bracketing, hold down
the “f” button 1 and press “d” or “c” 2 to select
“j”.
2
01 02
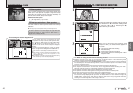
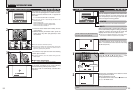
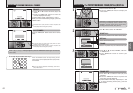
Use this setting to soften or emphasize outlines or
to adjust the image quality.
HARD : Emphasizes the outlines.
Best for shots of subjects such as buildings
or text where you want sharp images.
SOFT : Softens the outlines.
Best for shots of subjects such as people,
where a softer image is desirable.
NORMAL
: Best for ordinary photography.
Provides edge sharpness that is ideal
for ordinary shots.
G
SHARPNESS
Brightness adjustment allows you to change just the
amount of light emitted by the flash to suit the
photography conditions or to achieve a desired effect.
h Adjustment range : ±2 steps
–0.6 EV to +0.6 EV in approx. 0.3 EV increments
(total : 5 levels selectable)
See P.107 for information on EVs.
●
!
Depending on the type of subject and the shooting distance,
brightness adjustment may have no effect.
●
!
The image may appear dark when the shutter speed is set to
speeds higher than 1/1000 sec.
z
FLASH BRIGHTNESS ADJUSTMENT
™
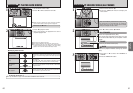
PHOTOMETRY
◆
The light metering modes are effective for the following subjects
◆
i AVERAGE
The advantage of this mode is that the exposure tends not to change for different compositions or
subjects. This mode is particularly effective for shots of people wearing black or white clothing and
shots of scenery.
i SPOT
This mode is useful for subjects with strongly contrasting light and dark areas where you want to
achieve the correct exposure for a particular feature.
i MULTI
In this mode, the camera uses automatic scene recognition to analyze the subject and provide
optimum exposure in a wide range of shooting conditions. This mode should be used for everyday
photography.