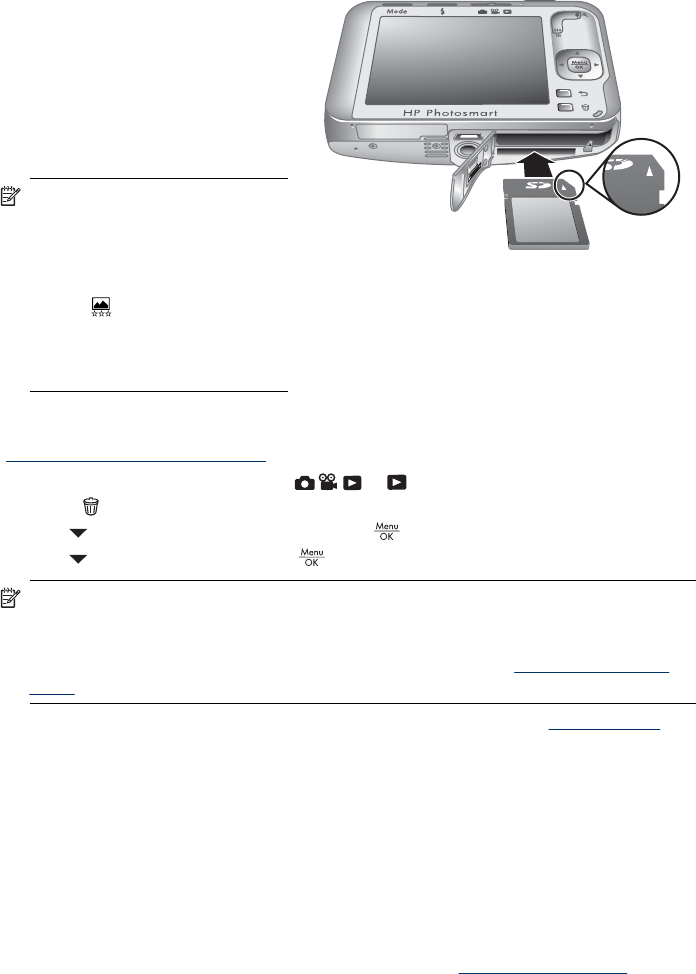
Install and format an optional memory card
This camera supports standard, high speed, and high capacity Secure Digital (SD and
SDHC) memory cards, 32MB to 8GB.
1. Turn off the camera and open the
Battery/Memory Card door.
2. Insert the optional memory card
in the smaller slot as shown.
Make sure the memory card
snaps into place.
3. Close the Battery/Memory Card
door and turn on the camera.
NOTE: When you turn on your
camera with a memory card
installed, the camera indicates
the number of images you can
store on the memory card at the
current
Image Quality
setting. This camera supports
storing a maximum of 1999
images on a memory card.
Always format new memory cards before first use. Formatting removes all images from
the memory card, so make sure to transfer existing images before formatting (see
“
Transferring and printing images” on page 31).
1. With the camera turned on, slide
to .
2.
Press
.
3.
Use
to select Format Card, then press .
4.
Use
to select Yes, then press to format the card.
NOTE: Once you install a memory card, all new images and video clips are stored
on the card, rather than in internal memory. To use internal memory and view images
stored there, remove the memory card. To transfer images from internal memory to
an optional memory card, see Move Images to Card under “
Using the Playback
Menu” on page 24.
For information about supported memory cards, see Storage under “Specifications”
on page 52.
Install the software
The HP Photosmart Software provides features for transferring images and video clips
to your computer, as well as features for modifying stored images (remove red eyes,
rotate, crop, resize, and more).
To install the HP Photosmart Software, your computer must meet the system
requirements as stated on the camera packaging.
If you have trouble installing or using the HP Photosmart Software, see the Hewlett-
Packard Technical Support website for more information:
www.hp.com/support. Known
issues are often fixed with new releases of firmware. To optimize your digital photography
Chapter 1
8 Getting started


