


10
BACK Key: Move back to the previous screen, or end/cancel current operation, such as slewing.
ENTER Key: Confirm an input, go to the next menu, select a choice, or slew the telescope to a
selected object.
Arrow (▲▼◄►) Keys: The arrow keys are used to control the movement of DEC and R.A. axes.
Press and hold ▲(DEC+),▼(DEC-) buttons to move a telescope along the DEC direction,
◄(R.A.+), ►(R.A.-) to move a telescope along the R.A. direction. They are also used to browse
the menu or move the cursor while in the menu. Press and hold down an arrow key for a fast
scrolling.
Number Keys: Input numerical values. Also used to adjust speeds (1: 1X; 2: 2X; 3: 8X; 4: 16X; 5:
64X; 6: 128X; 7: 256X; 8: 512X; 9: MAX)
Light Key(☼): Turns on/off the red LED reading light on the back of the controller.
? Key: Identify and display bright stars or objects where the telescope points to.
STOP/0 Key: Stop the mount during GOTO. Also toggling between start and stop tracking.
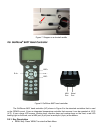
HBX (Handbox) port: connect the HC to the CEM60 mount using a 6-wire RJ11 cable.
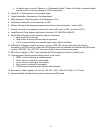
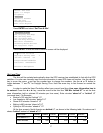
Serial port: connect the HC to a Computer via a RS232 to 4-wire RJ-9 cable. The pin out of the
serial port is shown in Figure 9.
Figure 9. Serial port pin out on an 8407 hand controller
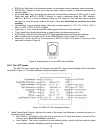
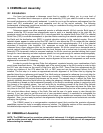
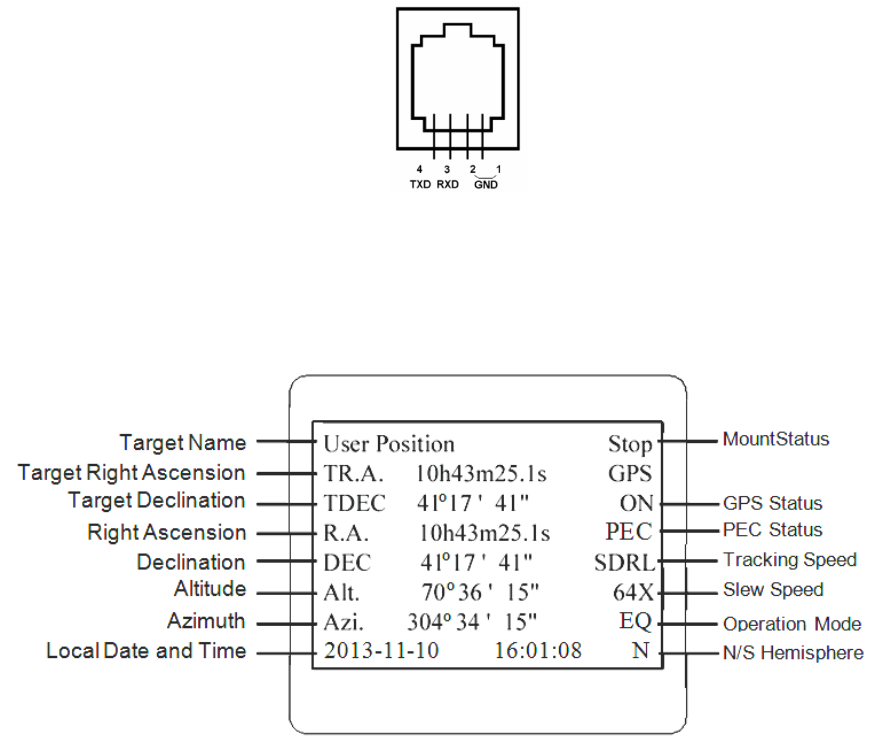
2.6.2. The LCD Screen
The 8407 HC has a large 8-line, 21-character per line LCD screen, which displays all the information
as shown in Figure 10. The user interface is simple and easy to operate.
Figure 10. 8407 HC LCD Information Screen
1. Target Name/Mount Position: displays the name of the target that telescope is currently pointed to or
the current mount position.
Zero Position: The position when the mount is turned on. Or when the mount is moved to Zero
Position using “Goto Zero Position” command;
User Position: The mount is pointed to a user defined position, which could be a real sky object
or just simply a position defined by pressing an arrow key.