


26
The telescope will now slew back to Star A to repeat the above steps. The iteration can be stopped
when it is determined that the alignment error has been minimized. Press BACK button to exit the
alignment procedure.
NOTE: It is highly recommended to use an eyepiece with illuminated crosshairs for accurate centering.
NOTE: The movement of the alignment star in your eyepiece may not be perpendicular but crossed,
depends on its location in the sky.
5.3.3. One Star Alignment
Press MENU button and select “Align”. Select “One Star Align” and press ENTER. A list of
alignment stars that are above the horizon is computed based on your local time and location. With the
mount at the “Zero Position,” use ▲ and ▼ buttons to select a star and press ENTER. Center the target in
your eyepiece using arrow key. Press ENTER when finished. If your mount is set up correctly and polar
aligned, one star alignment should be sufficient for good GOTO accuracy. To increase the average pointing
accuracy over the sky, you may choose to do multi-star alignment.
5.3.4. Solar System Align
This function uses a planet or the moon as an alignment object. Press MENU button and select
“Align”. Select “Solar System Align” and press ENTER for available alignment object.
5.3.5. Multi-Star Align
With iOptron’s multi-star alignment, you can choose two, three, or as many stars as you want to
reduce the mount average pointing offset across the sky. First, make sure you perform the “One Star Align”
procedure.
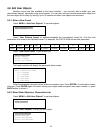
Press MENU button and select “Align”. Select “Multi-Star Align” in the align menu. A list of
alignment stars that are above the horizon is computed based on your local time and location. With the
mount is at the “Zero Position,” use ▲ and ▼ buttons to select first alignment star and press ENTER.
Center the target in your eyepiece using the arrow keys. Press ENTER when finished. The hand controller
will prompt you to choose the second star. If the star you choose is too close to the first one, the system will
let you choose another one. When the mount is aligned with the second star, the two star alignment is
finished. You can reject the suggested star if it is blocked by a tree or other obstruction.
When you are done with the two star alignment, press the BACK button to finish the alignment.
Press ENTER key to select third star for further alignment.
5.3.6. Two Star Polar Align
This Two Star Polar Align may improve the polar alignment accuracy. It requires a wider view of
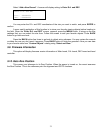
the sky, since the two alignment stars need to be far apart. Press MENU button and select “Align”. Select
“Two Star Polar Align” in the align menu. A list of alignment stars that are above the horizon is computed
based on your local time and location. With the mount at the “Zero Position,” use the ▲ and ▼ buttons to
select first alignment star and press ENTER. Center the target in your eyepiece using the arrow keys after
the mount slews to it. Press ENTER when finished. The hand controller will prompt you to choose the
second star. After centering the second star, the two-star alignment is finished. You can reject the
suggested star if it is blocked by a tree or other obstruction.
After the two-star alignment, a pointing error between the R.A. axis and the polar axis will be
recorded. This number can be used to fine tune the R.A. axis.
For example, if the screen shows 7.5" lower and 4.3" east, it means that THE MOUNT axis is
pointing lower and to the east.
5.3.7. Display Axes Error
This displays the pointing error between the R.A. axis and the polar axis.