


EN
ENEN
EN
"!
"!"!
"!
Master Page: Right
● If Program AE with special effects (੬ pg. 33) is
engaged, certain modes of Program AE with
special effects are disabled during Snapshot
recording. In such a case, the icon blinks.
● If SNAPSHOT is pressed when “DIS” is set to
“ON” (੬ pg. 36), the Stabilizer will be disabled.
● During playback as well, all snapshot modes are
available when “ COPY” is set to “OFF”
in VIDEO Menu. (੬ pg. 40) However, the shutter
sound is not heard.
● During Snapshot recording, the image displayed in
the viewfinder may be partially missing. However,
there is no effect in the recorded image.
● When a cable is connected to the S/AV connector,
the shutter sound is not heard from the speaker,
however it is recorded onto the tape.
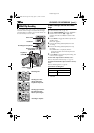
Motor Drive Mode
Keeping SNAPSHOT pressed in step 5 provides an
effect similar to serial photography. (Interval
between still images: approx. 1 second)
● The Motor Drive mode is disabled when “REC
SELECT” is set to “ / ”. (੬ pg. 39)
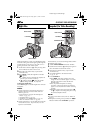
The flash can be used when a snapshot is taken in
Record-Standby mode. (੬ pg. 23, 42)
● When the Power Switch is set to “A”, the flash
automatically fires if it is dark ( appears).
● When the Power Switch is set to “M”, you can
select the flash setting. (੬ pg. 31, 37)
If “AUTO C” is selected...
The C Red-Eye reduction indicator lights. Press
SNAPSHOT. The flash fires twice. The first flash is
for reduction of the human eye’s red reflection and
the second flash is for the actual recording.
NOTES:
● Do not fire the flash at a person at short range.
● The flash does not fire when the flash is set to
“OFF” or when Night-Alive mode (੬ pg. 42) is
engaged, and also when the battery remaining
power is low.
● The flash does not fire even when it is set to “ON”,
if Program AE with special effects is set to
“SPORTS” or “SNOW”.
● Although images shot with a flash tend to look
whiter than they actually are, to compensate for
this the camcorder automatically darkens the
picture when using the flash. When shooting a
subject at a distance where the flash light cannot
reach (over approx. 2 m (6.5 ft)), set the flash to
“OFF” to prevent the picture from becoming too
dark or becoming too tinted.
● The color tone changes depending on the
background lighting conditions, such as under
fluorescent or halogen lamps.
● While charging the flash, blinks and the flash
will not fire. Although noise may appear, this is
not a malfunction and is not recorded. It can take
up to 10 seconds to charge the flash.
When a snapshot ( pg. 23, 42) is taken in the dark
the camcorder fires the flash and adjusts the
brightness automatically. You can also adjust the
flash brightness manually. When you find that the
snapshots you took look too bright or too dark,
adjust it manually.
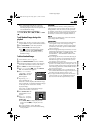
1
Select “FLASH ADJ.” in MANUAL Menu, and
press SELECT/SET.
•The parameter appears.
2
To intensify the flash, press +. To weaken the
flash, press –.
•Adjustment range: –3 to +3.
3
Press SELECT/SET. Press + or – to select
“BRETURN”, and press SELECT/SET twice to
close the Menu Screen.
NOTE:
When you change the subject you are shooting or
the shooting location, set it back to ±0 as described
in step 2 and take a snapshot to check the flash
brightness. After doing this adjust to your desired
brightness.
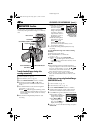
Snapshot Flash
FLASH
Flash Brightness Adjustment
ADVANCED FEATURES
GR-D200US.book Page 43 Friday, April 11, 2003 1:05 PM