


""
""""
""
EN
ENEN
EN
Master Page: Left
Once the camcorder is set, the camcorder operator
can become part of the scene in a more natural way,
adding the final touch to a memorable picture.
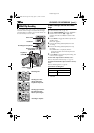
1
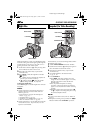
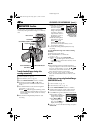
Set the Power Switch to “M” while pressing down
the Lock Button located on the switch.
2
Open the LCD monitor fully, or pull out the
viewfinder fully.
● You can tilt the LCD monitor upward to 180°
so that it faces forward and view yourself while
self-recording with the viewfinder pushed
back.
3
Set “SELF-TIMER” to
“ON ”. (੬ pg. 31, 36)
4
To engage the Self-Timer
for video recording, press
the Recording Start/Stop
Button.
● After 15 seconds, the
beep sounds and video
recording starts.
5
To stop Self-Timer
recording, press the
Recording Start/Stop
Button again.
● The camcorder re-enters
Record-Standby mode.
OR
5
Press SNAPSHOT.
● After 15 seconds, the beep sounds and
snapshot recording starts. After that, the
camcorder re-enters Record-Standby mode.
6
To end Self-Timer recording, select “OFF” in
step 3.
NOTE:
If “BEEP” and “TALLY” are set to “OFF” (੬ pg. 37),
the beep does not sound and the tally lamp does not
light.
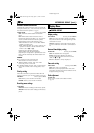
Self-Timer
NU
L MA A
OMEL –TI SE F R FF–
NRETUR
O
N
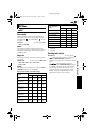
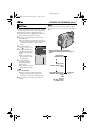
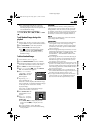
Self-Timer indication
When the Recording Start/Stop Button or
SNAPSHOT is pressed, the tally lamp changes as
shown:
Begins blinking
(Self-Timer starts)
Blinks quickly
(Self-Timer shooting starts
soon)
Stops blinking and stays on
(Self-Timer video recording
starts)
OR
Turns off
(Self-Timer snapshot
recording occurs)
After approx.
15 sec.
FEATURES FOR RECORDING (cont.)
GR-D200US.book Page 44 Friday, April 11, 2003 1:05 PM